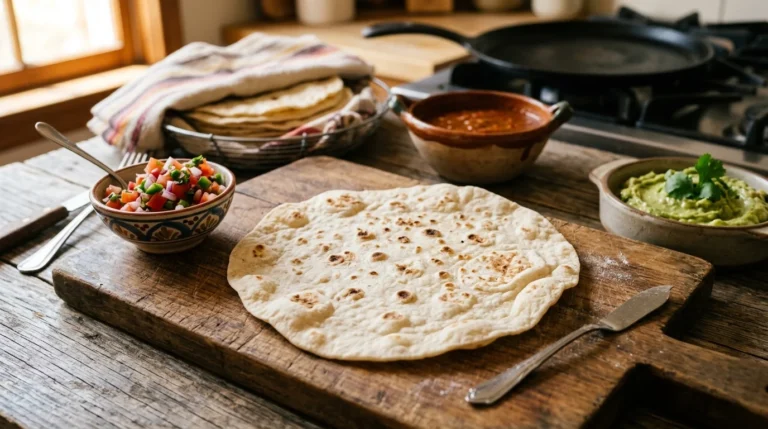
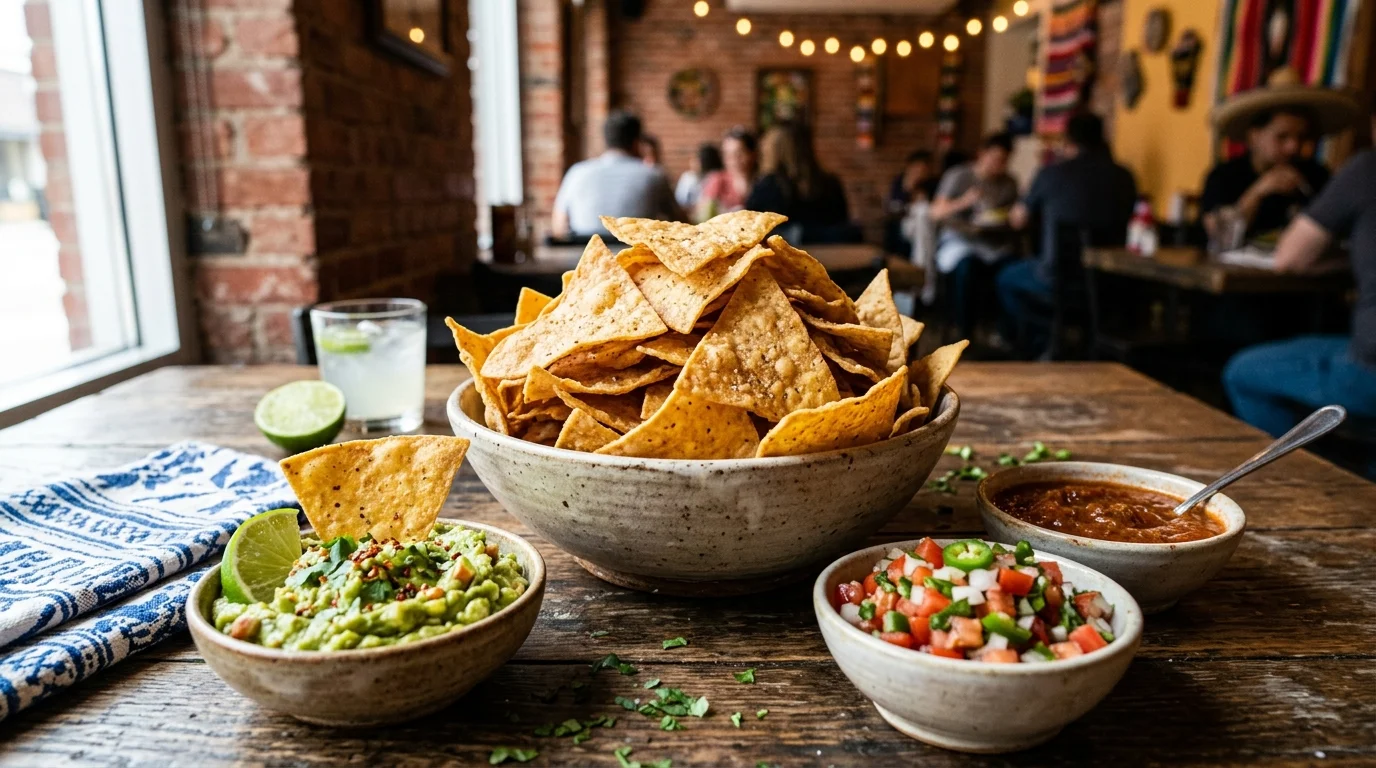
Tortilla Chips Crispy, Salty & Ready in 15 Minutes
This tortilla chips recipe turns a stack of plain tortillas into crispy, golden, salty crunch in under 15 minutes. They work for game-day snacks, weeknight nachos, or a quick scoop alongside guacamole and fresh salsa. Just three ingredients, two methods, one dependable result. No complicated steps just pure tortilla chip goodness, straight from your kitchen.
Ingredients List
- 10–12 corn tortillas (6-inch, white or yellow — yellow gives the deepest golden color)
- 3 tbsp neutral oil (avocado, canola, or vegetable — for baking)
- 2–3 cups oil (for deep frying — only if frying)
- 1 tsp kosher salt (or fine sea salt)
- ½ tsp lime zest (optional, for fresh aroma)
- ½ tsp chili powder (optional, for a smoky kick)
- ¼ tsp garlic powder (optional)
- ¼ tsp ground cumin (optional)
- Flaky sea salt (for finishing)
Step-by-Step Instructions
Step 1: Gather and Prep Your Ingredients
Pull the tortillas, oil, and salt onto your counter before you turn on the heat. Tortilla chips cook fast — there is no time to chase ingredients while a hot pan or oven waits. If your tortillas feel soft and pliable, that is fine. Slightly stale tortillas actually crisp up better than freshly opened ones.
Preheat your oven to 375°F if baking, or pour 2 inches of oil into a deep pot if frying. Line two baking sheets with parchment paper for the baked version. A clean, well-organized setup keeps the chips moving from raw to crisp without burning at the edges or going soft in the middle.
Pro Tip: Day-old tortillas crisp better than fresh — leftovers from yesterday’s dinner are the best raw material.
Step 2: Cut the Tortillas Into Wedges
Stack 4 to 5 tortillas on a clean cutting board. Use a sharp knife or pizza cutter to slice the stack into 6 even wedges, like cutting a pizza. A pizza cutter speeds this up by 2x and gives cleaner edges than a dull knife dragged through the stack.
Aim for evenly sized wedges so they cook at the same speed. Tiny pieces will burn while larger ones still feel chewy. Once cut, separate the wedges so they are not stuck together — each piece needs space and air around it to crisp properly during cooking.
Pro Tip: A pizza cutter is the secret weapon — clean, fast wedges every time.
📖 Read More: Flour Tortilla Recipe
Step 3: Oil and Season the Tortilla Wedges
For the baked version, place the wedges in a large bowl and drizzle with 3 tablespoons of oil. Toss gently with your hands until every piece has a thin, even coat. Skipping this step gives you cardboard-textured chips. Oil is what carries heat into the tortilla and creates the crisp.
Sprinkle salt evenly across the wedges while still in the bowl. Add any optional seasonings now — chili powder, cumin, garlic powder, or lime zest — and toss again. Seasoning before cooking sticks better than dusting after, because the oil acts as glue that locks every spice onto the surface.
Pro Tip: Always taste one chip plain first — adjust salt before seasoning the entire batch.
Step 4: Bake or Fry — Pick Your Method
For baked chips, spread the wedges in a single layer across two baking sheets. Do not overlap — overlapping traps steam and creates soft spots. Bake at 375°F for 10 to 14 minutes, flipping once halfway through. The chips should be deep golden brown at the edges and pale gold at the center.
For fried chips, heat oil to 350°F in a deep pot or Dutch oven. Drop wedges in small batches — about 8 to 10 at a time. Fry for 1 to 2 minutes, stirring once, until they turn golden and stop bubbling rapidly. Lift out with a spider strainer or slotted spoon.
Pro Tip: Use a thermometer when frying — oil too cool means greasy chips, too hot means burnt edges.
Step 5: Cook Until Golden and Crisp
Watch chips closely during the final 2 minutes of either method. Tortilla chips go from golden to burnt in under 60 seconds. Pull them when the edges look deep gold and the centers stay pale gold — they will continue to crisp as they cool down on the rack or pan.
For the fried method, transfer hot chips to a wire rack or paper towel-lined tray to drain. For baked, leave them on the sheet pan to release residual heat. Either way, do not stack them while still warm — trapped steam softens the crisp instantly and ruins the texture you just built.
Pro Tip: A wire rack drains better than paper towels — air circulates underneath and keeps the bottoms crisp.
Step 6: Cool, Salt, and Serve
While chips are still warm, sprinkle a final pinch of flaky salt across the top. Warm surfaces grip salt better than cold ones — this final layer adds a clean, sharp finish to every bite. Skip this and the chips taste flat, no matter how much you seasoned earlier in the process.
Let the chips cool completely for 5 minutes before serving. Cooling is when the final crunch develops — chips taste soft straight from the heat. Pile them in a bowl and serve with fresh salsa, guacamole, queso, or any dip you love. They disappear fast.
Pro Tip: Always finish with flaky sea salt — the texture and flavor jump compared to fine table salt.
Cook Time
Total Time: 15 minutes | Prep: 5 minutes | Cook: 10 minutes For fried chips: total time around 12 minutes.
Servings
Makes about 60 chips — serves 4 to 6 as a snack (roughly 4 oz of chips per serving).
Nutritional Information (approx. per serving — baked, 4 servings)
| Nutrient | Amount |
|---|---|
| Calories | 175 |
| Fat | 7g |
| Saturated Fat | 1g |
| Carbohydrates | 25g |
| Protein | 3g |
| Sugar | 0g |
| Fiber | 3g |
| Sodium | 290mg |
| Vitamin C | 0mg |
| Potassium | 70mg |
| Calcium | 45mg |
Values are approximate and will vary based on ingredients used.
Storage Instructions
Tortilla chips are at their best within hours of cooking, when the crunch is sharpest. Once fully cooled, store them in an airtight container at room temperature for up to 5 days. Avoid the fridge — humidity there softens the chips overnight and turns the texture chewy and disappointing.
If chips lose their crunch, revive them on a 350°F sheet pan for 3 to 5 minutes. Skip freezing — homemade chips do not thaw well. Use the freezer pack method for the tortillas instead: cut the wedges, freeze flat in bags, and bake or fry straight from frozen for fresh batches.
📖 Read More: Tortilla Pizza
Suggestions
- Cinnamon Sugar Dessert Chips: Skip savory seasoning and toss the wedges with melted butter, cinnamon, and sugar before baking. Serve with fruit salsa, chocolate sauce, or vanilla ice cream. A dessert version that takes 15 minutes and turns plain tortillas into a sweet, crunchy treat for the whole family or for last-minute guests.
- Lime and Chili Chips: Add 1 teaspoon lime zest, ½ teaspoon chili powder, and a pinch of cayenne to the salt mix. The result is bright, smoky, and slightly spicy. Serve with creamy avocado dips or alongside ceviche for a tropical-style snack that tastes far better than anything you can buy in a bag.
- Air Fryer Method: Skip the oven and use an air fryer at 350°F for 5 to 7 minutes. Toss the wedges in oil and salt, work in single-layer batches, and shake the basket halfway through. The result is crisp, even chips with less oil, less cleanup, and faster cook time overall.
- Whole Wheat or Gluten-Free Tortillas: Both work beautifully for tortilla chips. Whole wheat adds a nuttier flavor and more fiber per serving. Corn tortillas are naturally gluten-free already — just check the package for cross-contamination labeling. Cooking time stays the same for either substitute, no adjustment needed.
- Loaded Nacho Base: After baking, transfer the chips to an oven-safe dish, top with shredded cheese, beans, jalapeños, and proteins, then broil for 2 minutes. The chips stay crisp under cheese while the toppings melt fast — a complete weeknight nacho dinner ready in under 20 minutes total.
- Salt and Vinegar Style: Mist the cooked chips with white vinegar straight from a spray bottle while still hot from the oven. Sprinkle with sea salt immediately. The vinegar evaporates and leaves a sharp, tangy finish. A homemade twist on a classic flavor that beats any bagged version on the shelf.
- Soft Wrap Alternative: Skip cutting the tortillas into wedges and use the same seasoning blend on whole, soft tortillas instead. Same ingredients, different format — perfect when you want soft and warm over crisp and salty. The spice mix works on both formats equally well, no recipe changes needed.
- Kid-Friendly Mild Version: Skip the chili and cumin — just use salt, a touch of garlic powder, and a tiny squeeze of lime. Serve with mild salsa or plain sour cream. Most kids fight bold seasoning but love a simple, salty chip with their favorite mild dip on the side.
📖 Read More: Tortilla Wraps
Seasonal Relevance
Tortilla chips work year-round, but the dip shapes the season. May through September, pair them with mango salsa, summer guacamole, or fresh pico de gallo. October through April, lean into roasted salsa, queso fundido, and warm bean dips. Limes peak December through March, when zest is sharpest. Late-summer sweet corn makes incredible roasted-corn salsa too.
Conclusion
This tortilla chips recipe proves the crispiest, freshest snack needs no bag from the store. Master the cut, the oil, and the cook time — bake or fry, your call. Try them sweet, smoky, lime-spiked, or simply salted. Make them once, and store-bought feels like a downgrade forever. Grab the tortillas and start cutting.
FAQs
Q: Should I use corn or flour tortillas for chips?
Corn tortillas are the classic choice — they crisp up faster, hold seasoning better, and deliver a more authentic flavor and texture. Flour tortillas work too, but stay slightly chewier. For the closest match to bagged chips, go with yellow corn tortillas. They give the deepest golden color and sturdiest crunch.
Q: Why are my tortilla chips not crispy?
Three usual causes — tortillas were too thick, you skipped the oil coating, or they were not cooked long enough. Make sure each wedge has a thin, even coat of oil. Bake until edges turn deep gold, then let them cool fully before tasting. Cooling is what builds the final crunch.
Q: Can I make tortilla chips without oil?
Yes, but the texture changes. Without oil, chips bake into hard, drier crackers rather than the light, crisp version most people expect. A light spritz from an oil mister hits the middle ground — far less oil than dredging while keeping the texture proper. Air fryers also help significantly with this issue.
Q: How do I store homemade tortilla chips?
Store fully cooled chips in an airtight container at room temperature for up to 5 days. Skip the fridge — moisture there softens chips fast. If they lose crunch, refresh them in a 350°F oven for 3 to 5 minutes. They come right back to crisp without any loss in flavor.
Q: Can I make these chips ahead for a party?
Yes — bake them up to 1 day ahead and store airtight at room temperature. Refresh in a 350°F oven for 3 minutes right before serving so they taste freshly cooked. Avoid making them more than 24 hours ahead — the longer chips sit, the more crunch they lose.
Q: What dips work best with homemade tortilla chips?
The classics are king — guacamole, fresh salsa, queso, and bean dip. For something different, try mango salsa, black bean and corn dip, or chipotle ranch. The heavier the chip’s seasoning, the simpler the dip should be. Plain salted chips handle the boldest dips with the most balance.