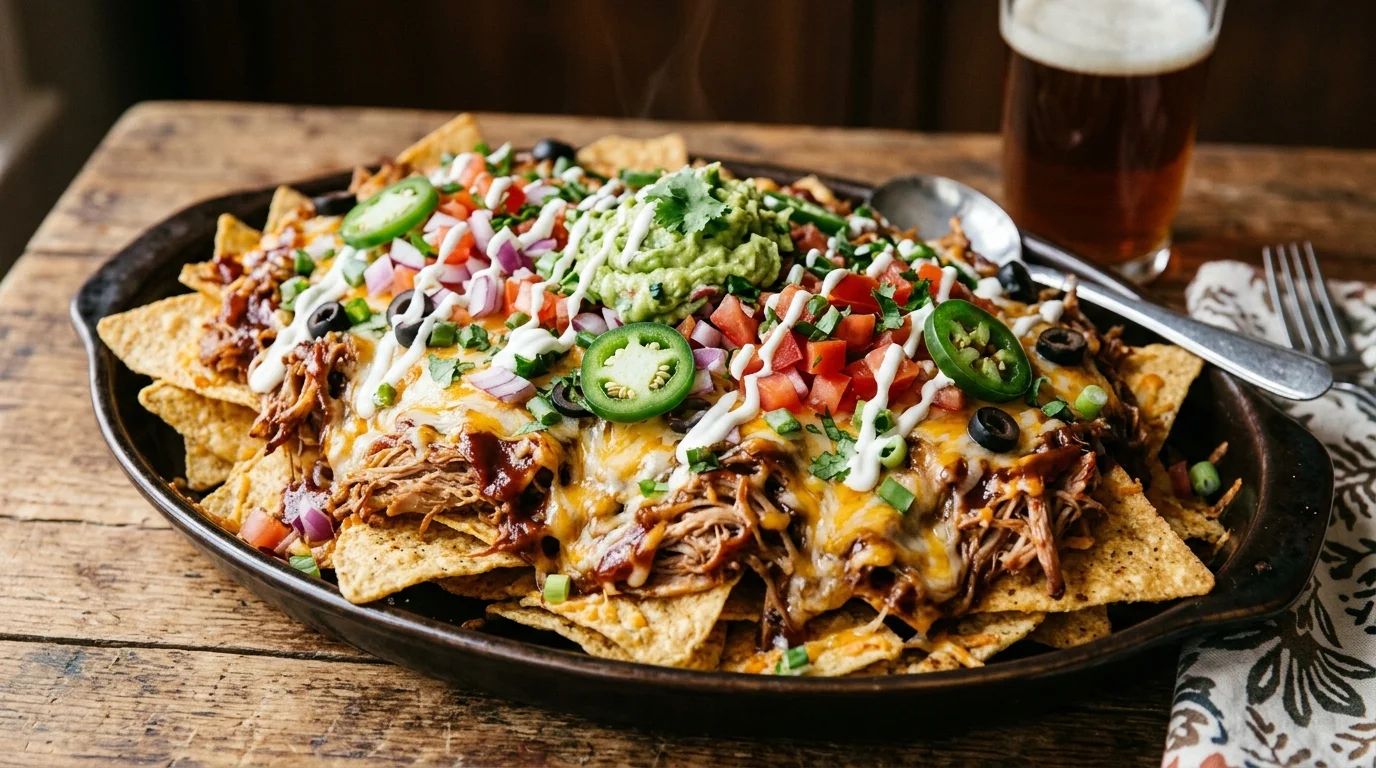
Pulled Pork Nachos Smoky, Loaded & Done in 20 Minutes
Pulled pork nachos are what happens when barbecue leftovers meet a hot oven and a fully stocked topping station. Tender, slow-cooked pork piled onto crispy chips with melted cheese, tangy slaw, and a drizzle of smoky sauce — every bite delivers something different. Pull them together for a game-day spread, a relaxed weekend dinner, or a quick Friday night snack that feels more intentional than takeout. No complicated steps — just pure pulled pork nacho goodness straight from your oven.
Ingredients List
For pulled pork nachos (serves 4 as a main, 6–8 as a shared appetizer):
- 3 cups pulled pork, pre-cooked and shredded (slow cooker, smoker, or store-bought all work)
- ½ cup BBQ sauce, plus extra for drizzling (smoky or sweet-heat style recommended)
- 1 bag (10–12 oz) tortilla chips (thick-cut restaurant-style chips hold up best under heavy toppings)
- 2 cups shredded cheese (Monterey Jack and smoked cheddar blend melts best; pepper jack for extra heat)
- 1 can (15 oz) pinto beans, drained and rinsed (black beans as a substitute)
- 1 cup corn kernels (fresh off the cob, frozen and thawed, or canned and drained)
- ½ red onion, finely diced
- 1 jalapeño, thinly sliced (pickled or fresh — both work)
- 1 cup coleslaw (store-bought or homemade — adds crunch and acidity)
- ½ cup sour cream, for serving (plain Greek yogurt as a lighter substitute)
- 1 avocado, diced or sliced
- ¼ cup fresh cilantro, roughly chopped
- 2 tbsp fresh lime juice
- ½ tsp smoked paprika
- ½ tsp garlic powder
- ¼ tsp onion powder
- Sliced pickled jalapeños, for serving (optional — adds vinegary heat)
- Hot sauce, for serving (optional)
Step-by-Step Instructions
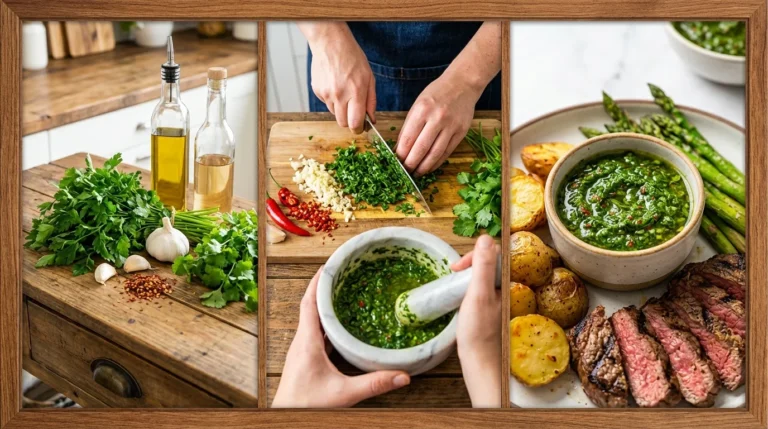
Step 1: Gather and Prep Your Ingredients
Set out every ingredient before the oven turns on. Dice the onion, slice the jalapeño, drain and rinse the beans, thaw the corn if frozen, and have the cheese shredded and ready to go. Pulled pork nachos move quickly once you start — stopping mid-assembly to search for the sour cream means warm chips cooling on the tray while you rummage through the fridge.
Preheat your oven to 400°F (200°C) and line a large rimmed baking sheet with foil. The foil makes cleanup fast and prevents cheese from bonding permanently to the pan. For a larger group, use two baking sheets side by side — a single overcrowded tray produces steamed chips instead of crispy ones.
Pro Tip: Shred cheese from a block — pre-shredded bags contain anti-caking powder that prevents clean, even melting.
Step 2: Toss the Pulled Pork in Sauce and Seasoning
Place the shredded pulled pork in a bowl and add BBQ sauce, smoked paprika, garlic powder, and onion powder. Toss thoroughly until every strand is evenly coated — the sauce should cling to the meat, not pool at the bottom of the bowl.
Taste the sauced pork before it goes anywhere near the chips. Adjust for sweetness, heat, or salt at this stage. Adding more BBQ sauce, a pinch of cayenne, or a squeeze of lime juice now takes seconds — correcting the seasoning after everything is assembled and baked is nearly impossible without dismantling the whole tray.
Pro Tip: Warm the sauced pork in a skillet over medium heat for 2–3 minutes before layering — warm meat melts the cheese faster and more evenly during baking.
Step 3: Build the First Layer — Chips and Base Cheese
Spread the tortilla chips across the prepared baking sheet in a single, slightly overlapping layer. Avoid stacking chips more than one or two deep — buried chips absorb moisture from the toppings above and turn soft before the top layer crisps. Every chip deserves a fair shot at staying crispy.
Scatter half the shredded cheese directly over the chips before any other toppings go on. This bottom cheese layer is structural — it melts and acts as a binding layer that keeps toppings anchored to chips when you pick one up. Without it, every topping slides straight off the moment the tray tilts.
Pro Tip: Press the chips gently into a single even layer before adding cheese — gaps in the base mean toppings fall through to the pan and burn.
📖 Read More: Loaded Nachos
Step 4: Add the Pulled Pork and Remaining Toppings
Distribute the sauced pulled pork evenly across the chip and cheese base. Follow with the pinto beans, corn, red onion, and jalapeño slices. Work methodically across the tray from edge to edge — every section of chips should have access to topping, not just the center where most people instinctively pile everything.
Finish with the remaining shredded cheese scattered generously over the entire surface. Add a light drizzle of extra BBQ sauce across the top — it caramelizes slightly in the oven, adds visual appeal, and reinforces the smoky flavor in every bite. Keep delicate fresh toppings off the tray completely until after baking.
Pro Tip: A light sprinkle of smoked paprika over the final cheese layer adds color and a deeper smoky note before the tray goes into the oven.
Step 5: Bake Until Melted, Bubbly, and Golden
Slide the tray into the preheated oven and bake for 10–12 minutes, until the cheese is fully melted, the edges are bubbling, and the BBQ sauce drizzle has caramelized to a sticky glaze. Start checking at the 8-minute mark — ovens vary, and cheese can go from golden to scorched faster than expected.
For a more caramelized finish on the cheese, switch to the broiler for the final 60–90 seconds. Keep the oven door slightly ajar and your eyes on the tray — broilers are fast and unforgiving. The moment the cheese starts turning golden-brown at the peaks, pull the tray immediately and set it on a heatproof surface.
Pro Tip: Rotate the baking sheet 180 degrees at the halfway point if your oven runs hotter at the back — even browning across the whole tray.
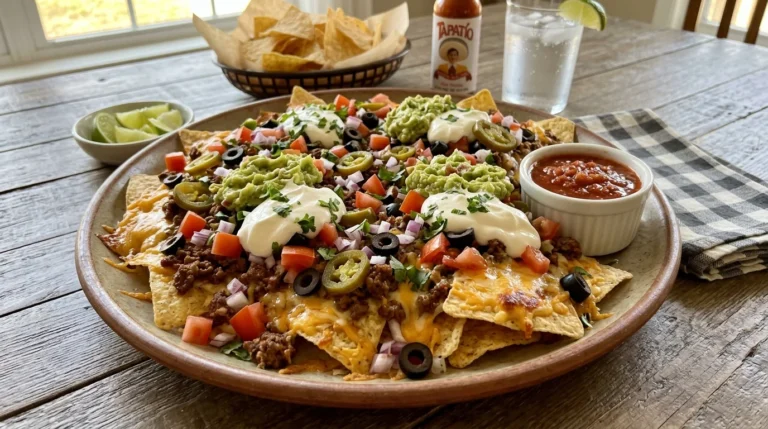
Step 6: Add Cold Toppings, Finish, and Serve
Pull the tray from the oven and add the fresh, cold toppings immediately: coleslaw, diced avocado, dollops of sour cream, and a generous scatter of fresh cilantro. The temperature contrast between hot cheese and cool, creamy toppings is central to what makes pulled pork nachos so satisfying — don’t skip this step.
Squeeze fresh lime juice over the entire tray right before serving — the acidity cuts through the richness of the pork and cheese and sharpens every other flavor on the tray. Serve straight from the baking sheet and eat immediately. Nachos deteriorate fast as the chips absorb moisture — the first five minutes are the best five minutes.
Pro Tip: Set out extra BBQ sauce, hot sauce, and lime wedges at the table so everyone can adjust their portion without slowing anyone else down.
Cook Time
Total Time: 20 minutes | Prep: 8 minutes | Bake: 12 minutes No stovetop cooking required if using pre-made pulled pork.
Servings
Serves 4 as a main | Serves 6–8 as a shared appetizer | Approximately 10–12 oz per main serving
Nutritional Information (approx. per serving — main dish portion)
| Nutrient | Amount |
|---|---|
| Calories | 650 kcal |
| Fat | 30g |
| Saturated Fat | 12g |
| Carbohydrates | 60g |
| Protein | 36g |
| Sugar | 10g |
| Fiber | 7g |
| Sodium | 920mg |
| Vitamin C | 10mg |
| Potassium | 540mg |
| Calcium | 310mg |
Values are approximate and will vary based on ingredients used.
Storage Instructions
Pulled pork nachos are best eaten immediately — fully assembled nachos do not store well because chips absorb moisture from the toppings and turn completely soft within an hour of baking. Store any leftover components separately: sauced pork in one airtight container, toppings in another, and chips sealed in their original bag. Everything keeps in the refrigerator for up to 3 days.
Reheat on a fresh foil-lined baking sheet at 375°F for 8–10 minutes to recover some crispiness. Avoid the microwave — it steams the chips rather than crisping them, and the result is uniformly soggy. For meal prep, use the freezer pack method: portion the sauced pulled pork into zip-lock bags and freeze for up to 3 months. Thaw overnight in the refrigerator, then assemble and bake fresh whenever nacho night arrives.
📖 Read More: Chicken Nachos
Suggestions
- Nacho Bowl Version: Skip the baking sheet entirely and serve all components deconstructed — chips in the base, pulled pork, beans, and corn layered on top, with cold toppings alongside. Each person builds their own bowl to their preferred ratio. It eliminates soggy chips, suits multiple dietary preferences simultaneously, and requires zero oven time.
- High-Protein Version: Double the pulled pork portion to 4–5 cups and reduce chips slightly. Add a layer of refried beans beneath the pork for extra protein and a creamier base that anchors toppings in place. The protein-to-carb ratio improves significantly per serving without changing anything about the fundamental flavor profile of the dish.
- Dairy-Free Option: Replace shredded cheese with a dairy-free cheese blend — Violife or Daiya both melt acceptably under oven heat. Swap sour cream for plain coconut yogurt or cashew cream. The coleslaw and avocado toppings are naturally dairy-free. Every other component in this recipe requires no substitution whatsoever for a fully plant-based result.
- Kid-Friendly Version: Use a mild, sweet BBQ sauce with no heat, skip the jalapeños and pickled toppings, and use mild cheddar only in place of pepper jack. Smaller individual portions on separate baking sheets let kids add only the toppings they want. Involving children in layering their own chips keeps the whole process fun and makes them significantly more likely to eat the finished result.
- Weight-Loss Version: Use baked tortilla chips instead of fried, reduce cheese to 1 cup of low-fat shredded cheddar, and increase pinto beans and corn to bulk up volume and fiber without raising calories meaningfully. Replace sour cream with plain Greek yogurt and load the finished tray with fresh salsa — natural sweetness, vitamin C, and almost no added calories.
- Carolina-Style Twist: Swap sweet BBQ sauce for a vinegar-based Carolina BBQ sauce — thinner, tangier, and sharper. The pulled pork takes on a completely different character that cuts through the richness of the cheese beautifully. Top with a mustard-dressed coleslaw rather than a creamy one, and finish with pickled red onion for extra acidity and color.
- Smoked Brisket Variation: Replace pulled pork with chopped smoked brisket — roughly the same weight, sliced or pulled into bite-sized chunks. Brisket is fattier and more intensely smoky than pork, which makes the nachos richer and more indulgent. Pair with horseradish cream instead of sour cream and top with crispy fried shallots for a steakhouse-inspired nacho experience.
📖 Read More: BBQ chicken nachos
Seasonal Relevance
Pulled pork nachos work year-round, but the seasons genuinely shape how you make them. From April through September, outdoor smokers and slow grills are running anyway — smoking a pork shoulder on the weekend and using the leftovers for nachos the next day is one of the most efficient moves in warm-weather cooking. Fresh corn is at its sweetest from June through August and adds a natural crunch that frozen corn approaches but never quite matches. October through February calls for slow cooker pulled pork — set it in the morning, shred it in the evening, and have nachos on the table in under 20 minutes. During colder months, store-bought pulled pork from a grocery deli counter is a completely respectable shortcut that keeps the whole meal manageable on a busy weeknight.
Conclusion
Once you’ve built a proper tray of pulled pork nachos, the bar for what nachos should be shifts permanently upward. The technique is straightforward — layer thoughtfully, bake hot, add cold toppings after — and the result consistently outperforms anything from a pub kitchen or sports bar menu. Try the Carolina-style vinegar twist for something sharper, or go the smoked brisket route when you want something more substantial. Either way, this recipe is worth having in your back pocket. Get the oven on and start layering.
FAQs
Q: Can I use store-bought pulled pork for this recipe?
Store-bought pulled pork works perfectly — most grocery stores carry it in the deli section or pre-packaged in the meat aisle. Drain off any excess liquid before tossing it in BBQ sauce and spices, as too much moisture will soften the chips faster during baking. A quick warm-through in a skillet before assembling significantly improves both the texture and the overall flavor of the finished nachos.
Q: Why do my pulled pork nachos always go soggy?
Soggy nachos come from too many wet toppings, too deep a chip layer, or both. Sauced meat, beans, and corn all release moisture as they heat — chips underneath absorb it rapidly. Spread chips in a single layer, apply wet toppings moderately, and bake at 400°F minimum to evaporate surface moisture quickly. Adding cold, wet toppings like salsa or coleslaw before baking also accelerates sogginess significantly.
Q: What is the best BBQ sauce style for pulled pork nachos?
Smoky, slightly sweet BBQ sauces — Kansas City style — work best for this recipe because they caramelize well under oven heat and complement both the pork and the cheese without competing with either. Vinegar-based sauces add brightness and cut through richness effectively but don’t caramelize the same way. Avoid very thin, watery sauces — they absorb into chips rather than coating the meat and make the whole tray wet.
Q: Can I make pulled pork nachos without beans?
Absolutely — beans are an addition, not a structural requirement. Skip them entirely and compensate with extra corn, diced tomato, or a layer of refried beans smeared directly onto the chips before the cheese goes down. Refried beans add creaminess and act as a moisture barrier between the chips and wetter toppings, which actually helps keep the chips crispier for longer.
Q: How far in advance can I prep pulled pork nachos for a party?
All components can be prepped up to 24 hours ahead — shred and sauce the pork, chop all fresh toppings, and shred the cheese. Store each element separately in the refrigerator. Assemble and bake only when you’re ready to serve, as assembled nachos deteriorate within minutes. Setting up a nacho assembly station and baking in two or three small batches keeps every tray fresh and crispy throughout the party.