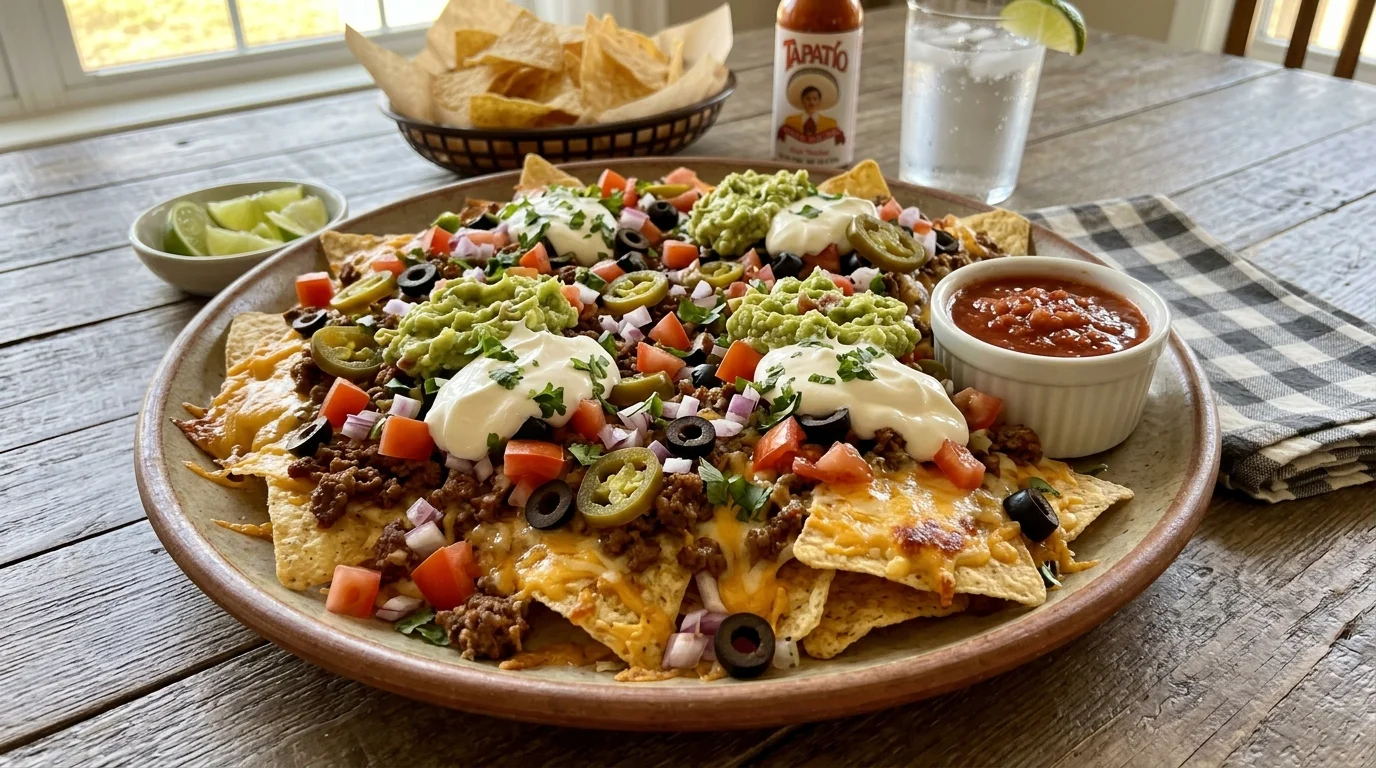
Nachos Con Carne Bold, Hearty & Done in 30 Minutes
Nachos con carne are the version of nachos that actually fills you up. Seasoned ground beef in a rich, spiced chili sauce piled onto crispy chips with melted cheese, jalapeños, and all the right cold toppings — it’s a full meal masquerading as a snack. Build a tray for game day, a quick weeknight dinner, or a casual gathering where you want something more substantial than plain nachos. No complicated steps — just pure nachos con carne goodness straight from your oven.
Ingredients List
For nachos con carne (serves 4 as a main, 6–8 as a shared appetizer):
For the Carne (Chili Beef):
- 1 lb ground beef (80/20 for best flavor; 93/7 for a leaner result)
- 1 tbsp olive oil
- 1 small yellow onion, finely diced
- 3 cloves garlic, minced
- 1 can (14 oz) diced tomatoes, drained
- 2 tbsp tomato paste
- ½ cup beef broth (or water as a substitute)
- 1 tbsp Worcestershire sauce
- 1 tsp chili powder
- 1 tsp smoked paprika
- ½ tsp ground cumin
- ½ tsp oregano
- ½ tsp salt, plus more to taste
- ¼ tsp black pepper
- ¼ tsp cayenne pepper (optional — adjust to your heat preference)
For the Nachos:
- 1 bag (10–12 oz) tortilla chips (thick-cut restaurant-style recommended)
- 2 cups shredded cheese (Monterey Jack and sharp cheddar blend melts best; pepper jack for added heat)
- 1 can (15 oz) kidney beans or pinto beans, drained and rinsed (optional — doubles down on the chili feel)
- 1 jalapeño, thinly sliced (fresh or pickled)
- ½ red onion, finely diced
- ½ cup sour cream, for serving (plain Greek yogurt as a lighter substitute)
- 1 avocado, diced (or prepared guacamole)
- ¼ cup fresh cilantro, roughly chopped
- 2 tbsp fresh lime juice
- Fresh tomato salsa or pico de gallo, for serving (optional)
- Hot sauce, for serving (optional)
Step-by-Step Instructions
Step 1: Gather and Prep Your Ingredients
Measure out every spice, dice the onion, mince the garlic, and have all nacho toppings prepped and within reach before anything goes on the stove. Nachos con carne involves a stovetop component and oven assembly running back-to-back — pre-prepping everything means neither stage gets neglected while you deal with the other.
Preheat your oven to 400°F (200°C) and line a large rimmed baking sheet with foil. Rimmed sheets are non-negotiable here — the carne is saucy, and any overhang will drip straight onto the oven floor without raised edges to contain it. For a crowd, prep two baking sheets so every chip stays in a single layer.
Pro Tip: Shred your cheese from a block — pre-shredded bags contain anti-caking agents that prevent smooth, even melting across the chips.
Step 2: Cook the Carne
Heat olive oil in a wide skillet over medium-high heat. Add the diced onion and cook for 3–4 minutes until softened, then add the garlic and stir for 30 seconds until fragrant. Add the ground beef in one flat layer and leave undisturbed for 2 minutes — that contact time builds the brown crust where most of the flavor lives.
Break the beef apart and cook until no pink remains — about 6–8 minutes total. Drain excess fat, leaving one tablespoon behind. Add tomato paste, chili powder, smoked paprika, cumin, oregano, and cayenne, stirring continuously for 60 seconds to toast the spices directly into the meat.
Pro Tip: Don’t skip the 60-second spice toast — raw spices added directly to liquid taste flat and gritty; toasted spices taste deep and rounded.
Step 3: Simmer the Carne Until Thick
Pour the diced tomatoes, beef broth, and Worcestershire sauce into the spiced beef and stir well. Scrape any browned bits from the bottom of the pan — those bits are concentrated flavor, and deglazing pulls them into the sauce where they belong.
Bring to a gentle simmer and cook uncovered for 8–10 minutes, stirring occasionally, until the sauce thickens and clings to the meat rather than pooling around it. Too much liquid in the carne leads directly to soggy nachos — you want a thick, saucy consistency that sits on top of chips, not soaks through them.
Pro Tip: Taste and adjust seasoning before the carne goes anywhere near the chips — it’s far easier to fix salt, heat, or acidity now than after everything is assembled.
📖 Read More: Loaded Nachos
Step 4: Build the Nacho Base — Chips and First Cheese Layer
Spread tortilla chips across the prepared baking sheet in a single, slightly overlapping layer. Avoid piling them deep — chips buried under heavy toppings steam instead of staying crispy. A wide, even layer gives every chip exposure to heat and a fair chance at a crunchy finish.
Scatter half the shredded cheese directly over the chips before any other topping goes on. This foundational cheese layer melts and fuses the chips together slightly, creating a stable base. Without it, the carne and toppings slide off the moment a chip is lifted — the bottom cheese layer is structural, not decorative.
Pro Tip: Lightly press chips into an even layer before adding cheese — gaps in the base mean toppings fall through to the pan and burn underneath.
Step 5: Layer the Carne, Beans, and Final Cheese
Spoon the carne evenly over the chip and cheese base using a slotted spoon if the mixture still has excess liquid. Distribute it methodically from edge to edge — every section of chips should have coverage, not just the center of the tray. Follow with the kidney beans, diced red onion, and jalapeño slices.
Finish with the remaining shredded cheese scattered generously across the entire surface. A light drizzle of extra sauce from the pan over the cheese adds a final layer of flavor and gives the nachos a glossy, restaurant-style appearance as it caramelizes in the oven. Slide the tray in immediately — the carne is at its best warm.
Pro Tip: Use a slotted spoon when layering the carne — it leaves excess sauce in the pan rather than depositing it onto the chips and softening them prematurely.
Step 6: Bake, Add Cold Toppings, and Serve
Bake at 400°F for 10–12 minutes until the cheese is fully melted, bubbling, and beginning to turn golden at the edges. Check at the 8-minute mark — every oven runs slightly differently. For a more caramelized finish, broil for a final 60–90 seconds with the door slightly ajar and your eyes on the tray the entire time.
Remove from the oven and immediately add cold toppings: diced avocado, dollops of sour cream, fresh cilantro, and pico de gallo. Squeeze fresh lime juice over everything right before serving — the acidity cuts through the richness of the beef and cheese and makes every other flavor on the tray sharper and brighter. Serve immediately.
Pro Tip: Serve from the baking sheet at the table with extra lime wedges, hot sauce, and sour cream alongside — nachos cool fast and the first few minutes are always the best.
Cook Time
Total Time: 30 minutes | Prep: 10 minutes | Cook Carne: 18 minutes | Bake: 12 minutes Stovetop and oven both required.
Servings
Serves 4 as a main | Serves 6–8 as a shared appetizer | Approximately 12–14 oz per main serving
Nutritional Information (approx. per serving — main dish portion)
| Nutrient | Amount |
|---|---|
| Calories | 680 kcal |
| Fat | 32g |
| Saturated Fat | 13g |
| Carbohydrates | 62g |
| Protein | 40g |
| Sugar | 6g |
| Fiber | 8g |
| Sodium | 960mg |
| Vitamin C | 12mg |
| Potassium | 620mg |
| Calcium | 330mg |
Values are approximate and will vary based on ingredients used.
Storage Instructions
Nachos con carne are always best straight from the oven — assembled nachos do not store well because chips absorb moisture from the carne and turn completely soft within an hour. Store all components separately: carne in one airtight container, toppings in another, and chips sealed in their original bag. Refrigerated components keep for up to 3 days without any quality loss.
Reheat the carne in a skillet over medium-low heat, then reassemble on a fresh foil-lined baking sheet and bake at 375°F for 8–10 minutes to restore crispiness. Microwaving assembled nachos produces uniformly soggy chips — not worth it. For meal prep, use the freezer pack method: portion the cooked carne into zip-lock bags and freeze for up to 3 months. Thaw overnight in the fridge and bake fresh the next evening.
📖 Read More: Pulled Pork Nachos
Suggestions
- Nacho Bowl Version: Serve all components deconstructed in individual bowls — chips on the base, carne and beans on top, cold toppings alongside. Each person builds their own to their preferred ratio. It eliminates the soggy-chip problem entirely, works across different dietary preferences at the same table, and requires zero oven time after the carne is cooked.
- High-Protein Version: Increase the ground beef to 1½ lbs and add a full can of kidney beans to the carne while it simmers. Together they push the protein per serving well above 45g. Using 93/7 lean ground beef keeps the fat content in check while the beans add fiber and natural plant-based protein that complements the meat without altering the chili flavor profile.
- Dairy-Free Option: Replace the shredded cheese with a dairy-free cheese blend — Violife or Daiya melt acceptably under oven heat for this application. Swap sour cream for plain coconut yogurt or a cashew-based sour cream. Every other ingredient in this recipe — including the carne itself — is naturally dairy-free, so this variation requires minimal adjustment to the overall process.
- Kid-Friendly Version: Reduce chili powder to ½ teaspoon, skip the cayenne entirely, and use mild cheddar only in place of pepper jack. Serve the carne slightly less saucy so chips hold up longer — kids tend to take longer to eat. Set out mild toppings separately so children can assemble their own portion without heat or unfamiliar flavors getting in the way.
- Weight-Loss Version: Use baked tortilla chips instead of fried, reduce cheese to 1 cup of low-fat shredded cheddar, and double the kidney beans inside the carne to increase volume and fiber. Replace sour cream with plain Greek yogurt and top generously with fresh salsa for vitamin C and natural sweetness at nearly zero extra calories. Each serving drops to approximately 520 calories with these adjustments.
- Green Chile Carne Twist: Swap diced tomatoes for a can of green chiles and replace chili powder with ancho chili powder for a smokier, earthier profile. Add a tablespoon of diced hatch green chile alongside the garlic if you can find them fresh. The result is a lighter-colored carne with a distinct Southwest character that pairs beautifully with a drizzle of lime crema instead of plain sour cream.
- Chorizo and Beef Blend: Replace half the ground beef with Mexican chorizo — equal parts of each, cooked together from the start. Chorizo brings its own spice blend, paprika, and fat, which deepens the overall flavor of the carne dramatically. Use slightly less chili powder to compensate, and finish with crumbled cotija cheese over the top instead of standard shredded cheddar for an authentic, bold result.
📖 Read More: Chicken Nachos
Seasonal Relevance
Nachos con carne fit naturally into every season, but they hit different notes depending on the time of year. From October through February, the deep, warming spice of the carne feels exactly right alongside cold evenings and slow weekends — it’s genuinely one of the most satisfying cold-weather meals you can build in under 30 minutes. Summer months, particularly June through August, call for lighter carne — dial back the cayenne and pile on fresh corn, diced tomato, and avocado while seasonal produce is at its peak. Spring, especially March and April, is ideal for batch-cooking carne and freezing it in portions for the months ahead. Out of peak tomato season, canned diced tomatoes perform reliably and often outperform out-of-season fresh ones in a cooked sauce.
Conclusion
Few dishes deliver the combination of boldness, substance, and speed that nachos con carne manages in under 30 minutes. Built on a properly seasoned, thick-cut beef chili and assembled with intentional layering, the result is consistently far better than anything from a bar menu or frozen nacho kit. Try the chorizo and beef blend for a deeper, spicier profile, or keep it classic and let the carne speak for itself. Either way, once you’ve nailed the technique, this becomes one of the most requested meals in your rotation. Get the skillet on — it’s time to build something worth eating.
FAQs
Q: Can I use canned chili instead of making the carne from scratch?
Canned chili works as a shortcut — drain off most of the liquid first so the nachos don’t go soggy, then warm it in a skillet and season to taste before layering. The flavor won’t be as fresh or layered as homemade carne, but it produces a respectable result in about 15 minutes total. Add a teaspoon of smoked paprika and cumin to canned chili to sharpen the flavor quickly.
Q: Why did my nachos con carne turn out soggy every time?
Soggy nachos almost always come from carne that’s too wet, chips layered too deep, or both. A properly cooked carne should be thick enough to hold its shape on a spoon — if yours pools with liquid, simmer it uncovered for an extra 5 minutes before assembling. Additionally, use a slotted spoon when layering, bake at 400°F minimum, and keep chips in a single even layer with no deep stacking.
Q: What cheese works best for nachos con carne?
A 50/50 blend of Monterey Jack and sharp cheddar is the most reliable combination — Monterey Jack melts cleanly and creates that classic pull, while cheddar adds sharpness that balances the richness of the beef. Pepper jack is a strong choice if you want built-in heat without adding extra jalapeños. Avoid pre-shredded bags — the anti-caking coating prevents smooth, even melting across the tray.
Q: Can I make nachos con carne without beans?
Absolutely — beans are entirely optional in this recipe. The carne stands fully on its own without them. If you’d like to keep some of that hearty, filling quality without beans, increase the ground beef by ¼ lb and add extra corn or diced roasted peppers for texture and volume. Refried beans spread directly onto chips beneath the carne are another option — they add body and act as a moisture barrier.
Q: How do I keep the chips crispy when the carne is quite saucy?
Two techniques help significantly. First, cook the carne until it’s genuinely thick — it should cling to a spoon, not run off it. Second, always put a layer of shredded cheese directly on the chips before adding the carne. That cheese layer melts and forms a barrier between the chips and the sauce above, slowing moisture absorption and keeping more chips crispy for longer.