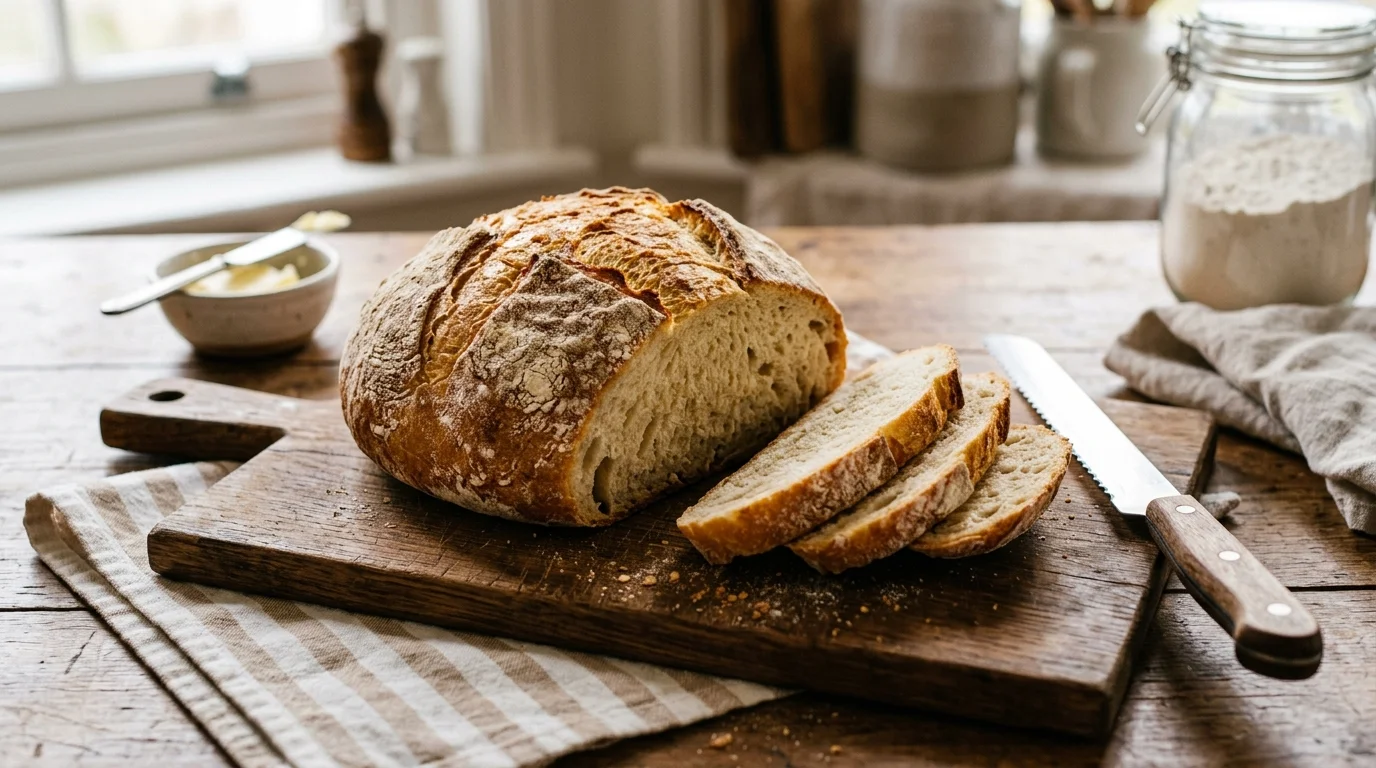
Easy Bread Recipes Simple, Satisfying & Done in 45 Minutes
Easy bread recipes are the gateway into home baking — and once you start, it’s nearly impossible to go back to store-bought. Fresh bread from your own oven is warmer, more flavorful, and far more rewarding than anything sealed in a plastic bag. Bake a simple loaf for weekend breakfast, pull flatbreads together for a weeknight dinner side, or prep a quick batch for meal prep that holds all week. No professional skills needed — just pure easy bread recipe goodness straight from your kitchen.
Ingredients List
For a classic no-knead easy white bread (makes 1 loaf or 8 rolls):
- 3 cups all-purpose flour (bread flour gives more chew; white whole wheat for added fiber)
- 2¼ tsp active dry yeast (one standard packet; instant yeast also works — no proofing required)
- 1 tsp granulated sugar (feeds the yeast; honey works as a natural substitute)
- 1¼ cups warm water (100–110°F — warm to the wrist, not hot)
- 1½ tsp salt
- 2 tbsp olive oil (neutral vegetable oil or melted butter as substitutes)
- 1 tbsp plain yogurt (optional — adds tenderness and slight tang to the crumb)
- 1 tsp garlic powder (optional — for a savory, aromatic variation)
- 1 tbsp sesame seeds or rolled oats, for topping (optional — for texture and visual finish)
- Extra flour for dusting the work surface
Step-by-Step Instructions
Step 1: Gather and Prep Your Ingredients
Measure every ingredient before you begin. Bread baking moves through stages that don’t pause conveniently — having everything pre-measured means you stay focused on the dough rather than scrambling for the salt mid-mix.
Check your water temperature carefully. Between 100–110°F is the target — warm enough to activate the yeast without killing it. A kitchen thermometer removes all guesswork. If you don’t have one, the water should feel comfortably warm on your inner wrist, like a mild bath, not hot.
Pro Tip: Set out butter or yogurt 20 minutes early so they reach room temperature — cold additions can slow yeast activity and produce an uneven rise.
Step 2: Activate the Yeast and Build the Dough
Combine warm water, sugar, and active dry yeast in a large mixing bowl and stir once. Leave it undisturbed for 5–10 minutes until a foamy layer forms on the surface — that foam confirms the yeast is alive and active.
Add olive oil, salt, and any optional additions like garlic powder or yogurt to the yeast mixture. Stir briefly, then add flour one cup at a time, mixing with a wooden spoon until a shaggy dough pulls together and clears the sides of the bowl.
Pro Tip: If your yeast doesn’t foam after 10 minutes, discard it and start over — inactive yeast is the number one reason bread doesn’t rise.
Step 3: Knead Until Smooth and Elastic
Turn the dough out onto a lightly floured surface and knead for 8–10 minutes using the heel of your hand. Push, fold, and rotate the dough in a steady rhythm — this develops the gluten network that gives bread its structure and chew.
Well-kneaded dough transforms visibly. At the start it tears easily and feels rough. After 8 minutes, it becomes smooth, elastic, and slightly tacky — it springs back when you poke it. If it sticks heavily to your hands, dust the surface lightly, but avoid adding too much flour or the crumb turns dense.
Pro Tip: A stand mixer with a dough hook on medium speed for 6 minutes produces identical results — ideal when you’d rather not knead by hand.
📖 Read More: Focaccia Bread Recipes
Step 4: First Rise — Let the Dough Double
Shape the kneaded dough into a smooth ball and place it in a lightly oiled bowl, turning once to coat all sides. Cover with a clean kitchen towel or plastic wrap and set in a warm, draft-free spot to rise for 1 hour, or until doubled in size.
Patience at this stage pays off directly in flavor and texture. The rise isn’t just about size — it’s where fermentation develops the complex, slightly tangy taste that separates homemade bread from bland commercial loaves. Rushing it with too much heat produces large, uneven bubbles and a gummy interior.
Pro Tip: The inside of an oven with only the light switched on stays at a consistent 75–80°F — the ideal environment for proofing dough in a cold kitchen.
Step 5: Shape, Second Rise, and Prepare to Bake
Punch the risen dough down firmly to release the gas, then turn it out onto a lightly floured surface. Shape it into your preferred form — a round boule, a standard loaf for a 9×5-inch pan, or 8 equal rolls. Each shape bakes slightly differently, but the technique is the same.
Place the shaped dough into a greased pan or onto a parchment-lined baking sheet. Cover loosely and allow a second rise of 30–45 minutes until noticeably puffed. This second proof refines the crumb structure and produces a lighter, more even texture than a single long rise alone.
Pro Tip: Score the top of a loaf with a sharp knife or razor blade just before baking — it controls where the bread expands and prevents uneven splitting along the sides.
Step 6: Bake, Cool, and Slice
Preheat your oven to 375°F (190°C) while the dough completes its second rise. Bake a standard loaf for 28–32 minutes, rolls for 18–22 minutes, until deep golden brown on top and hollow-sounding when you tap the bottom. Internal temperature should reach 190–200°F for a fully baked crumb.
Remove from the oven and transfer to a wire rack immediately — leaving bread in the pan traps steam underneath and softens the crust. Allow at least 20 minutes of cooling before slicing. Cutting too early releases steam that hasn’t finished setting the crumb, leaving the interior gummy regardless of how well it baked.
Pro Tip: Place a small oven-safe dish of water on the bottom rack during baking — the steam creates a crispier crust on the outside while keeping the crumb soft inside.
Cook Time
Total Time: 2 hours 10 minutes | Prep: 15 minutes | Rise Time: 1 hour 45 minutes | Bake: 30 minutes No special equipment required.
Servings
Makes 1 standard loaf (12 slices) or 8 rolls | Approximately 2 oz per slice
Nutritional Information (approx. per slice)
| Nutrient | Amount |
|---|---|
| Calories | 155 kcal |
| Fat | 3g |
| Saturated Fat | 0.5g |
| Carbohydrates | 28g |
| Protein | 4g |
| Sugar | 1g |
| Fiber | 1g |
| Sodium | 195mg |
| Vitamin C | 0mg |
| Potassium | 55mg |
| Calcium | 10mg |
Values are approximate and will vary based on ingredients used.
Storage Instructions
Fresh bread is best on day one — the crust is at its crispest and the crumb at its most tender. Store a cooled loaf in a bread bag or wrapped in a clean kitchen towel at room temperature for up to 3 days. Avoid airtight plastic bags for crusty breads — trapped moisture softens the crust within hours.
Sliced bread keeps well in the refrigerator for up to 5 days, though the texture firms slightly — toasting revives it fully. For longer storage, the freezer pack method works best: slice the loaf completely, layer parchment paper between slices, seal in a freezer bag, and freeze for up to 3 months. Pull individual slices and toast straight from frozen — no thawing required, no quality lost.
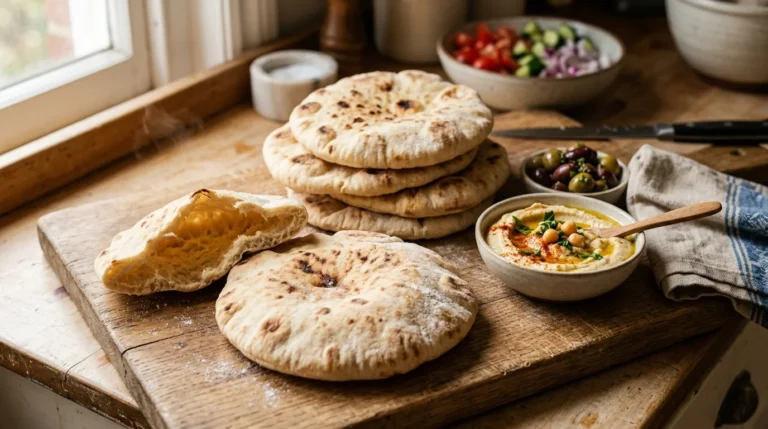
📖 Read More: Pita Bread Recipe
Suggestions
- Focaccia-Style Variation: Press the risen dough into an oiled baking sheet instead of shaping a loaf, dimple the surface generously with your fingertips, and drizzle with olive oil. Top with rosemary, flaky sea salt, and halved cherry tomatoes before baking at 425°F for 20–22 minutes. The result is a completely different bread from the same base dough — crispy edges, pillowy center.
- High-Protein Version: Replace ¼ cup of all-purpose flour with an equal amount of chickpea flour, and add 2 tablespoons of hemp seeds to the dry ingredients. Chickpea flour increases protein per slice meaningfully without altering the texture noticeably. It also adds a subtle nuttiness that works particularly well in savory loaves paired with cheese or deli meats.
- Dairy-Free Option: Every core ingredient in this recipe is naturally dairy-free. Skip the optional yogurt, or replace it with an equal amount of unsweetened coconut yogurt for the same tenderizing effect without any dairy. The finished loaf is fully plant-based and suitable for vegan diets — no compromise on texture or flavor required.
- Kid-Friendly Rolls: Divide the dough into 8 equal portions and roll each into a smooth ball. Bake on a parchment-lined tray at 375°F for 18–20 minutes until golden. Small rolls are easier for kids to handle than sliced bread, and involving them in the shaping step turns baking into a hands-on activity that makes them far more likely to actually eat what they made.
- Weight-Loss Version: Swap half the all-purpose flour for white whole wheat flour, reduce olive oil to 1 tablespoon, and skip any optional sugary toppings. Whole wheat flour increases fiber content significantly, which improves satiety and slows the digestive impact of each slice. Each piece comes in around 130 calories with this adjustment — still genuinely filling and satisfying.
- Garlic Herb Pull-Apart Bread: After the first rise, roll the dough into a rectangle, brush with garlic butter and chopped fresh herbs, then cut into strips and layer them vertically in a loaf pan. Bake at 375°F for 30 minutes. Each pull-apart section is loaded with herb and garlic flavor — ideal as a sharing bread for dinner parties or casual gatherings.
- Cheesy Jalapeño Loaf: Fold ¾ cup of shredded sharp cheddar and 2 tablespoons of finely diced pickled jalapeños into the dough just before shaping. The cheese melts into pockets throughout the crumb, and the jalapeño adds a controlled heat that makes every slice interesting. It pairs particularly well with soups, chili, and braised dishes where bold flavors are already on the table.
📖 Read More: Banana Bread Muffins
Seasonal Relevance
Easy bread recipes suit every season, but the rhythm of baking shifts naturally with the calendar. Winter months — November through February — are when bread baking makes the most instinctive sense: the oven warms the kitchen, and a fresh loaf alongside soup or stew is hard to improve on. Spring and early summer, particularly March through June, are ideal for lighter flatbreads, herbed focaccia, and rolls that complement seasonal salads and grilled dishes. From July through September, baking early in the morning avoids heating the kitchen during the hottest part of the day. Out of season or when fresh herbs aren’t available, dried herbs and pantry staples step in without sacrificing quality in the finished loaf.
Conclusion
Reliable easy bread recipes belong in every home cook’s repertoire — not because baking is complicated, but because it genuinely isn’t. With a handful of pantry staples and a couple of hours, you get bread that is fresher, more flavorful, and more satisfying than anything commercial. Try the garlic herb pull-apart for your next dinner gathering, or keep the base recipe simple and let the quality of a good loaf speak for itself. Either way, once you’ve baked your own bread, the habit tends to stick.
FAQs
Q: Can I make easy bread recipes without yeast?
Several reliable options exist for yeast-free bread. Soda bread uses baking soda and buttermilk as leavening agents and is ready in under an hour with no rise time at all. Flatbreads like tortillas and pita require no yeast whatsoever. For sandwich-style loaves, self-rising flour combined with yogurt produces a surprisingly tender, sliceable bread without any yeast involvement.
Q: Why did my bread turn out dense and heavy instead of light?
Dense bread almost always traces back to one of three causes: yeast that didn’t activate properly, not enough kneading to develop the gluten, or insufficient rise time. Check that your water temperature was in the 100–110°F range, knead for the full 8–10 minutes, and allow the dough to genuinely double during the first rise before moving to shaping.
Q: What is the best flour to use for easy bread recipes at home?
All-purpose flour is the most accessible and forgiving choice for beginners — it produces a soft, even crumb with reliable results. Bread flour contains more protein, which creates a chewier texture and stronger rise, making it ideal for sandwich loaves and rolls. Whole wheat flour adds fiber and a nuttier flavor but absorbs more liquid, so add an extra tablespoon of water when substituting.
Q: Can I make the dough the night before and bake it the next day?
Refrigerating dough overnight after the first rise is not just possible — it often improves the flavor considerably. Cold fermentation slows yeast activity and allows more complex flavors to develop over 8–12 hours. Remove the dough from the fridge 30 minutes before shaping to bring it back to room temperature, then proceed with the second rise and baking as normal.
Q: How do I know when my bread is fully baked without a thermometer?
Tap the bottom of the loaf firmly — fully baked bread sounds distinctly hollow, while underbaked bread sounds dense and dull. Additionally, the crust should be uniformly deep golden brown, not pale in the center. If the top browns quickly but the loaf still sounds dense when tapped, tent it loosely with foil and continue baking in 5-minute increments.