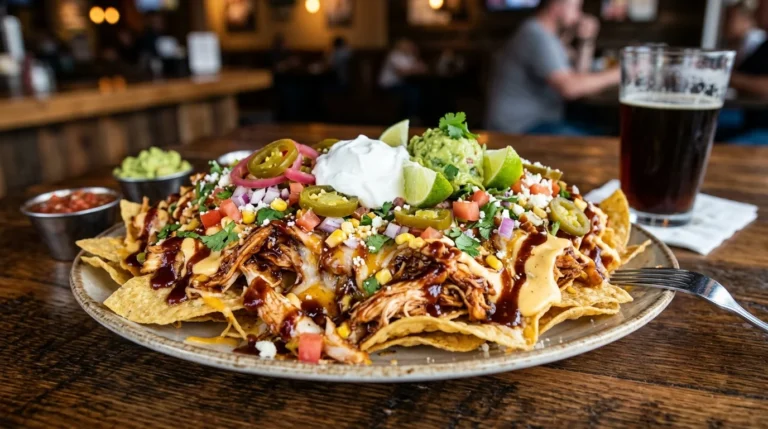
Chicken Nachos Crispy, Loaded & Ready in 25 Minutes
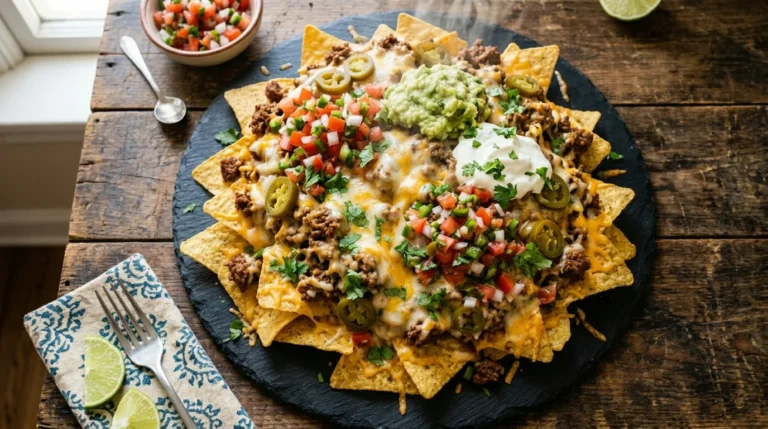
Chicken nachos are the dish that solves every gathering problem in one sheet pan. They’re fast, crowd-pleasing, endlessly customisable, and the kind of food that disappears from the tray before you’ve finished arranging the toppings. Seasoned chicken, melted cheese, jalapeños, black beans, pico de gallo, and sour cream layered across crispy tortilla chips and baked until bubbling — this is the full nacho experience done properly, not thrown together at the last minute with whatever is left in the fridge.
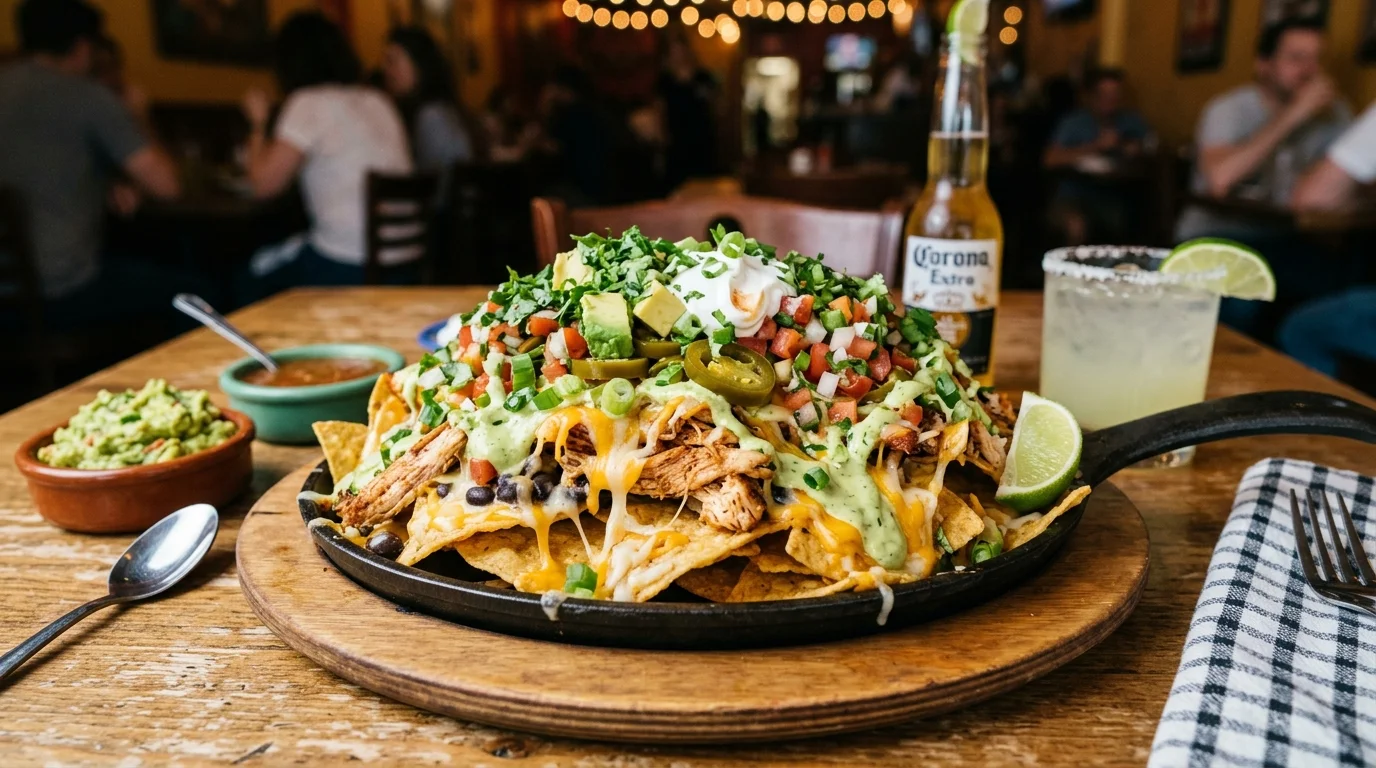
Whether you’re building them for game day, a casual Friday night, a party spread, or a quick weeknight dinner that the whole table clears without complaint, chicken nachos deliver every single time. No complicated steps — just pure chicken nacho satisfaction, hot from the oven and ready in 25 minutes.
Ingredients
For the Chicken Topping:
- 400g (14 oz) boneless, skinless chicken breast or thighs, cooked and shredded
- 1 tsp cumin
- 1 tsp smoked paprika
- 1 tsp chili powder
- ½ tsp garlic powder
- ½ tsp onion powder
- ½ tsp fine salt
- ¼ tsp black pepper
- ¼ tsp cayenne pepper [optional]
- 1 tbsp olive oil
- 2 tbsp chicken broth or water [to keep the chicken moist]
For the Nachos Base:
- 200g (7 oz) thick-cut tortilla chips [restaurant-style, not thin — they hold toppings without snapping]
- 2 cups shredded Monterey Jack cheese [or a Mexican blend]
- 1 cup shredded sharp cheddar cheese
For the Toppings:
- 1 can (15 oz) black beans, drained and rinsed
- ½ cup pickled jalapeños [or fresh, sliced]
- ½ cup corn kernels, fresh or frozen and thawed
- ½ cup cherry tomatoes, quartered [or fresh pico de gallo]
- ¼ cup red onion, finely diced
- ¼ cup fresh cilantro, roughly chopped
For Serving — Added After Baking:
- ½ cup sour cream
- 1 ripe avocado, diced [or guacamole]
- ¼ cup pickled jalapeños, extra
- Hot sauce, for serving
- Fresh lime wedges
Optional Add-Ins:
- ¼ cup sliced black olives (optional)
- 2 tbsp chipotle sauce or salsa (optional)
- ¼ cup cream cheese, dolloped — for extra richness (optional)
- 1 tbsp taco seasoning instead of individual spices (optional)
Step-by-Step Instructions
Step 1: Gather and Prep Your Ingredients
Before the oven goes on, have every component prepped and ready at the counter. Shred or chop the chicken, drain and rinse the beans, dice the red onion, quarter the tomatoes, and have the cheese measured into a bowl. Prep the cold toppings — sour cream, avocado, cilantro — separately so they’re ready to go on the moment the nachos come out of the oven. Cold toppings applied immediately to hot chicken nachos are one of the best contrasts in food — the cold sour cream against the bubbling cheese, the fresh cilantro against the smoky chicken — and having everything staged before the chips go down means it all happens at exactly the right moment.
Pro Tip: Use rotisserie chicken as the most practical and flavourful shortcut for chicken nachos. Shred the meat into medium-sized pieces — not too fine, not too large — and toss with the spices and a small splash of chicken broth or the juice from the rotisserie packaging. The already-seasoned rotisserie meat absorbs the additional spices quickly and produces a richer, more deeply flavoured nacho topping than plain cooked chicken breast tossed with the same spices.
Step 2: Season and Warm the Chicken
In a skillet over medium heat, warm the shredded chicken with the olive oil for 2–3 minutes. Add the cumin, smoked paprika, chili powder, garlic powder, onion powder, salt, pepper, and cayenne. Stir continuously for 60–90 seconds, letting the dry spices toast briefly into the hot chicken and oil before adding the broth. Pour the broth over the spiced chicken and stir — it will sizzle and reduce within 30 seconds, coating every piece of chicken in a glossy, intensely seasoned sauce. Remove from the heat. The chicken should look glistening, well-coated, and smell deeply of toasted cumin and smoked paprika — this is the flavour foundation of the entire nacho build and it needs to be bold before it goes onto the chips.
Pro Tip: Toast the spices in the pan with the chicken for the full 60–90 seconds before adding any liquid. Dry-toasted spices release their volatile flavour compounds into the hot oil and develop a deeper, more rounded flavour than spices dissolved directly into a liquid. This single step is what makes seasoned nacho chicken taste restaurant-quality rather than flat and one-dimensional.
Step 3: Build the First Layer of Nachos
Preheat the oven to 400°F (200°C) and line a large rimmed baking sheet with foil — shiny side up to reflect heat evenly across the chips. Spread half the tortilla chips in a single, even layer across the entire baking sheet — every chip should be visible and flat rather than stacked or overlapping. Scatter half the seasoned chicken across the chips, distributing it so every chip has some coverage. Scatter half the black beans, corn, red onion, and jalapeños across the chicken layer. Sprinkle half the combined shredded cheese evenly across everything — the cheese is the binder that holds the first layer together and connects it to the second layer that goes on top.
Pro Tip: Two layers are non-negotiable for properly loaded chicken nachos — a single layer produces chips with heavy toppings in the centre and bare chips at the edges. The double-layer method ensures every chip in the batch has chicken, cheese, and at least one other topping regardless of where it sits on the tray. It also produces a more substantial portion per person and makes the nachos genuinely filling rather than just snack-sized.
📖 Read More: Alfredo Stuffed Shells
Step 4: Build the Second Layer and Add the Cheese Topping
Add the remaining tortilla chips directly on top of the first layer, spreading them to cover evenly. Distribute the remaining seasoned chicken, beans, corn, red onion, and jalapeños across the second chip layer. Finish with the remaining shredded cheese scattered generously across the entire surface — this final cheese layer is what produces the golden, bubbling, visually impressive top that makes chicken nachos look as good as they taste. Press the toppings gently across the chip surface so they sit flat rather than piling up in peaks — flat distribution means the cheese melts evenly across everything and no chip is buried without coverage.
Pro Tip: Mix the Monterey Jack and cheddar cheeses together before scattering rather than adding them separately. Monterey Jack melts smoothly and produces the glossy, creamy melt; cheddar adds sharp flavour and the golden colour. Applied together, they produce a cheese layer that is both visually appealing and better-tasting than either cheese used alone across the entire nacho build.
Step 5: Bake Until the Cheese is Bubbling and Golden
Bake the assembled chicken nachos at 400°F for 8–10 minutes — watch them closely from the 7-minute mark because the difference between perfectly melted cheese and slightly overcooked chips is narrow at this temperature. The cheese should be fully melted, bubbling actively across the surface, and beginning to develop golden-brown patches in spots. The chips should look golden and crispy at the edges — pale chips means more time is needed; significantly darkened chips means they’re overdone. For an extra-golden cheese finish, switch to broil for the final 90 seconds and watch the entire time. Remove the moment the cheese hits the colour and bubble level you want.
Pro Tip: Never cover the baking sheet when baking nachos — steam trapped under foil or a cover softens the chips and produces soggy nachos rather than crispy ones. The open, uncovered bake is what keeps the chips crunchy through the cheese melt. If the cheese is melting too slowly and the chips are darkening, the oven isn’t hot enough — preheat for a full 15 minutes before the nachos go in to ensure the oven is at the correct temperature before baking starts.
Step 6: Add Cold Toppings and Serve Immediately
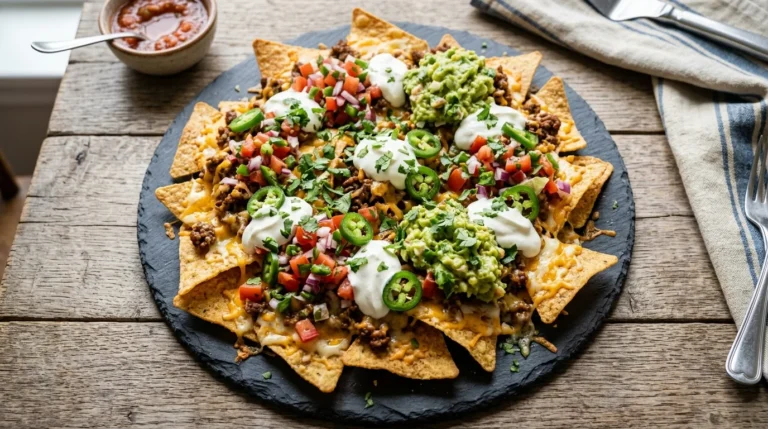
Remove the chicken nachos from the oven and add every cold topping immediately while the cheese is still molten. Distribute dollops of sour cream across the surface — use a spoon and place them in gaps between chips rather than spreading, which maintains the creamy texture rather than smearing it into the cheese. Add the diced avocado or guacamole, the quartered cherry tomatoes or pico de gallo, extra jalapeños, and a generous handful of fresh cilantro scattered across the top. Squeeze a lime wedge over the entire tray just before serving — the acidity of the lime brightens every element of the nacho and is the final flavour step that makes the whole tray taste genuinely complete. Serve immediately, directly from the sheet pan, with hot sauce on the side.
Pro Tip: Serve chicken nachos the moment the cold toppings go on — within 5 minutes of coming out of the oven. Nachos that sit for 10 minutes begin to soften as the steam from the hot cheese meets the cold toppings above, and the chips at the base of the pile absorb moisture from the toppings and lose their crunch progressively. Nachos are a serve-immediately dish — build them last, serve them first.
Cook Time
Total Time: 25 minutes | Prep: 12 minutes | Season Chicken: 5 minutes | Build and Bake: 10 minutes One sheet pan — loaded chicken nachos ready in 25 minutes.
Servings
Serves 4 as a main course or 6–8 as a party appetiser.
Nutritional Information (approx. per serving — based on 4 main course servings, with sour cream and avocado)
| Nutrient | Amount |
|---|---|
| Calories | 680 kcal |
| Fat | 36g |
| Saturated Fat | 14g |
| Carbohydrates | 54g |
| Protein | 42g |
| Sugar | 4g |
| Fiber | 8g |
| Sodium | 920mg |
| Vitamin C | 16mg |
| Potassium | 680mg |
| Calcium | 420mg |
Values are approximate and will vary based on chip brand, cheese quantity, and toppings used.
Storage Instructions
Chicken nachos are designed to be consumed immediately and don’t store well as a completed dish — the chips soften significantly within 30 minutes of baking and become completely limp and unpleasant within a few hours. There is no practical method for reviving assembled, baked nachos to their original crispy state. The most useful storage approach is to keep the components separate. The seasoned chicken stores in an airtight container in the refrigerator for up to 4 days and reheats in a skillet with a splash of broth in under 3 minutes — it makes excellent tacos, rice bowls, and wraps throughout the week alongside the leftover nacho build. The shredded cheese blend keeps refrigerated for up to 1 week. Drained black beans, corn, and diced red onion keep covered in the refrigerator for up to 3 days. Diced avocado with lime juice pressed against the surface and plastic wrap pressed directly against the flesh keeps for up to 24 hours before browning becomes a problem. For party preparation, season the chicken up to 2 days ahead and refrigerate. Mix the cheese blend, drain the beans, and dice the onion the morning of the event. When guests arrive, build and bake the nachos in two 10-minute batches rather than one large batch — two fresh-from-the-oven trays served 20 minutes apart produce consistently better nachos than one large batch that sits and softens while people graze.
📖 Read More: Artisan Bread Recipes
Suggestions
- Buffalo Chicken Nachos: Toss the shredded chicken in 3 tablespoons of hot sauce and 1 tablespoon of melted butter instead of the Tex-Mex spice blend. Replace the Monterey Jack with a blue cheese crumble scattered across the top layer alongside the standard cheddar. Drizzle additional buffalo sauce across the finished nachos after baking and top with thinly sliced celery for crunch. This version has the bold, tangy heat of classic buffalo wings in a nacho format — the blue cheese and buffalo combination is one of the most addictive flavour pairings in the entire nacho catalogue.
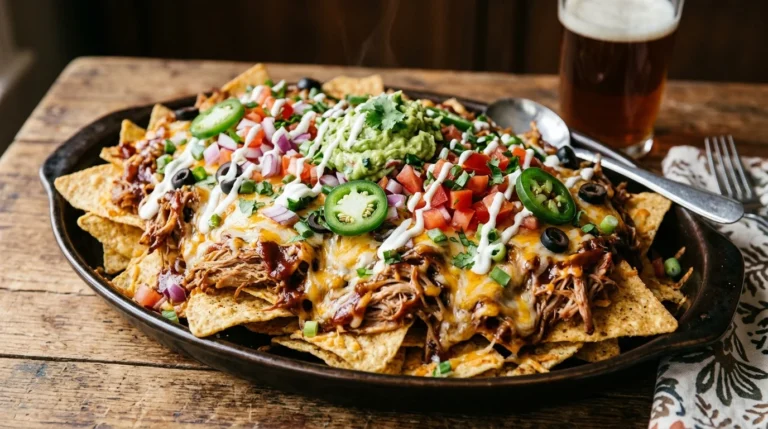
- BBQ Chicken Nachos: Toss the shredded chicken with 3 tablespoons of smoky BBQ sauce and a pinch of smoked paprika instead of the standard spice blend. Replace the pico de gallo with a simple red onion and corn mixture dressed with lime. Skip the jalapeños and add thinly sliced scallions instead. The BBQ sauce caramelises slightly against the hot cheese during baking and produces a sweet, smoky chicken layer that is the most crowd-pleasing variation in the list — universally liked and consistently requested.
- White Queso Chicken Nachos: Make a quick white queso by melting 200g of white American cheese or a white queso blend with ¼ cup of whole milk and 1 tablespoon of diced pickled jalapeños in a small saucepan over low heat until smooth. Drizzle generously over the assembled nachos immediately before baking instead of using shredded cheese. The queso coats every chip and filling element uniformly — no bare patches, no clumps — and produces a creamy, pourable cheese layer that is visually and texturally different from shredded cheese in the best possible way.
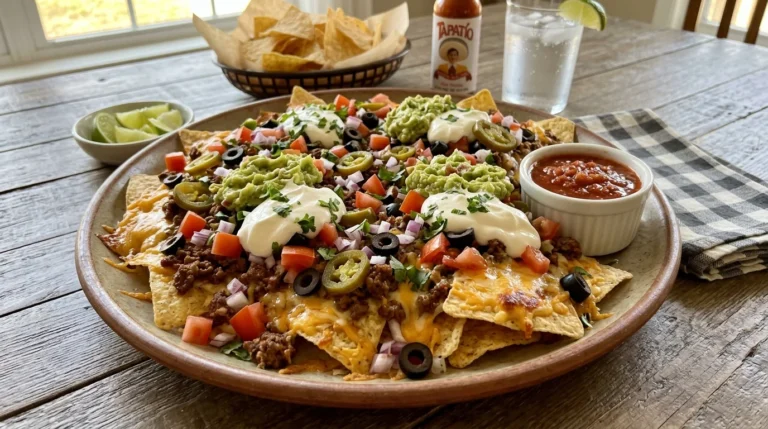
- Sheet Pan Nacho Bar: Build the chicken nachos without any cold toppings on the tray — bake with only the chicken, cheese, beans, corn, and jalapeños. Place the sour cream, guacamole, pico de gallo, hot sauces, sliced jalapeños, and cilantro in individual small bowls around the centre of the table. Each person builds their own portion from the sheet pan as they go. This format is the most practical for gatherings where dietary preferences vary — everyone gets the hot chip and cheese base they want and adds cold toppings according to their own preference.
- Pulled Pork Nachos: Replace the chicken entirely with pulled pork — either slow-cooked from scratch or from a good quality store-bought pulled pork. Toss the pulled pork in a small amount of the cooking liquid and a drizzle of BBQ sauce. Use the same build method as the base recipe. The pulled pork adds a richer, more unctuous protein element than chicken and pairs particularly well with a sharp white cheddar topping, pickled red onion, and a jalapeño coleslaw on the side. This is the most substantial version in the list — genuinely filling and better suited as a main course than a party snack.
- Vegetarian Nachos: Skip the chicken entirely and double the black beans and corn. Add 1 cup of sautéed bell pepper and mushroom cooked with the same spice blend used for the chicken — the vegetables absorb the cumin and paprika beautifully and provide enough substance and flavour to hold the nacho build together without any protein shortfall. Finish with a full avocado’s worth of diced avocado on top — the extra fat and creaminess from the avocado compensates for the missing richness of the cheese and chicken combination.
- Kid-Friendly Mild Chicken Nachos: Use plain shredded chicken seasoned only with garlic powder, onion powder, and a pinch of salt — no chili powder, no cayenne, no smoked paprika. Skip the pickled jalapeños entirely and replace with mild corn salsa. Use only mild cheddar cheese and serve extra sour cream in generous amounts. The mild version of chicken nachos is the most reliably consumed by younger eaters — familiar flavours, no heat, and the interactive chip-and-topping format makes them genuinely fun for children to eat without any selective topping removal.
- Weight-Loss Friendly Chicken Nachos: Use baked tortilla chips instead of fried to reduce the fat content of the base. Reduce the cheese to 1 cup total — enough to melt and bind the toppings without the full calorie load of the standard 3-cup amount. Add an extra cup of black beans for fibre and protein that extends satiety. Replace sour cream with plain low-fat Greek yogurt — it tastes identical cold on nachos and saves approximately 100 calories per serving. Each serving comes in under 480 calories on this build while still delivering the full chicken nacho flavour experience.
Seasonal Relevance
Chicken nachos are a genuinely year-round dish but they earn their biggest audiences at specific seasonal moments. From September through February, nachos are at their most culturally relevant — game day season from September through January means nachos appear on more tables simultaneously than at any other time of year. The buffalo chicken version and the BBQ build suit autumn and winter specifically — bolder, richer flavours that align with the season’s appetite for more indulgent food. From May through August, chicken nachos appear at backyard cookouts and pool parties where something that requires minimal utensils and can be eaten standing up is the most practical food format available. The vegetarian version with fresh corn from the cob and peak-season tomatoes suits summer particularly well — the produce quality at this time of year makes the fresh toppings taste dramatically better than the same ingredients in winter. Spring, March through May, is when the nacho bar format gets most use — entertaining season begins again, lighter gatherings call for shareable food, and the customisable format accommodates the mixed dietary preferences that early-season parties always reveal.
Conclusion
Chicken nachos earn their reputation as one of the most reliable crowd-pleasing dishes available because they combine genuinely good flavour with a format that makes eating social and interactive. The two-layer build, the bold spiced chicken, the double cheese blend, and the cold toppings added at the last second — all of it contributes to a nacho that is better than what most people expect from a home version. Master the base recipe first and understand the layering and timing. Then work through the variations — the buffalo build, the BBQ version, the white queso method — and find the chicken nachos that earn a permanent place in your rotation. Make them for game day, make them for a quick Friday dinner, make them for a party where something genuinely good needs to arrive fast. Every version disappears completely, and that is always the right outcome.
FAQs
Q: How do I stop the bottom chips from going soggy on my chicken nachos? Soggy bottom chips are caused by two things — toppings with too much moisture placed directly on the chips before baking, and nachos that sit too long after coming out of the oven before being eaten. Drain the beans completely, pat the corn dry if using thawed frozen corn, and avoid adding salsa or pico de gallo to the chips before baking — add those cold and wet after the oven. Use thick-cut restaurant-style chips rather than thin ones — thicker chips have more structural integrity and hold up against the moisture from toppings significantly longer than thin, crispy chips. Bake on a preheated sheet pan so the base chips start crisping immediately from the bottom, and serve within 5 minutes of adding cold toppings.
Q: What is the best cheese for chicken nachos? A blend of Monterey Jack and sharp cheddar in equal parts is the most effective combination for nachos. Monterey Jack melts cleanly, quickly, and evenly — it produces the glossy, smooth melt that coats every chip and filling element. Cheddar adds sharp, pronounced flavour and a golden colour that Monterey Jack alone doesn’t develop. Used together, they produce nachos that look golden, taste bold, and have the creamy melt that makes a nacho worth picking up. Pre-shredded cheese bags contain anti-caking agents that inhibit smooth melting — freshly shredded cheese from a block melts significantly better and produces a noticeably more appealing result on baked nachos.
Q: Can I make chicken nachos ahead of time for a party? You can prepare every component in advance, but the nachos themselves must be built and baked immediately before serving — there is no practical way to make assembled nachos ahead of time without sacrificing the crispy chip texture that defines the dish. Season and refrigerate the chicken up to 2 days ahead. Mix the cheese blend, drain the beans, and dice all vegetables the morning of the event. When guests arrive, build and bake in 10-minute batches rather than one large batch made an hour before. Two fresh, hot trays of chicken nachos served in sequence produce a far better result than one large tray made in advance that softens progressively on a table while people graze.