
Focaccia Bread Recipes Crispy, Pillowy & Ready in 2 Hours
Focaccia bread recipes are the most rewarding baking project available to a home cook at any skill level — because the method is genuinely simple, the results are consistently spectacular, and the bread itself is one of the most versatile things you can make in a single pan.
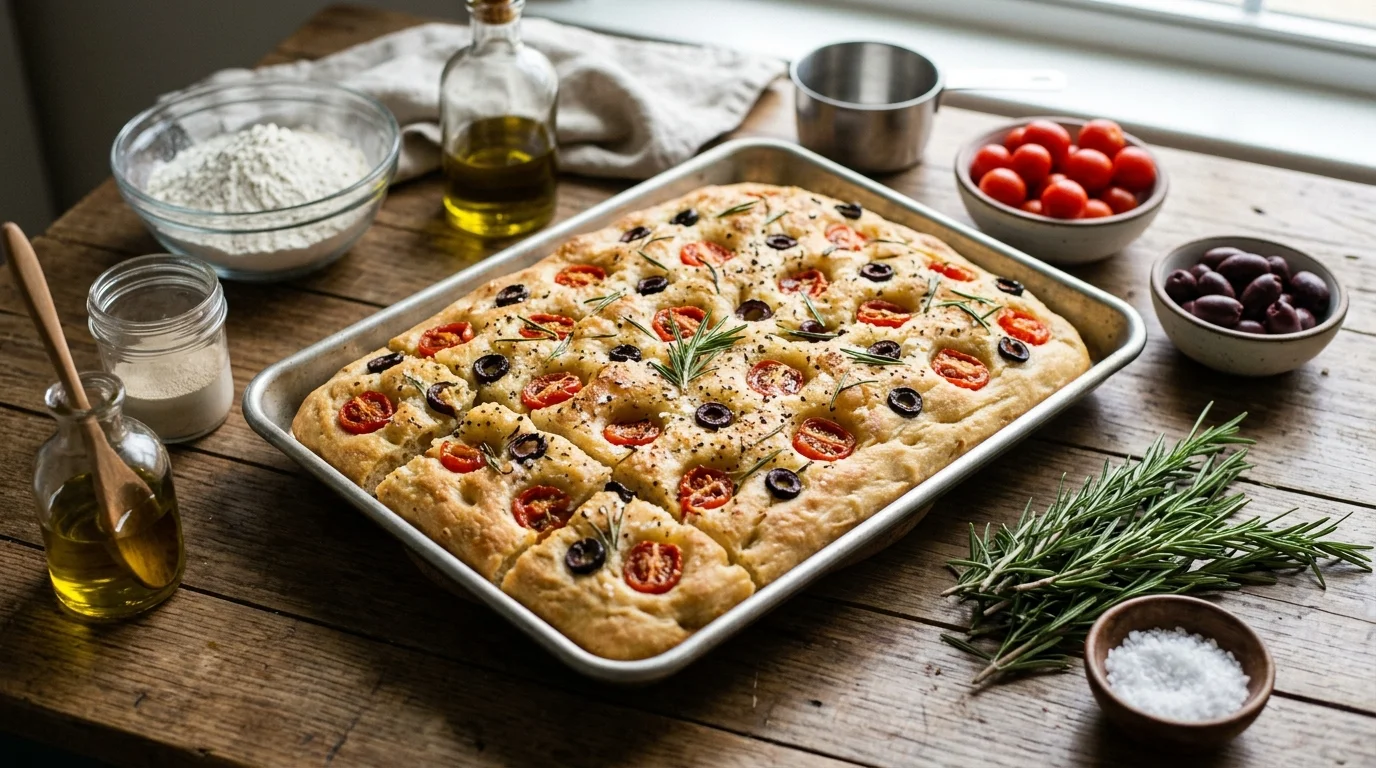
The signature golden crust, the olive-oil-rich dimpled surface, the pillowy open crumb that tears apart in satisfying layers — all of it comes from a high-hydration dough that requires no kneading, no shaping expertise, and no special equipment beyond a baking pan and a bowl. It works as a table bread alongside soup or pasta, as the base for a loaded sandwich, as a party centrepiece with toppings people pick at all evening, or simply eaten warm from the pan with nothing but the olive oil it was baked in. No complicated steps — just pure focaccia bread recipe satisfaction, golden and fragrant from the oven in 2 hours.
Ingredients
For the Classic Focaccia Dough (makes one 9×13-inch pan):
- 4 cups (480g) bread flour [or all-purpose — bread flour produces a chewier, more structured crumb]
- 2¼ tsp (7g) instant yeast [one standard packet]
- 2 tsp fine salt
- 1¾ cups (420ml) warm water [around 110°F]
- 5 tbsp extra virgin olive oil, divided [quality matters here — it defines the flavour]
- 1 tsp honey or sugar [activates the yeast and adds slight depth]
For the Dimpling and Topping:
- 3 tbsp extra virgin olive oil [for the pan and the surface dimpling]
- 1½ tsp flaky sea salt [Maldon or fleur de sel — do not substitute fine salt]
- Fresh rosemary sprigs [the classic topping — 4–5 sprigs]
- 1 tsp dried oregano or Italian herbs (optional)
Popular Topping Variations:
- Roasted garlic cloves and fresh thyme
- Cherry tomatoes, halved, and fresh basil
- Caramelised onion and gorgonzola
- Olives, sun-dried tomatoes, and feta
- Za’atar and lemon zest
- Sliced red onion, rosemary, and flaky salt
Optional Enrichments:
- 2 tbsp plain Greek yogurt — folded into the dough for extra tenderness (optional)
- 1 tsp garlic powder — added to the dough with the flour (optional)
- ¼ cup finely grated Parmesan — scattered across the surface before baking (optional)
Step-by-Step Instructions
Step 1: Gather and Prep Your Ingredients
Before anything is mixed, check the temperature of the water — 105–115°F is the correct range for activating instant yeast without killing it. Too cold and the yeast won’t activate fully; too hot and the yeast dies completely, leaving you with a dough that never rises. Measure the flour and salt into a large bowl and whisk them together briefly. Have the olive oil measured and at the counter. For focaccia specifically, ingredient quality matters more than in most bread recipes — the olive oil is not a background flavour but the primary one, and a good extra virgin olive oil with genuine flavour makes a measurable difference to the finished bread. Use the best bottle you have.
Pro Tip: Flaky sea salt for the top of the focaccia is non-negotiable — it performs a completely different role from fine salt mixed into the dough. Flaky salt sits on the surface of each dimple and delivers bursts of salinity with each bite against the rich olive oil crust. Fine salt dissolves into the oil and disappears — the textural and flavour effect is entirely lost. Buy a box of Maldon and use it every time.
Step 2: Make the No-Knead Focaccia Dough
In a large bowl, combine the warm water, honey, and instant yeast. Stir briefly and let it sit for 5 minutes until slightly foamy — this confirms the yeast is active before any flour is added. Pour the yeast mixture over the flour and salt and add 2 tablespoons of the olive oil. Mix with a fork or spatula until a shaggy, sticky, uniformly wet dough forms — it will look significantly wetter and less structured than standard bread dough and that is completely correct. Focaccia bread recipes rely on a high-hydration dough that is closer to a thick batter than a traditional kneaded dough — the hydration is what creates the open, airy crumb during baking. Cover the bowl tightly with plastic wrap and refrigerate overnight, or let it rise at room temperature for 1–1.5 hours until doubled.
Pro Tip: The overnight cold proof is the best approach for focaccia and takes zero extra effort. Mix the dough in 5 minutes the evening before, cover, and refrigerate overnight for 8–18 hours. The long, cold fermentation develops a depth of flavour in the bread that a 90-minute room-temperature proof simply cannot replicate — a slightly tangy, more complex, more interesting focaccia that makes the overnight method worth planning around every time.
Step 3: Oil the Pan and Transfer the Dough
Pour 3 tablespoons of olive oil into a 9×13-inch baking pan and use your hand to spread it across the entire base and up the sides — the oil should pool visibly in the corners rather than being a thin film. This generous oil quantity is what creates the focaccia’s signature crispy, almost fried base and the golden, slightly crunchy bottom crust that defines a properly made focaccia. Turn the risen dough into the oiled pan and use your fingertips to gently stretch it toward the edges — the dough will resist and spring back, which is normal. Cover loosely with oiled plastic wrap and leave to rest for 15 minutes, then stretch again. Repeat one more time after another 15 minutes until the dough reaches the corners of the pan. Cover and allow to proof in the pan for 30–45 minutes until noticeably puffy.
Pro Tip: Never force the dough to the edges in one go — stretching cold, resistant focaccia dough tears the gluten structure and creates thin spots that bake into holes rather than the uniform, open crumb the bread is known for. The three-stretch method across 30 minutes gives the gluten time to relax between each stretch, and the dough reaches the edges naturally on the third pass without any resistance or tearing.
📖 Read More: Alfredo Stuffed Shells
Step 4: Dimple, Top, and Prepare for Baking
Preheat the oven to 425°F (220°C) while the dough completes its final proof in the pan. Once the dough looks puffy and relaxed, drizzle 2 more tablespoons of olive oil evenly across the entire surface — the dough should look generously, almost excessively oiled before the dimples go in. Press your fingertips firmly into the dough to create deep, irregular dimples across the entire surface — push all the way down until your fingertips nearly touch the base of the pan. Each dimple should be deep and distinct — the oil pools in these depressions during baking and creates the characteristic golden, slightly crispy craters that make focaccia visually distinctive. Add the rosemary sprigs, pressing them gently into the surface, and scatter the flaky sea salt generously across everything.
Pro Tip: Don’t be shy with the dimpling pressure — timid, shallow dimples fill back in during baking and the surface bakes flat. Deep, confident dimples stay open during baking, pool oil throughout the bake, and produce the signature look of a properly made focaccia. Think of pressing your fingers into the dough as an intentional, deliberate action rather than a gentle touch — the dough is resilient and will not tear under firm, direct pressure from fingertips.
Step 5: Bake Until Golden and Crispy
Bake the dimpled, topped focaccia at 425°F for 20–25 minutes until the surface is a deep, even golden brown across every dimple and the edges have pulled away slightly from the sides of the pan. The base should be audibly crispy when you lift a corner with a spatula — a soft, pale base means the pan needs more oil next time or the oven wasn’t hot enough. The surface should have patches of darker golden-brown where the oil has crisped against the flaky salt and rosemary — these darker areas are not burning, they’re exactly where the flavour is. Remove the pan from the oven and let the focaccia rest in the pan for 5 minutes before lifting onto a wire rack — resting in the pan allows the base to continue crisping from the residual heat without steaming in trapped moisture.
Pro Tip: For the crispiest possible base — the single most requested texture improvement in focaccia baking — place the baking pan directly on the floor of the oven for the first 10 minutes of baking before moving it to the centre rack for the remainder. The direct, intense bottom heat from the oven floor crisps the base faster and more thoroughly than a rack-baked pan, producing a result that is genuinely restaurant-quality in texture.
Step 6: Cool, Slice, and Serve
Lift the baked focaccia from the pan onto a wire rack using a wide spatula — the golden base should release cleanly from the well-oiled pan surface without sticking. If it sticks at any point, run a thin offset spatula around the edges before attempting to lift. Cool for at least 15 minutes before slicing — cutting into hot focaccia releases the steam that hasn’t yet redistributed through the crumb and produces a gummy interior rather than the clean, airy, slightly chewy texture of a properly rested loaf. Slice with a serrated bread knife using a sawing motion rather than pressing down — pressure compresses the open crumb and the slices look dense rather than light and airy. Serve warm or at room temperature with extra olive oil for dipping, alongside soup, pasta, or as the bread for sandwiches.
Pro Tip: Drizzle extra olive oil across the top of the focaccia the moment it comes out of the oven while the surface is still hot and porous — the hot bread absorbs the oil instantly and the surface becomes richer, more fragrant, and more deeply flavoured than focaccia left to cool without this final oil addition. This is the step that makes your focaccia taste like it came from an Italian bakery rather than a home oven.
Cook Time
Total Time: 2 hours (or overnight + 1 hour) | Active Prep: 15 minutes | First Proof: 90 minutes (or overnight) | Pan Proof: 45 minutes | Bake: 22 minutes | Cool: 15 minutes One bowl, one pan — golden focaccia bread ready in 2 hands-on hours.
Servings
Makes one 9×13-inch focaccia — serves 8 to 12 as a side bread, or 6 as a sandwich base.
Nutritional Information (approx. per serving — based on 10 servings, plain rosemary focaccia)
| Nutrient | Amount |
|---|---|
| Calories | 280 kcal |
| Fat | 10g |
| Saturated Fat | 1.5g |
| Carbohydrates | 40g |
| Protein | 6g |
| Sugar | 1g |
| Fiber | 2g |
| Sodium | 380mg |
| Vitamin C | 0mg |
| Potassium | 80mg |
| Calcium | 20mg |
Values are approximate and will vary based on olive oil quantity and toppings used.
Storage Instructions
Focaccia bread is best eaten on the day it’s baked — the base is crispiest and the crumb most tender within the first 6 hours of coming out of the oven. Store leftover focaccia at room temperature wrapped in a clean kitchen towel or loosely in a paper bag for up to 2 days — do not use plastic bags or airtight containers for room-temperature storage, as the trapped moisture softens the crust and produces a gummy, soft texture within hours. For storage beyond 2 days, slice and freeze rather than continuing to store at room temperature. To refresh day-old focaccia, place slices directly on the oven rack at 375°F for 5–7 minutes until the base is crispy again and the surface is warm — this method genuinely revives day-old focaccia to close to its original quality in a way that no microwave reheating can approach. Focaccia freezes very well for up to 3 months — slice the completely cooled bread into individual portions, wrap each piece tightly in plastic wrap and then foil, and freeze flat. Thaw at room temperature for 45 minutes and refresh in a 375°F oven for 5–6 minutes before serving. For sandwich-style focaccia, freeze the entire unsliced loaf and thaw overnight at room temperature before splitting and filling. Never freeze focaccia that has already been topped with fresh tomatoes, fresh basil, or other moisture-releasing fresh ingredients — freeze the plain bread and add fresh toppings after thawing and warming.
Suggestions
- Roasted Garlic and Rosemary Focaccia: Separate a full head of garlic into unpeeled cloves, toss with olive oil, and roast at 400°F for 30 minutes until soft and caramelised. Squeeze the roasted garlic from the skins directly onto the dimpled focaccia surface alongside fresh rosemary sprigs before baking. The roasted garlic caramelises further during the bake and produces a sweet, mellow, deeply savoury topping that is the most popular focaccia variation for a reason — it pairs with almost everything and disappears faster than any other topping at a table.
- Cherry Tomato and Basil Focaccia: Press halved cherry tomatoes cut-side up into the dimples across the entire surface of the proofed dough before baking. The tomatoes collapse and caramelise during baking, releasing their juices into the surrounding olive oil and bread surface. Add torn fresh basil only after the focaccia comes out of the oven — fresh basil added before baking burns and turns black within minutes at 425°F. The combination of caramelised tomato, olive oil, flaky salt, and fresh basil produces a focaccia that needs nothing else alongside it.
- Caramelised Onion and Gorgonzola Focaccia: Cook 2 large yellow onions in 2 tablespoons of butter and 1 tablespoon of olive oil over very low heat for 40–45 minutes, stirring occasionally, until deeply caramelised, sweet, and reduced. Spread the caramelised onions across the dimpled focaccia surface and crumble gorgonzola generously across the top before baking. The sweet onion against the sharp, salty cheese against the olive-oil-rich bread is one of the most complex and satisfying flavour combinations in the entire focaccia topping catalogue.
- Za’atar and Lemon Focaccia: Whisk 3 tablespoons of za’atar spice blend with 3 tablespoons of olive oil into a loose paste. Spread across the dimpled dough surface before baking. Finish the baked focaccia with a squeeze of fresh lemon juice and a scatter of lemon zest the moment it comes out of the oven. The za’atar — a Middle Eastern blend of dried herbs, sesame seeds, and sumac — produces a focaccia that is earthy, slightly tart, and deeply aromatic in a direction that Italian herb versions don’t reach.
- Focaccia Sandwiches: Split the completely cooled focaccia horizontally into a top and bottom half using a long serrated knife. The open, airy crumb holds sandwich fillings more securely than most bread types — it doesn’t compress to nothing under pressure and it doesn’t become soggy as quickly as softer breads. Layer with prosciutto, fresh mozzarella, roasted red peppers, and a drizzle of good olive oil for a classic Italian build, or use grilled chicken, pesto, sun-dried tomatoes, and arugula for a lighter, herb-forward version.
- Focaccia Pizza: After dimpling the proofed dough, spread 3 tablespoons of good marinara sauce across the surface instead of olive oil alone. Top with shredded mozzarella, pepperoni or vegetables of choice, and a drizzle of olive oil across everything. Bake at 425°F for 20–22 minutes until the cheese is melted and the base is golden. The thick, chewy focaccia base produces a pizza that is closer to a Sicilian-style deep-dish than a thin-crust — it handles the weight of generous toppings without becoming soggy and produces a satisfying, shareable bread-pizza hybrid.
- Olive and Sun-Dried Tomato Focaccia: Press whole Kalamata olives and roughly chopped oil-packed sun-dried tomatoes into the dimpled dough surface before baking alongside the standard rosemary and flaky salt. The olives add a briny, intensely savoury flavour and the sun-dried tomatoes add concentrated sweetness and a chewy texture against the light, open crumb. This version travels and holds at room temperature better than fresh tomato versions — it’s the most practical topping combination for a focaccia being made ahead for a gathering.
- Gluten-Free Focaccia: Use a high-quality gluten-free bread flour blend — one that contains xanthan gum as a binding agent — as a direct 1:1 replacement for the bread flour. Increase the olive oil by 1 tablespoon in the dough to compensate for the reduced fat-retention of gluten-free flour. The dough will be slightly stickier and less elastic than the standard version — handle it with oiled hands rather than floured hands and don’t attempt to stretch it with the three-pass method. Pour it directly into the oiled pan and smooth to the edges with oiled fingertips in one session. The finished focaccia is slightly denser than the wheat version but entirely acceptable and genuinely good for anyone who cannot eat gluten.
Seasonal Relevance
Focaccia bread recipes work in every season but the toppings and the role the bread plays at the table shift meaningfully throughout the year. From May through September, cherry tomato and basil focaccia is the natural daily build — peak-season tomatoes caramelise during baking into something that out-of-season tomatoes simply cannot produce, and fresh basil at its most fragrant makes the summer version genuinely outstanding. This is also the season when focaccia appears most frequently as sandwich bread for outdoor meals and picnics — it holds up in a bag for hours without going soggy, travels flat without breaking, and tastes as good at room temperature as it does fresh from the oven. From October through February, roasted garlic, caramelised onion, and gorgonzola toppings earn their place — richer, more warming, and appropriate for the cold-weather appetite for heavier, more indulgent bread. The focaccia pizza variation is a natural winter project — an indoor baking afternoon that produces dinner and makes the kitchen smell excellent. Spring, March through May, is when za’atar, lemon, and herb-forward focaccia toppings feel most seasonally right — lighter, more aromatic, and suited to the season’s instinct toward fresh flavours after the heaviness of winter.
Conclusion
Focaccia bread recipes reward every level of baker from first-time bread makers to experienced home bakers because the method is forgiving, the results are consistently excellent, and the room for personalisation through toppings and variations is genuinely unlimited. Get the olive oil generous in the pan, make the dimples deep and confident, use flaky salt rather than fine, and drizzle extra oil the moment the bread comes out of the oven. Those four things done correctly produce a focaccia that earns a standing ovation from anyone who tastes it — golden, crispy-based, pillowy-crumbed, and deeply flavoured in a way that no store-bought bread approaches. Try the overnight cold proof, work through the topping variations, and find the version that becomes your house focaccia. Once you have it, you’ll find reasons to make it every week.
FAQs
Q: Why is my focaccia dense instead of light and airy? Dense focaccia is almost always caused by one of three things — insufficient proofing time, dough that was too cold when it went into the oven, or flour that was measured incorrectly. The dough needs to be genuinely puffy and filled with gas bubbles before the dimples go in — pressing under-proofed focaccia produces a flat, dense bread that never recovers its open crumb in the oven. Ensure the first proof is complete with the dough doubled in size, allow the full 30–45 minute pan proof, and measure flour using the spoon-and-level method rather than scooping. If the dough was cold-proofed overnight, give it 30–45 minutes at room temperature in the pan before dimpling — cold dough hasn’t finished proofing even if it looks big.
Q: How much olive oil is too much in a focaccia recipe? There is no such thing as too much olive oil in focaccia — the bread’s entire identity is built around generous olive oil at every stage. The pan should have a visible pool of oil before the dough goes in. The surface should look almost excessively oiled before the dimples go in. The finished baked focaccia should be drizzled with more oil immediately out of the oven. If your focaccia tastes flat, oily without flavour, or lacks the characteristic richness of the real thing, the answer is almost always better quality olive oil rather than less of it. Use the most flavourful extra virgin olive oil you have — the bread has nowhere to hide and the olive oil is not a background ingredient.
Q: Can I make focaccia without an overnight proof? Yes — a room-temperature proof of 60–90 minutes until the dough has doubled produces perfectly good focaccia without the overnight step. The overnight cold proof builds significantly more flavour through slow fermentation and is the recommended method whenever time allows — but same-day focaccia made with a room-temperature proof is still outstanding bread. To maximise flavour in a same-day proof, add 1 tablespoon of plain Greek yogurt to the dough when mixing — the lactic acid in the yogurt contributes a subtle tang that approximates some of the complexity developed during a longer fermentation. Same-day focaccia should be eaten the day it’s baked — it stales faster than overnight-proofed focaccia because the shorter fermentation produces fewer flavour-preserving organic acids in the crumb.