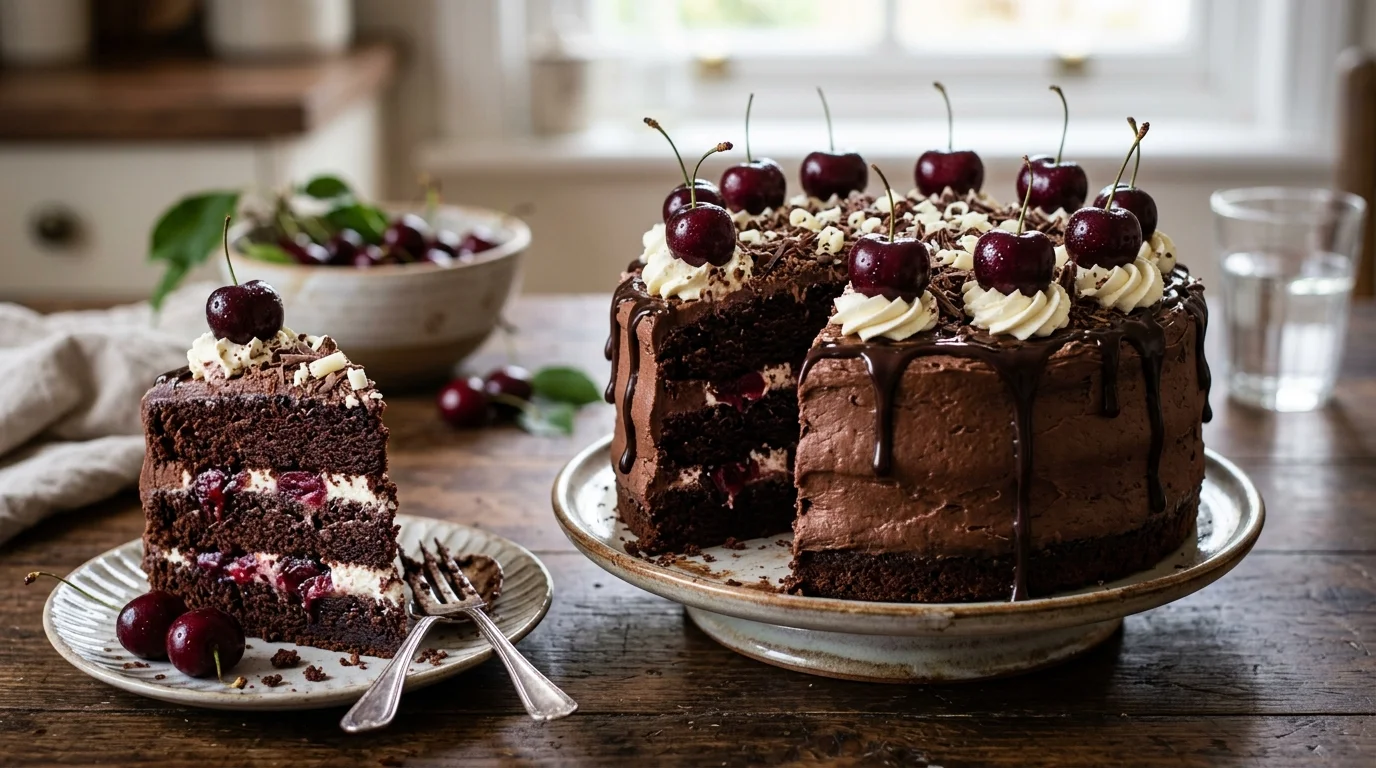
Chocolate Cherry Cake Rich, Decadent & Ready in 1 Hour
A chocolate cherry cake is the showstopper dessert that delivers on every promise — deeply chocolatey, layered with sweet-tart cherries, and finished with a cloud of whipped cream that makes every slice look genuinely impressive. The combination of bitter chocolate and bright cherry is one of the most naturally perfect flavour pairings in baking. It works as a birthday centrepiece, a dinner party dessert, or a weekend bake worth the effort. No complicated steps — just pure chocolate cherry cake satisfaction, rich and ready in 1 hour.
Ingredients
For the Chocolate Cake Layers:
- 2 cups (240g) all-purpose flour
- ¾ cup (75g) unsweetened cocoa powder [Dutch-process for the deepest colour and flavour]
- 2 cups (400g) granulated sugar
- 2 tsp baking soda
- 1 tsp baking powder
- 1 tsp fine salt
- 2 large eggs, room temperature
- 1 cup (240ml) buttermilk [or whole milk + 1 tbsp white vinegar, rested 5 minutes]
- 1 cup (240ml) strong brewed coffee, cooled [deepens chocolate flavour without tasting of coffee]
- ½ cup (120ml) vegetable oil
- 2 tsp pure vanilla extract
For the Cherry Filling:
- 2 cups pitted cherries [fresh, frozen and thawed, or canned and drained]
- 3 tbsp granulated sugar
- 1 tbsp cornstarch
- 1 tbsp lemon juice
- 2 tbsp kirsch or cherry liqueur [optional — traditional in Black Forest cake]
For the Whipped Cream Frosting:
- 2 cups (480ml) heavy whipping cream [very cold]
- 3 tbsp powdered sugar
- 1 tsp pure vanilla extract
For Decoration:
- Fresh cherries with stems, for topping
- Dark chocolate shavings or curls [made with a vegetable peeler on a chocolate bar]
- Extra cocoa powder, for dusting [optional]
Step-by-Step Instructions
Step 1: Gather and Prep Your Ingredients
Pull every ingredient out at least 30 minutes before baking and bring eggs and buttermilk to room temperature. Brew the coffee and allow it to cool completely — hot liquid added to the batter scrambles the eggs. Grease two 9-inch round cake pans and line the bases with parchment paper circles. Measure every dry ingredient into a bowl before mixing begins. Room-temperature ingredients produce a smoother, more evenly mixed batter with better rise.
Pro Tip: Parchment-lined pans are non-negotiable — a chocolate cherry cake that sticks and tears on removal cannot be recovered.
Step 2: Make the Chocolate Cake Batter
In a large bowl, whisk together the flour, cocoa powder, sugar, baking soda, baking powder, and salt. In a separate jug, whisk the eggs, buttermilk, cooled coffee, oil, and vanilla extract until smooth. Pour the wet ingredients into the dry ingredients and whisk until just combined — stop the moment no dry flour remains visible. The batter will be thinner than standard cake batter — this is correct and produces a moist, deeply chocolatey crumb.
Pro Tip: Thin batter is correct — this recipe produces a moist crumb precisely because of the high liquid ratio.
Step 3: Bake the Cake Layers
Divide the batter evenly between the two prepared pans — use a kitchen scale for uniform layers. Bake at 350°F (175°C) for 32–36 minutes until a toothpick inserted in the centre comes out with moist crumbs but no wet batter. Do not open the oven before 30 minutes — cold air causes the centre to sink before it has set. Cool in the pans for 10 minutes before turning onto a wire rack to cool completely.
Pro Tip: Cool completely before frosting — even slightly warm cake melts whipped cream immediately and irreversibly.
📖 Read More: Banana Bread Recipe
Step 4: Make the Cherry Filling
Combine the cherries, sugar, cornstarch, and lemon juice in a small saucepan over medium heat. Stir continuously and cook for 5–6 minutes until the mixture thickens, the cherries release their juices, and the cornstarch turns the liquid from cloudy to glossy and clear. Remove from heat and stir in the kirsch if using. Allow to cool completely before assembling — a warm cherry filling melts the whipped cream and makes the cake slide apart during layering.
Pro Tip: Cool the cherry filling completely — even warm filling collapses whipped cream frosting on contact.
Step 5: Make the Whipped Cream Frosting
Chill the mixing bowl and beaters in the freezer for 10 minutes before whipping — cold equipment makes the cream whip faster and hold its structure longer. Pour the cold heavy cream into the chilled bowl. Beat on medium-high speed, adding the powdered sugar and vanilla after 1 minute of whipping. Beat until stiff peaks form — the cream holds its shape and doesn’t move when the bowl is tilted. Use immediately or refrigerate for up to 1 hour.
Pro Tip: Cold bowl, cold cream, cold beaters — all three cold guarantees stable, fluffy whipped cream every time.
Step 6: Assemble, Decorate, and Serve
Place one cake layer on a serving plate. Spread a generous layer of whipped cream across the top. Spoon the cooled cherry filling across the cream, leaving a 1-inch border so the filling doesn’t spill over the edges when the second layer goes on. Place the second cake layer on top and press down gently. Frost the top and sides with the remaining whipped cream. Decorate with fresh cherries, chocolate shavings, and a dusting of cocoa. Refrigerate for 30 minutes before slicing.
Pro Tip: Refrigerate assembled cake for 30 minutes before cutting — the cream firms up and slices cut cleanly without collapsing.
Cook Time
Total Time: 1 hour 30 minutes | Prep: 20 minutes | Bake: 35 minutes | Cool: 30 minutes | Assemble: 15 minutes | Chill: 30 minutes Two cake pans, one saucepan — chocolate cherry cake ready to slice in 1 hour 30 minutes.
Servings
Serves 10–12 slices from a standard two-layer 9-inch round cake.
Nutritional Information (approx. per serving — based on 12 slices, with whipped cream and cherry filling)
| Nutrient | Amount |
|---|---|
| Calories | 480 kcal |
| Fat | 24g |
| Saturated Fat | 12g |
| Carbohydrates | 62g |
| Protein | 6g |
| Sugar | 42g |
| Fiber | 3g |
| Sodium | 320mg |
| Vitamin C | 4mg |
| Potassium | 220mg |
| Calcium | 80mg |
Values are approximate and will vary based on ingredients used.
Storage Instructions
A chocolate cherry cake with whipped cream frosting must be refrigerated — never stored at room temperature. The whipped cream will collapse within 2 hours without refrigeration. Store covered loosely with plastic wrap or in a cake dome in the refrigerator for up to 3 days. The chocolate layers actually improve after 24 hours in the refrigerator as moisture distributes through the crumb. Bring individual slices to room temperature for 15 minutes before eating for the best flavour.
For freezing, the unfrosted chocolate cake layers freeze very well for up to 3 months. Wrap each cooled layer tightly in two layers of plastic wrap then foil. Thaw overnight at room temperature before assembling. The cherry filling freezes adequately for up to 2 months in a sealed container. The whipped cream frosting cannot be frozen — make it fresh on the day of assembly. Never freeze the fully assembled cake.
Suggestions
- Black Forest Cake Version: Soak each cake layer with kirsch syrup — combine 3 tablespoons of kirsch with 3 tablespoons of sugar syrup and brush liberally over the warm cake layers. This is the classic German Black Forest preparation — bold, slightly boozy, and deeply traditional alongside the cherry and cream combination.
- Chocolate Ganache Version: Replace the whipped cream frosting with a dark chocolate ganache — heat 200ml of heavy cream until just simmering, pour over 200g of chopped dark chocolate, and stir until smooth. Cool until spreadable. The ganache version is richer, more intense, and significantly more stable at room temperature than whipped cream.
- Mini Chocolate Cherry Cakes: Divide the batter among a 12-cavity muffin tin lined with paper cups — bake for 18–22 minutes at 350°F. Top each with a spoonful of whipped cream, a teaspoon of cherry filling, and a fresh cherry. The individual format is ideal for parties and gatherings where slicing a whole cake is impractical.
- Dairy-Free Chocolate Cherry Cake: Replace the buttermilk with oat milk mixed with 1 tablespoon of apple cider vinegar. Replace the vegetable oil with coconut oil. Use full-fat coconut cream in place of heavy whipping cream — whipped cold, it produces a stable, dairy-free frosting. The chocolate cake layers require no other adjustment.
- Chocolate Cherry Cupcakes: Fill each cupcake case two-thirds full with the batter and bake at 375°F for 18–20 minutes. Core a small hole in the top of each cooled cupcake using an apple corer or a teaspoon. Fill with cherry filling. Pipe whipped cream over the top and garnish with a fresh cherry. The cupcake format makes the most of every component in individual, portable portions.
- Gluten-Free Version: Replace all-purpose flour with a 1:1 gluten-free baking flour blend containing xanthan gum. Add 1 tablespoon of extra oil to compensate for the slightly drier texture that gluten-free flour produces. Bake for 3–5 extra minutes and test carefully — gluten-free cakes can appear done on the surface while the centre is still underbaked.
- Boozy Adult Version: Soak the cake layers in cherry syrup mixed with kirsch. Add 1 tablespoon of kirsch directly into the cherry filling. Fold a tablespoon of kirsch into the whipped cream before whipping to soft peaks. The result is a properly boozy, adult celebration cake — the alcohol cuts the sweetness and makes every layer more complex.
- Lighter Chocolate Cherry Cake: Replace ½ cup of sugar with unsweetened applesauce in the batter to reduce the calorie density. Use low-fat Greek yogurt in place of heavy whipping cream for the frosting — stir in powdered sugar and vanilla directly without whipping. The result is tangier and less fluffy than standard whipped cream but significantly lighter and still delicious.
Seasonal Relevance
Chocolate cherry cake is at its most spectacular from June through August when fresh cherries are at peak ripeness — deeply red, sweet-tart, and far superior to any canned or frozen alternative for both the filling and the decoration. This is the window to make the cake at full strength and let the fruit speak for itself. From September through May, frozen cherries thawed completely and drained produce excellent filling — their flavour concentrates during freezing and they perform nearly identically to fresh in a cooked filling. Canned sour cherries work well too — drain thoroughly and reduce the sugar in the filling by half to compensate for the already-sweetened syrup.
Conclusion
A chocolate cherry cake earns its reputation as one of the most satisfying baking projects available because every element — the moist chocolate layers, the jammy cherry filling, the cloud of whipped cream — genuinely works together rather than just coexisting. Cool every component before assembling, whip the cream cold, and refrigerate before slicing. Those three things produce a chocolate cherry cake that slices cleanly and tastes as impressive as it looks. Try the ganache version for richness, the Black Forest build for tradition, or the cupcake format for a party. Make it once and it earns a permanent place in the celebration baking rotation.
FAQs
Q: Why did my chocolate cake sink in the centre? Sinking centres come from one of three causes — opening the oven too early before the structure has set, underbaking, or too much leavening. Never open the oven before 30 minutes. Check doneness with a toothpick — moist crumbs are correct, wet batter means more time is needed. Measure baking soda and baking powder precisely — excess leavening causes the cake to rise rapidly then collapse before the crumb structure has set around it.
Q: Can I use canned cherries instead of fresh? Yes — canned sour cherries work very well in the filling and are the traditional choice in authentic Black Forest cake. Drain them thoroughly and reduce the sugar in the filling recipe by half since canned cherries are already preserved in sweetened syrup. Fresh cherries produce the most vibrant colour and flavour. Frozen cherries thawed and drained perform nearly identically to fresh in the cooked filling — a reliable year-round alternative.
Q: How do I stop my whipped cream frosting from weeping or collapsing? Weeping whipped cream comes from under-whipping, warm cream, or warm equipment. Beat to stiff peaks — the cream must hold its shape completely when the bowl is tilted without sliding. Use cream straight from the refrigerator and chill the bowl and beaters in the freezer for 10 minutes before whipping. Adding 1 tablespoon of cornstarch to the cream alongside the powdered sugar significantly stabilises the whipped cream and extends the time it holds its structure by several hours.