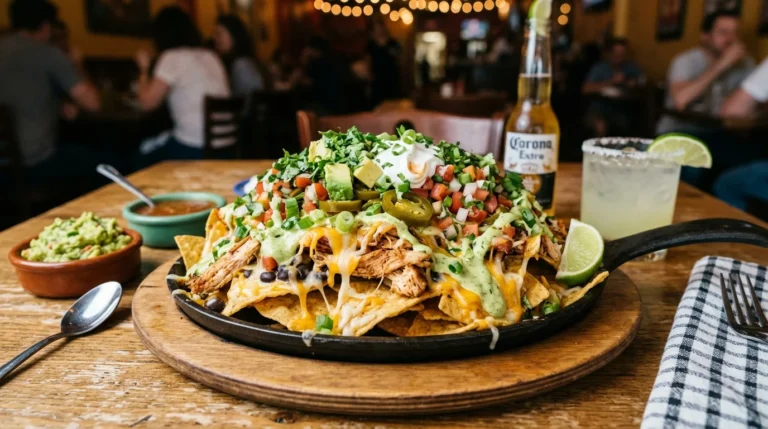
Loaded Nachos Crispy, Cheesy & Ready in 25 Minutes
Loaded nachos are the dish that earns a room’s attention the moment they land on the table — and the one that disappears faster than anything else at every gathering they appear at. Layers of thick, crispy tortilla chips buried under seasoned ground beef, melted cheese, black beans, jalapeños, pico de gallo, guacamole, sour cream, and whatever else belongs on the most loaded nacho tray you’ve ever built.
This isn’t a simple snack — it’s a complete, satisfying, genuinely impressive dish that takes 25 minutes and one sheet pan to produce. Whether you’re building for game day, a Friday night at home, a party spread, or a weeknight dinner that requires zero convincing to finish, loaded nachos deliver every single time. No complicated steps — just pure loaded nacho satisfaction, hot and crispy straight from the oven.
Ingredients
For the Seasoned Ground Beef:
- 450g (1 lb) lean ground beef [80/20 for flavour — drain excess fat]
- 1 medium yellow onion, finely diced
- 3 cloves garlic, minced
- 1 tsp cumin
- 1 tsp chili powder
- 1 tsp smoked paprika
- ½ tsp garlic powder
- ½ tsp onion powder
- ½ tsp fine salt
- ¼ tsp black pepper
- ¼ tsp cayenne pepper [optional]
- 2 tbsp tomato paste
- 3 tbsp water or beef broth
For the Nacho Base:
- 250g (9 oz) thick-cut restaurant-style tortilla chips [never thin — they collapse under toppings]
- 2 cups shredded Monterey Jack cheese
- 1 cup shredded sharp cheddar cheese
For the Baked Toppings:
- 1 can (15 oz) black beans, drained and rinsed
- ½ cup pickled jalapeños [or fresh, sliced]
- ½ cup corn kernels, fresh or frozen and thawed
- ¼ cup red onion, finely diced
- ½ cup cherry tomatoes, quartered
For the Cold Toppings — Added After Baking:
- ½ cup sour cream [or plain Greek yogurt]
- 1 ripe avocado, diced [or ½ cup guacamole]
- ½ cup fresh pico de gallo [store-bought or homemade]
- ¼ cup fresh cilantro, roughly chopped
- 2 tbsp pickled jalapeños, extra
- Hot sauce, for serving
- 2 limes, cut into wedges for serving
Optional Add-Ins:
- ¼ cup sliced black olives (optional)
- 2 tbsp chipotle mayo, drizzled (optional)
- ½ cup shredded pepper jack — for extra heat (optional)
- Crumbled cotija cheese, for finishing (optional)
- 4 strips crispy bacon, crumbled (optional)
Step-by-Step Instructions
Step 1: Gather and Prep Your Ingredients
Before the skillet goes on, have everything ready at the counter. Dice the onion, mince the garlic, drain the beans, thaw and dry the corn, quarter the tomatoes, and measure the cheese into a combined bowl. Have the cold toppings prepped and ready in individual bowls so they go on the moment the tray comes out of the oven — cold sour cream against bubbling hot cheese is one of the best contrasts in food and it only exists when the cold toppings go on immediately. The loaded nachos build moves fast once the beef is seasoned and the oven is hot — staging every component before the first ingredient hits the pan is what keeps the whole cook clean and efficient.
Pro Tip: Set the cold toppings — sour cream, guacamole or avocado, pico de gallo, cilantro, extra jalapeños — on a serving board or small individual bowls beside the sheet pan before the nachos go into the oven. When the tray comes out, you go straight from oven to topping without any searching, measuring, or scrambling. The difference between nachos that are perfectly topped and nachos that sit on the counter while you locate the sour cream is the difference between crispy chips and soggy ones.
Step 2: Cook and Season the Ground Beef
Heat a large skillet over medium-high heat. Add the ground beef and break it apart immediately — spread it across the full surface of the pan and leave it undisturbed for 2 minutes so the contact surface can brown before being broken up. Cook for 6–8 minutes total, breaking into small pieces, until no pink remains and the meat has some golden-brown colour at the edges. Add the diced onion for the final 3 minutes of cooking and stir to soften. Drain the excess fat, leaving approximately 1 tablespoon in the pan. Add the garlic and stir for 60 seconds, then add the tomato paste and cook for 60 seconds more — letting it caramelise against the hot pan before any liquid touches it. Add the spice blend and broth, stir to coat, and simmer for 2 minutes until the liquid is mostly absorbed and the beef looks glistening and bold.
Pro Tip: The tomato paste caramelisation step is the most impactful single minute in the entire loaded nachos recipe. Tomato paste cooked directly against a hot pan before liquid is added develops a deep, concentrated savouriness that transforms the ground beef seasoning from good to genuinely exceptional. One minute, undisturbed, stirring only once — that’s all it takes to build a flavour foundation that carries through the entire nacho build.
Step 3: Build the First Layer
Preheat the oven to 400°F (200°C) and line a large rimmed baking sheet with aluminium foil — shiny side up for even heat reflection. Spread half the tortilla chips in a single, even layer across the entire sheet — every chip should lie flat with minimal stacking. Distribute half the seasoned beef across the chips, covering as much surface area as possible. Scatter half the black beans, corn, red onion, tomatoes, and jalapeños across the beef layer. Finish the first layer with half the combined shredded cheese spread evenly across every topping — the cheese is the structural glue that bonds the first layer to the second and keeps everything in place during baking.
Pro Tip: Never skip the two-layer method for loaded nachos — a single layer produces uneven coverage where centre chips are buried and edge chips are bare. Two even layers mean every chip in the batch gets beef, cheese, and toppings regardless of where it sits on the tray. The two-layer method is what separates truly loaded nachos from just nachos with toppings piled in the middle.
📖 Read More: Chicken Nachos
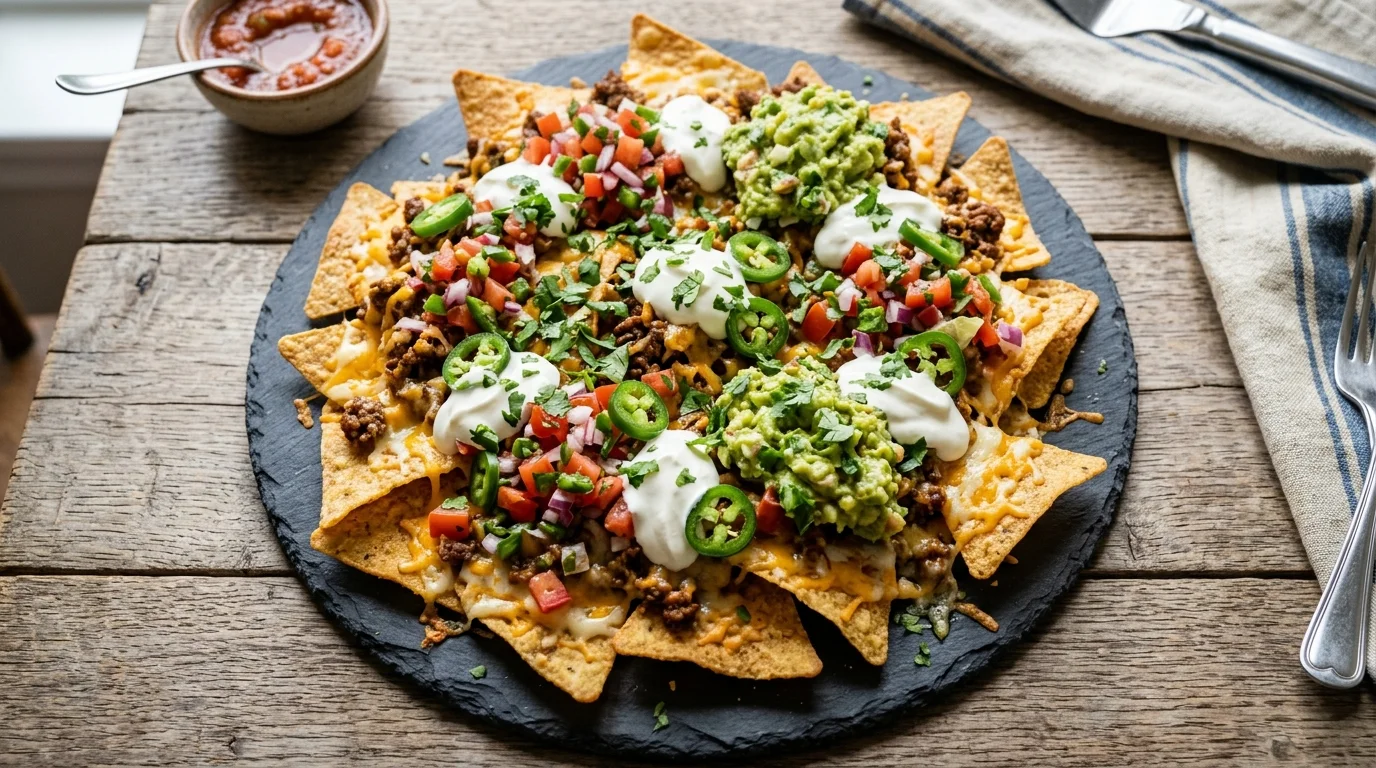
Step 4: Build the Second Layer and Final Cheese Topping
Add the remaining tortilla chips directly on top of the first layer — spread them to cover evenly without pressing the first layer down. Distribute the remaining seasoned beef, beans, corn, red onion, tomatoes, and jalapeños across the second chip layer. Finish with the remaining cheese scattered generously across the entire surface — this is the most visible layer and it should be generous enough that every chip is partially covered. Press any toppings that have gathered in peaks gently flat so the cheese has maximum contact with everything beneath it. A flat, evenly distributed cheese layer melts uniformly and produces a golden, visually even top rather than thick clumps in some spots and bare chips in others.
Pro Tip: Add any optional extras — bacon crumbles, cotija cheese, extra jalapeños — at this stage on the very top layer rather than buried between the layers. Toppings added on top get caramelised and slightly crisped during the final bake while buried toppings stay soft and steamed. The contrast between caramelised surface toppings and the warm, juicy toppings inside the layers is one of the defining textural characteristics of a properly built loaded nacho.
Step 5: Bake Until Bubbling and Golden
Bake the assembled loaded nachos uncovered at 400°F for 8–10 minutes — check at the 7-minute mark because the window between perfectly melted and slightly over-baked chips is narrow. The cheese should be fully melted and visibly bubbling at the edges, with golden-brown patches developing across the surface. The chip edges should be golden and look slightly darkened — not burnt, but noticeably more golden than before baking. For a particularly golden, bubbling cheese finish, switch to broil for the final 90 seconds and watch without looking away. Remove the moment the cheese is at the right colour — carry-over heat continues cooking after the tray leaves the oven and the cheese will firm up within 60 seconds of being removed.
Pro Tip: Bake on the middle rack of the oven rather than the bottom. The bottom rack concentrates heat on the chips and can burn the base layer before the cheese on top has melted. The middle rack allows even heat circulation from both above and below — the chips crisp from the bottom heat and the cheese melts from the top heat simultaneously, which produces the most evenly cooked loaded nachos across the entire tray.
Step 6: Add Cold Toppings and Serve Immediately
The moment the loaded nachos come out of the oven, add every cold topping immediately while the cheese is still bubbling. Spoon the sour cream in dollops across the surface — place each spoonful into a gap between chips rather than spreading, which preserves the creamy texture and visual appeal. Add the diced avocado or guacamole in clusters, spoon the pico de gallo across the tray, scatter the cilantro generously, and distribute the extra jalapeños. Squeeze a lime wedge across the entire tray just before serving — the acid hit of fresh lime over loaded nachos is the finishing step that brings every flavour into sharp focus and makes the whole build taste complete. Serve directly from the sheet pan with hot sauce on the side and extra lime wedges for each person.
Pro Tip: Slice through the nacho tray with a pair of kitchen scissors or a sharp knife before serving — cutting through the cheese layer into portion-sized sections makes it significantly easier for people to serve themselves without dragging toppings across the tray and lifting adjacent chips. One set of cuts before the tray hits the table makes the serving experience considerably more controlled and less messy for everyone around it.
Cook Time
Total Time: 25 minutes | Prep: 10 minutes | Cook Beef: 10 minutes | Build and Bake: 10 minutes One skillet, one sheet pan — loaded nachos on the table in 25 minutes.
Servings
Serves 4 as a main course or 6–8 as a party appetiser.
Nutritional Information (approx. per serving — based on 4 main course servings, with all cold toppings)
| Nutrient | Amount |
|---|---|
| Calories | 720 kcal |
| Fat | 40g |
| Saturated Fat | 16g |
| Carbohydrates | 56g |
| Protein | 38g |
| Sugar | 5g |
| Fiber | 9g |
| Sodium | 980mg |
| Vitamin C | 18mg |
| Potassium | 720mg |
| Calcium | 480mg |
Values are approximate and will vary based on chip brand, cheese quantity, and toppings used.
Storage Instructions
Loaded nachos are built to be consumed immediately — fully assembled and baked nachos do not store or reheat effectively as a completed dish. The chips absorb moisture from the toppings and the sauce within 20–30 minutes of baking and become limp and unpleasant with no practical method of revival. The most effective approach is to store every component separately so the nachos can be built fresh to order throughout the week. The seasoned ground beef keeps in an airtight container in the refrigerator for up to 4 days and reheats in a skillet with a splash of broth in 3 minutes — it works equally well in tacos, rice bowls, burritos, and quesadillas alongside the nacho build. The combined shredded cheese blend keeps refrigerated in a sealed bag for up to 1 week. Drained black beans, corn, and diced red onion keep in separate covered containers for up to 3 days. Pico de gallo keeps for up to 2 days — it releases water as it sits and should be lightly drained before serving after the first day. Guacamole or diced avocado keeps for up to 24 hours with lime juice and plastic wrap pressed directly against the surface. For a party, the most practical approach is to batch-build and bake nachos in two fresh rounds rather than one large tray assembled early — two 10-minute bakes timed 15 minutes apart produce consistently better results than one tray that softens while guests graze over 45 minutes. Nachos are always better fresh from the oven than sitting at room temperature, and the batching method ensures every serving is at peak quality.
Suggestions
- Steak Loaded Nachos: Replace the ground beef with thinly sliced and quickly seared skirt steak or flank steak seasoned with the same spice blend. Cook the steak over very high heat for 2–3 minutes per side, rest for 5 minutes, and slice thinly against the grain before distributing across the nacho layers. Steak nachos are the most elevated version in the list — the distinct sliced beef against the melted cheese and fresh toppings reads as restaurant-quality rather than home cooking, and the texture difference between sliced steak and crumbled beef makes every bite more interesting.
- Pulled Pork Loaded Nachos: Use slow-cooked or store-bought pulled pork in place of ground beef — toss the pulled pork in a small amount of BBQ sauce and a pinch of smoked paprika before distributing across the layers. The rich, smoky, slightly sweet pulled pork against the sharp cheddar and pickled jalapeño is one of the best flavour combinations in the nacho world. Finish with a drizzle of extra BBQ sauce across the cold topping layer after baking.
- Queso Loaded Nachos: Replace the shredded cheese with a poured white queso — melt 200g of white American cheese with ¼ cup of whole milk and 1 tablespoon of pickled jalapeño brine until smooth and pourable. Pour the queso across each layer of chips and toppings rather than scattering shredded cheese. The queso coats everything uniformly — every chip, every bean, every piece of beef gets an even layer of molten cheese rather than the uneven coverage that shredded cheese produces in spots between toppings.
- Spicy Chipotle Loaded Nachos: Add 2 tablespoons of chipotle peppers in adobo sauce, finely minced, to the ground beef during the seasoning step. Replace half the pickled jalapeños with fresh sliced serrano peppers for a different, more floral heat. Drizzle chipotle mayo — chipotle peppers blended with mayonnaise — across the finished tray alongside the standard cold toppings. This is the hottest, most complex version of loaded nachos in the list — the smoky, slow heat of chipotle builds through each bite and lingers in the best way.
- Breakfast Loaded Nachos: Replace the seasoned beef with scrambled eggs cooked with diced onion, bell pepper, and crumbled breakfast sausage. Use the same chip and cheese base. Add the bean, corn, and jalapeño toppings and bake identically. Finish with pico de gallo, sour cream, sliced avocado, and a drizzle of hot sauce. Breakfast nachos use the same method as the dinner version — just a protein and time-of-day shift that makes them the most unexpected and crowd-pleasing weekend brunch option in the list.
- Vegetarian Loaded Nachos: Skip the ground beef and replace it with a seasoned black bean and sweet potato mixture — dice 1 medium sweet potato into small cubes, toss with olive oil, cumin, and smoked paprika, and roast at 400°F for 20 minutes until caramelised. Combine with the standard black beans and distribute across the nacho layers. The sweet potato adds a natural sweetness and substance that ground beef provides in the meat version — the result is a fully satisfying vegetarian loaded nacho that doesn’t feel like a compromise version of the original.
- Game Day Loaded Nacho Bar: Build and bake the loaded nachos with only the beef, cheese, beans, corn, and jalapeños — no other toppings baked in. Set out a spread of 8–10 topping options in individual small bowls: sour cream, guacamole, pico de gallo, chipotle mayo, hot sauces, sliced jalapeños, diced red onion, cilantro, cotija cheese, and lime wedges. Each person builds their own plate from the tray. This format eliminates every dietary preference problem at a gathering — the customisable nacho bar is the single most crowd-pleasing party format in this list because everyone gets exactly the loaded nacho they want.
- Weight-Loss Friendly Loaded Nachos: Use baked tortilla chips to reduce the base fat content. Reduce the cheese to 1½ cups total across both layers. Use 90/10 lean ground beef and skip the tablespoon of reserved cooking fat. Replace sour cream with plain low-fat Greek yogurt, which tastes nearly identical on hot nachos. Load generously with beans, corn, tomatoes, and jalapeños — the high-volume toppings add fibre, flavour, and satiety without meaningful calories. Each serving comes in under 520 calories on this build while delivering over 32g of protein and the full loaded nacho experience.
Seasonal Relevance
Loaded nachos are one of the most season-flexible dishes in the food canon — they have a moment at every point in the year without ever feeling out of place. From September through January, game day culture drives nacho consumption to its annual peak. Football season is the most natural environment for loaded nachos — the shareable tray, the hands-on eating format, and the bold flavours all suit the social energy of a watching party in a way that very few other dishes do. The chipotle and steak versions suit this season best — richer, bolder, more indulgent than the lighter builds. From May through August, loaded nachos appear at backyard cookouts and poolside gatherings where minimal utensils and maximum flavour is the priority. Summer is when fresh corn from the cob, peak-season tomatoes, and ripe avocados make every nacho topping taste better than it does in any other month — the fresh cold toppings are where the seasonal quality improvement is most dramatic and most worth seeking out. Spring, March through May, is when the nacho bar format makes the most sense — entertaining season reawakens, gatherings become more frequent, and the customisable build-your-own format suits the variable dietary preferences of early-season social events better than a preset, plated dish.
Conclusion
Loaded nachos earn their place as one of the most reliably crowd-pleasing dishes you can put on a table because they combine bold flavour, impressive presentation, and a completely interactive eating format in one 25-minute sheet pan build. The two-layer method, the bold seasoned beef, the cheese blend, the cold toppings added immediately from the oven — all of it contributes to a nacho that is genuinely better than anything arriving in a basket from a restaurant kitchen. Make the classic version first and understand the layering and timing. Then work through the variations — the steak build, the queso version, the pulled pork, the vegetarian sweet potato — and find the loaded nachos that your table requests by name. Once you’ve made them well, you won’t need a reason to make them again — the occasion creates itself.
FAQs
Q: How do I keep the bottom layer of chips from going soggy in loaded nachos? Soggy chips in loaded nachos come from three sources — wet toppings placed on chips before baking, chips that are too thin to hold up under the weight and moisture of the toppings, and nachos that sit too long after baking before being eaten. Drain all canned ingredients completely and pat the corn dry before using. Use thick-cut restaurant-style chips — they have the structural density to hold toppings without absorbing moisture quickly. Never add salsa, pico de gallo, or sour cream before baking — these go on immediately after the tray comes out. And serve within 5 minutes of adding the cold toppings — every additional minute on the counter softens the base chips further.
Q: How much cheese is the right amount for loaded nachos? Three cups of shredded cheese for a standard 9×13-inch tray of loaded nachos is the correct quantity for proper coverage across two layers. Less than 2 cups produces patchy, insufficient melt with bare chips visible throughout the finished tray. More than 3½ cups produces an excessively thick, gummy cheese layer that dominates every other flavour and makes the nachos feel heavy. Within the 2½–3 cup range, the cheese melts into a cohesive layer that binds the toppings to the chips, produces golden patches on top, and doesn’t overwhelm the beef, beans, and other components beneath it. Always freshly shred cheese from a block rather than using pre-shredded bags — the anti-caking agents in pre-shredded cheese prevent proper melting and produce a grainy result.
Q: Can I use ground turkey instead of ground beef in loaded nachos? Yes — ground turkey works as a direct substitute with two important adjustments. Add 1 tablespoon of olive oil when cooking the turkey since it has significantly less fat than ground beef and will cook dry and stick to the pan without added fat. Increase the Worcestershire sauce to 2 teaspoons and add 1 teaspoon of soy sauce to the seasoning — both are umami amplifiers that add the savoury depth that ground beef fat contributes naturally. The finished nachos made with seasoned ground turkey are lighter in fat and calories than the beef version and just as satisfying with these two adjustments in place.