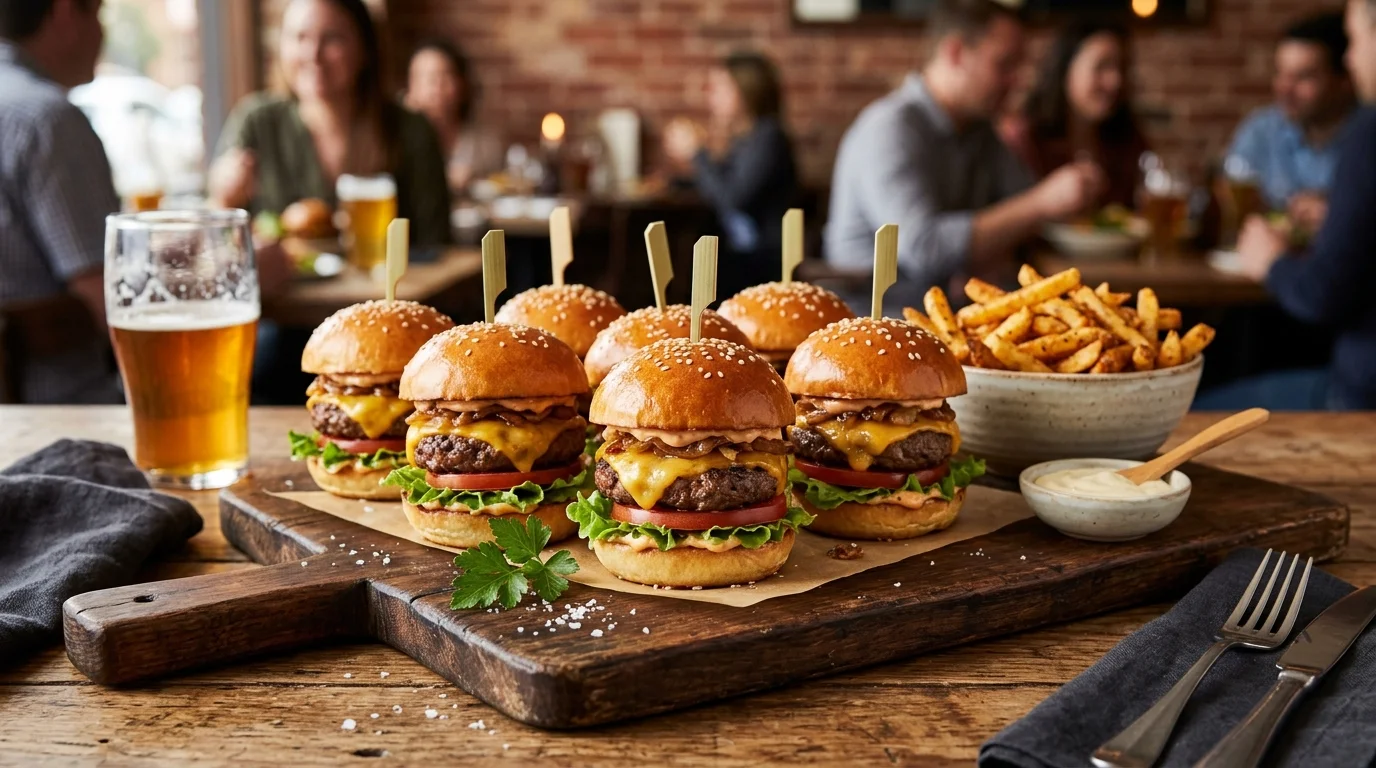
Cheeseburger Sliders Juicy, Melty & Ready in 30 Minutes
Cheeseburger sliders are the kind of food that makes every occasion better — game day, birthday parties, weeknight dinners, backyard cookouts, or any situation where you need to feed a group of people something that disappears off the tray before you’ve even set it down.
They pack every single element of a full-size cheeseburger into a two-bite format that’s easy to handle, easy to serve, and genuinely hard to stop eating. Seasoned beef, melted cheese, soft toasted buns, and a sauce that ties everything together — all built in one pan and finished in one oven. No complicated steps — just pure cheeseburger slider satisfaction, hot from the oven and ready to serve in 30 minutes.
Ingredients
For the Beef Patty Layer:
- 700g (1.5 lb) 80/20 ground beef
- 1 tsp fine salt
- 1 tsp black pepper, freshly ground
- 1 tsp garlic powder
- 1 tsp onion powder
- ½ tsp smoked paprika
- 1 tbsp Worcestershire sauce
- 1 tbsp olive oil
- 1 medium yellow onion, very finely diced
For the Cheese Layer:
- 8 slices American cheese [or sharp cheddar — American melts more evenly]
- 4 slices sharp cheddar cheese [optional, for a two-cheese layer]
For the Slider Sauce:
- ⅓ cup mayonnaise
- 2 tbsp ketchup
- 1 tbsp yellow mustard
- 1 tbsp sweet pickle relish
- 1 tsp white wine vinegar
- ½ tsp garlic powder
- ½ tsp smoked paprika
- Pinch of sugar
- Salt and black pepper, to taste
For the Build:
- 12 Hawaiian rolls or brioche slider buns, kept intact as a sheet
- 3 tbsp unsalted butter, melted
- 1 tsp sesame seeds [optional, for topping]
- 1 tsp garlic powder [for the butter wash]
- 1 tsp Worcestershire sauce [for the butter wash]
- ½ tsp dried parsley or Italian seasoning [for the butter wash]
Optional Toppings:
- 12 dill pickle slices (optional)
- 1 cup shredded iceberg lettuce (optional)
- 2 medium tomatoes, thinly sliced (optional)
- Sliced jalapeños (optional)
- Crispy bacon strips, halved (optional)
Step-by-Step Instructions
Step 1: Gather and Prep Your Ingredients
Pull everything out and get organised before a single burner goes on. Finely dice the onion — smaller than you think you need, because large onion pieces create air pockets in the beef layer that cause it to fall apart when you slice the sliders. Measure your spices, mix your slider sauce, melt the butter, and line up your cheese slices so the moment the beef comes off the stovetop everything moves fast and efficiently. Cheeseburger sliders are a high-momentum cook — having everything ready before you start is what keeps the process clean and the result consistent.
Pro Tip: Keep the Hawaiian rolls connected as a single sheet rather than separating them before slicing. You’ll slice the entire sheet horizontally in one cut, which gives you a perfectly even top and bottom layer that holds the beef and cheese uniformly across every slider without any gaps or uneven thickness.
Step 2: Make the Slider Sauce
In a small bowl, stir together the mayonnaise, ketchup, yellow mustard, sweet pickle relish, white wine vinegar, garlic powder, and smoked paprika until completely smooth. Taste the sauce — it should be tangy, slightly sweet, a little smoky, and rich enough to hold its own against seasoned beef and melted cheese. Add a pinch of sugar to round out any sharp edges, season with salt and pepper, and refrigerate until needed. This sauce takes under two minutes to make and can be prepared up to 5 days in advance — it gets noticeably better after sitting overnight as the flavours settle into each other.
Pro Tip: Double the sauce batch every time you make it. It works as a dipping sauce for the sliders on the side, a spread for sandwiches throughout the week, and a burger sauce for full-size burgers whenever you need one. It keeps in a sealed jar in the refrigerator for up to 5 days.
Step 3: Cook the Beef and Onion Layer
Heat 1 tablespoon of olive oil in a large skillet over medium-high heat. Add the finely diced onion and cook for 3–4 minutes until softened and just beginning to turn golden at the edges. Add the ground beef to the pan and break it apart with a wooden spoon or spatula, spreading it across the full surface of the pan as evenly as possible. Add the salt, pepper, garlic powder, onion powder, smoked paprika, and Worcestershire sauce. Cook for 6–8 minutes, continuing to break up any large pieces, until no pink remains and the beef has developed some colour at the edges. Drain any excess fat from the pan — too much fat in the beef layer makes the bottom bun soggy and the sliders difficult to handle.
Pro Tip: Press the cooked beef into an even, flat layer in the pan using the back of a spatula once it’s fully cooked and drained. This uniform thickness is what allows you to transfer it cleanly onto the bun base and slice the finished sliders into neat individual portions without the filling shifting or spilling.
📖 Read More: hamburger meat recipes
Step 4: Assemble the Sliders in the Baking Dish
Preheat your oven to 350°F (175°C). Using a long serrated knife, slice the entire sheet of Hawaiian rolls horizontally through the middle — one cut, keeping both halves intact as connected sheets. Place the bottom half into a lightly greased 9×13-inch baking dish. Spread the slider sauce generously and evenly across the entire cut surface of the bottom bun sheet. Spoon the cooked beef and onion mixture over the sauce layer and spread it into an even, flat layer that reaches every corner and edge of the bun sheet. Layer the American cheese slices across the beef, overlapping slightly to ensure full coverage — no bare patches of beef without cheese on top. Add the optional cheddar layer on top of the American cheese if using. Place pickle slices across the cheese layer now if you’re including them inside the slider rather than as a topping.
Pro Tip: If your beef layer looks thicker in the centre than at the edges, press it down with a flat spatula before adding the cheese. An even beef layer means every slider in the pan has the same ratio of bun, sauce, beef, and cheese — the ones at the edges are just as good as the ones in the middle.
Step 5: Butter Wash and Bake
Place the top bun sheet over the cheese layer and press down gently to compact everything slightly. In a small bowl, combine the melted butter, garlic powder, Worcestershire sauce, and dried parsley. Brush this mixture generously across the entire top surface of the bun sheet using a pastry brush — get it into the crevices between each roll as well. Scatter sesame seeds across the top if using. Cover the baking dish tightly with aluminium foil and bake at 350°F for 15 minutes. Remove the foil and bake for a further 5 minutes until the tops are golden, the butter wash is caramelised, and the cheese is fully melted and visible at the edges.
Pro Tip: The foil-covered bake is essential for the first 15 minutes — it traps steam inside the dish that heats the beef through and melts the cheese without drying out the buns. Removing the foil for the final 5 minutes is what gives the tops their golden, slightly crispy finish that makes cheeseburger sliders look as good as they taste.
Step 6: Rest, Slice, and Serve
Remove the cheeseburger sliders from the oven and let them rest in the baking dish for 3–4 minutes before slicing — this brief resting time allows the cheese to set slightly so it doesn’t pour out the moment you cut. Using a sharp knife, slice down through the natural seams between each roll to separate the individual sliders. Add shredded lettuce and tomato slices now if using — fresh toppings go on after the oven, never before, or they wilt and water out. Arrange on a serving board or platter and serve immediately with extra slider sauce and pickle slices on the side. Cheeseburger sliders are at their absolute best the moment they come out of the oven while the buns are warm, buttery, and slightly toasted at the edges.
Pro Tip: Use the seam lines between the rolls as your cutting guide — a sharp chef’s knife pressed straight down along each seam produces clean individual sliders without dragging through the beef layer. A sawing motion tears the buns and shifts the filling. One straight downward press per cut is all you need.
Cook Time
Total Time: 30 minutes | Prep: 10 minutes | Stovetop: 12 minutes | Bake: 20 minutes One skillet, one baking dish — minimal cleanup, maximum output.
Servings
Makes 12 cheeseburger sliders — serves 4 to 6.
Nutritional Information (approx. per serving — 2 sliders)
| Nutrient | Amount |
|---|---|
| Calories | 520 kcal |
| Fat | 30g |
| Saturated Fat | 13g |
| Carbohydrates | 34g |
| Protein | 28g |
| Sugar | 9g |
| Fiber | 1g |
| Sodium | 860mg |
| Vitamin C | 4mg |
| Potassium | 380mg |
| Calcium | 220mg |
Values are approximate and will vary based on ingredients used.
Storage Instructions
Cheeseburger sliders store better than most people expect, which makes them a genuinely practical make-ahead option for parties and meal prep alike. Let the sliders cool completely before covering the baking dish tightly with foil or transferring portions to an airtight container. Refrigerate for up to 3 days. When reheating, cover the baking dish with foil and warm in a 325°F oven for 12–15 minutes until heated through — this method revives the buns without drying them out and gets the cheese melting again without overcooking the beef. Avoid microwaving if possible; it softens the buns unevenly and toughens the beef layer. For individual sliders, the microwave works in a pinch — wrap each one in a damp paper towel and heat in 30-second intervals until warmed through. For make-ahead preparation, assemble the sliders fully — beef layer, cheese, sauced buns — cover tightly with foil, and refrigerate unbaked for up to 24 hours before baking. Add 5 extra minutes to the covered bake time since the dish goes in cold. This is the most practical approach when feeding a crowd — all the prep happens the night before and the sliders go into the oven 25 minutes before guests arrive. Freezing assembled, baked sliders is possible but not recommended — the buns become soft and slightly gummy after thawing. Freeze the cooked, seasoned beef layer separately in an airtight container for up to 2 months, then thaw overnight, reheat in a skillet, and assemble fresh for the best result.
📖 Read More: cheeseburger soup
Suggestions
- Bacon Cheeseburger Sliders: Fry 8 strips of thin-cut bacon until crispy and lay them across the cheese layer before closing the top bun sheet. The bacon fat renders slightly during the oven bake and adds a smoky, salty richness that takes this version of cheeseburger sliders to a completely different level. Use sharp cheddar instead of American cheese here — the combination of bacon and sharp cheddar is one of the most reliable flavour pairings in the burger world.
- Mushroom and Swiss Sliders: Sauté 2 cups of sliced cremini mushrooms in butter with a splash of Worcestershire sauce until deeply caramelised and glossy — about 8 minutes over medium heat. Layer the mushrooms directly on top of the beef before adding Swiss cheese instead of American. Replace the standard slider sauce with a Dijon aioli on the bottom bun. This version of cheeseburger sliders is more complex and dinner-appropriate, and works particularly well at gatherings where you want to offer something beyond the classic build.
- Spicy Jalapeño Sliders: Stir 1 tablespoon of hot sauce and ½ teaspoon of cayenne directly into the beef while it cooks, and add a full layer of sliced pickled jalapeños on top of the cheese before closing the top bun. Replace half the American cheese with pepper jack for extra heat in the melt. Finish with a drizzle of hot honey across the butter wash before baking — the sweetness against the spice makes these sliders unexpectedly addictive.
- BBQ Cheeseburger Sliders: Stir 3 tablespoons of your favourite smoky BBQ sauce into the cooked beef and onion mixture before layering onto the buns. Replace the slider sauce with a thin spread of extra BBQ sauce on the bottom bun, and top the beef with sharp cheddar and a few strips of crispy bacon. The caramelised BBQ sauce in the beef layer gets slightly sticky and intensified during the oven bake, producing a deeply savoury, smoky slider that disappears faster than any other variation.
- Dairy-Free Build: Skip the cheese layers entirely and compensate with a generous extra spread of slider sauce on both bun faces. Use a dairy-free butter alternative for the butter wash. Load the beef layer with extra caramelised onion and a handful of sautéed mushrooms to add richness and depth in place of the melted cheese. The sliders are still satisfying and fully flavoured — the beef and sauce carry the build without needing dairy to hold it together.
- Kid-Friendly Mild Version: Keep the seasoning simple — salt, pepper, and garlic powder only, no Worcestershire or smoked paprika. Use American cheese exclusively, which kids reliably accept over any sharper alternative. Replace the slider sauce with a simple ketchup-mayo blend and skip the pickles inside the slider, serving them on the side instead. Hawaiian rolls are already naturally sweet and soft, which makes them the ideal bun for younger eaters who find brioche slightly too rich.
- Pizza Sliders Variation: Replace the slider sauce with a good quality marinara or pizza sauce, swap the beef seasoning blend for Italian seasoning and fennel, and top the cheese layer with pepperoni slices before closing the bun. Sprinkle the butter wash with Italian seasoning and grated Parmesan instead of sesame seeds. This crossover between cheeseburger sliders and pizza flavours is particularly popular with kids and at casual gatherings where both options would normally be requested.
- Weight-Loss Friendly Option: Use 90/10 extra-lean ground beef, replace the Hawaiian rolls with whole grain dinner rolls of similar size, reduce the cheese to a single layer of part-skim mozzarella, and swap the full-fat mayo in the sauce for low-fat Greek yogurt. Skip the butter wash and replace it with a light spray of olive oil across the top buns before baking. Each slider comes in at around 180 calories, making two sliders a genuinely balanced meal when paired with a simple green salad on the side.
Seasonal Relevance
Cheeseburger sliders work in every season but earn their biggest audiences in two specific windows. From May through September, they’re a natural fit for outdoor gatherings — game day setups, backyard cookouts, and any occasion where food needs to be portable, shareable, and crowd-proof. The smaller format means guests can eat while standing, while watching sport, or while managing a plate and a drink simultaneously — which is the whole point of slider-sized food in a summer social context. From October through February, cheeseburger sliders shift into the indoor comfort food category — game day watching parties, holiday gatherings, and casual family dinners where something warm and cheesy feels exactly right. In autumn, lean into the BBQ variation with caramelised onion and smoky cheddar for a richer, more warming build. In winter, the mushroom and Swiss version with Dijon aioli feels more appropriate for dinner-party-style serving than the classic summer build. Spring, March through April, is when sliders start appearing at Easter gatherings and end-of-school events — the classic build with fresh lettuce and tomato added after baking is the right call when the produce quality starts improving and lighter toppings feel seasonally appropriate again.
Conclusion
Cheeseburger sliders prove that the best food doesn’t need to be complicated to be genuinely impressive. One pan of beef, one sheet of rolls, one baking dish, and 30 minutes is all it takes to produce something that gets requested at every occasion you bring it to. The base recipe is reliable and forgiving, the sauce takes two minutes and improves every day it sits in the fridge, and the variations give you a different experience every time you make them without requiring a new set of ingredients or techniques. Make the classic version first, nail the butter wash, and get comfortable with the assembly. Then start working through the variations — the bacon build, the spicy jalapeño version, the BBQ pull. Every table these cheeseburger sliders land on gets cleared completely, and that’s the only review that matters.
FAQs
Q: Can I make cheeseburger sliders ahead of time for a party? Yes — and it’s one of the best make-ahead party dishes available in this format. Assemble the full slider tray the night before: beef layer, cheese, sauced buns, butter wash on top. Cover tightly with foil and refrigerate. When you’re ready to bake, add 5 extra minutes to the covered bake time since the dish goes in cold from the refrigerator. Pull off the foil for the final 5 minutes as usual. Everything comes out melted, golden, and hot, and all the prep was done the night before with zero stress on the day.
Q: What rolls work best for cheeseburger sliders? Hawaiian rolls are the most popular choice — their slight sweetness pairs beautifully with the savoury beef and tangy sauce, and their soft, pillowy texture absorbs the butter wash without becoming soggy. Brioche slider rolls are the richer, more buttery alternative that works particularly well for dinner-style serving. Standard dinner rolls work as a budget-friendly option. Avoid rolls that are too dense or crusty — they don’t soften in the oven the way softer rolls do, and the slider becomes difficult to bite through cleanly.
Q: Why is 80/20 ground beef better than leaner options for sliders? The 20% fat content in 80/20 beef seasons the meat from within as it cooks, producing a juicier, more flavourful beef layer than leaner alternatives. Leaner beef — 90/10 or above — tends to cook dry and crumbly in a pan, which makes it difficult to press into a flat, even layer that holds together when sliced. The fat also binds the beef and onion mixture together, which is what keeps each slider intact when you slice and lift it from the baking dish. For sliders specifically, 80/20 is the right choice.
Q: My sliders came out soggy on the bottom — how do I fix it next time? Two things cause soggy bottoms: too much fat left in the beef after cooking, and assembling the sliders too far in advance before baking. Always drain the cooked beef thoroughly before layering onto the bun, and press it dry with a paper towel if the mixture still looks greasy. If you’re making sliders ahead, refrigerate them assembled but unbaked and put them in the oven as close to serving time as possible. Spreading the slider sauce on the bun rather than directly on the beef also helps create a barrier that slows moisture transfer from the meat to the bread.
Q: Can I cook cheeseburger sliders on a grill instead of in the oven? Yes — place the assembled, foil-covered baking dish on the grill over indirect medium heat and cook with the lid closed for 15 minutes, then remove the foil and move the dish to direct heat for 3–5 minutes until the tops are golden. The technique is identical to the oven method, and the slight smoky ambient heat of the grill adds a subtle additional layer of flavour. Make sure the baking dish is grill-safe before using this method.
Q: How many sliders per person should I plan for? For an appetiser or party snack situation, plan on 2–3 sliders per person. As a main course with sides like fries or a salad, 3–4 sliders per adult is a comfortable serving. For a crowd of hungry people at a game day gathering, 4–5 per person is not unrealistic. The format naturally encourages second and third helpings, so it’s always better to make slightly more than you think you need — leftover sliders reheat well and disappear quickly the following day.
Q: Can I use a different cheese instead of American? Yes, though American cheese melts the most evenly and quickly of any option and is specifically recommended for that reason. Sharp cheddar is the most common alternative — it has more flavour but takes slightly longer to melt fully in the oven. Pepper jack adds heat and melts well. Swiss works in the mushroom variation. Provolone melts cleanly and has a mild, slightly tangy flavour that sits well in a slider. Whatever cheese you choose, make sure it’s freshly sliced rather than pre-packaged slices where possible — freshly sliced cheese melts more evenly and produces a better pull.