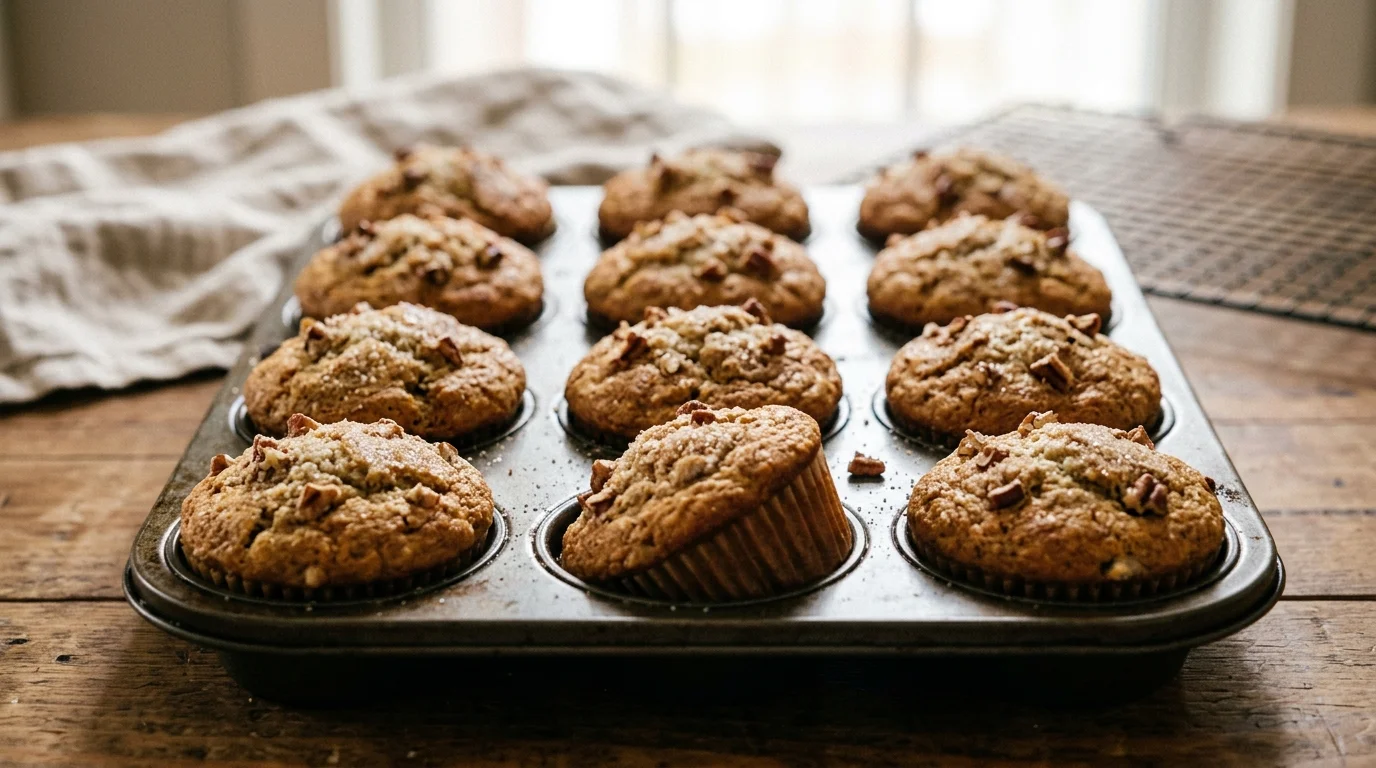
Banana Bread Muffins Moist, Tender & Ready in 30 Minutes
Banana bread muffins take everything you love about a classic loaf and turn it into something you can grab and go. Same rich banana flavor, same tender crumb — but done in a third of the time and portioned perfectly from the start. Bake a batch for weekday breakfasts, pack them as a mid-morning snack, or serve them warm after dinner as a simple dessert. No loaf pan required — just pure banana bread muffin goodness in every bite.
Ingredients List
For banana bread muffins (makes 12 standard muffins):
- 3 large ripe bananas, mashed (the riper, the better — brown-spotted bananas are ideal)
- 2 large eggs, room temperature
- ⅓ cup unsalted butter, melted and cooled (coconut oil works as a dairy-free substitute)
- ½ cup granulated sugar (brown sugar adds deeper caramel notes; coconut sugar for a lower-GI option)
- ¼ cup plain yogurt (sour cream, or dairy-free yogurt as a substitute)
- 1 tsp pure vanilla extract
- 1½ cups all-purpose flour (white whole wheat flour for added fiber)
- 1 tsp baking soda
- ½ tsp baking powder
- ½ tsp salt
- 1 tsp ground cinnamon
- ¼ tsp ground nutmeg (optional — adds warm spice depth)
- ½ cup chocolate chips (optional — semi-sweet or dark)
- ⅓ cup chopped walnuts or pecans (optional — for crunch and healthy fats)
- 1 tbsp rolled oats per muffin, for topping (optional — adds texture and visual appeal)
Step-by-Step Instructions
Step 1: Gather and Prep Your Ingredients
Pull butter and eggs from the fridge at least 20 minutes before starting. Room-temperature ingredients incorporate more evenly into the batter — cold butter seizes and cold eggs can make the mixture curdle slightly before it comes together.
Preheat your oven to 375°F (190°C) and line a standard 12-cup muffin tin with paper liners or grease each cup thoroughly with butter or non-stick spray. Preheating early ensures the oven is fully up to temperature when the batter is ready — an under-heated oven is one of the most common reasons muffins dome unevenly.
Pro Tip: Use paper liners with a light spray of oil on the inside — muffins release cleanly every time, no sticking, no torn tops.
Step 2: Mash the Bananas and Mix the Wet Ingredients
Place the ripe bananas in a large mixing bowl and mash thoroughly with a fork until almost no large chunks remain. A few small lumps are fine — they add texture — but mostly smooth mash distributes the natural sweetness and moisture more evenly throughout every muffin.
Add the melted butter, eggs, yogurt, sugar, and vanilla extract to the mashed banana and whisk until fully combined. The mixture will look slightly curdled at first — that’s normal. It comes together once the dry ingredients are folded in.
Pro Tip: Brown your butter before melting it for a nutty, toffee-like depth that elevates the banana flavor noticeably.
Step 3: Combine the Dry Ingredients Separately
Whisk together the flour, baking soda, baking powder, salt, cinnamon, and nutmeg in a separate bowl. Mixing dry ingredients separately before adding them to the wet ensures the leavening agents are evenly distributed throughout the batter.
Uneven distribution of baking soda is a common reason some muffins in a batch rise beautifully while others come out flat. Taking 60 seconds to whisk the dry mix properly prevents that inconsistency entirely — it’s a small step that makes a visible difference in the finished result.
Pro Tip: Sift the flour if it’s been sitting in the bag for a while — packed flour adds too much density and produces tough muffins.
📖 Read More: Banana Bread Recipe
Step 4: Fold Wet and Dry Together — Gently
Pour the dry ingredients into the bowl of wet ingredients and fold with a rubber spatula using slow, deliberate strokes. Count your folds — you want no more than 12–15 strokes to bring the batter together. Stop the moment the flour streaks disappear.
Overmixing is the single most common mistake in muffin baking. Excess stirring develops the gluten in the flour, which makes muffins dense, rubbery, and tough instead of light and tender. A lumpy batter is completely fine — it bakes out smooth and produces a far better texture than an over-worked one.
Pro Tip: Fold in chocolate chips or walnuts at the very end with 2–3 extra strokes — adding them earlier means more mixing time, which toughens the batter.
Step 5: Fill the Muffin Cups and Rest the Batter
Use an ice cream scoop or two spoons to divide the batter evenly among the 12 prepared cups. Fill each one about ¾ full — not to the rim. Overfilling causes the muffin tops to spread flat instead of doming up into that bakery-style crown.
Once filled, let the batter rest in the tin for 5 minutes before placing it in the oven. Resting allows the baking soda to start reacting with the acidic banana and yogurt, which gives the muffins a head start on rising and contributes to a higher, more even dome.
Pro Tip: Sprinkle rolled oats and a pinch of brown sugar over the tops just before baking for a bakery-finish look with minimal effort.
Step 6: Bake, Test, and Cool Before Serving
Bake at 375°F for 18–22 minutes, until the tops are golden and a toothpick inserted into the center of a muffin comes out clean or with just a few moist crumbs. Wet batter on the toothpick means they need more time — check again in 2-minute intervals.
Remove the tin from the oven and let the muffins cool in the pan for 5 minutes before transferring to a wire rack. Pulling them out immediately risks tearing the bottoms — the structure needs a few minutes to set. After 10 minutes on the rack, they’re ready to eat and at their absolute best.
Pro Tip: If the tops are browning too fast before the centers are done, tent loosely with foil for the last 5 minutes of baking.
Cook Time
Total Time: 32 minutes | Prep: 12 minutes | Bake: 20 minutes No special equipment required.
Servings
Makes 12 standard muffins | Approximately 3–4 oz per muffin
Nutritional Information (approx. per muffin)
| Nutrient | Amount |
|---|---|
| Calories | 195 kcal |
| Fat | 7g |
| Saturated Fat | 3.5g |
| Carbohydrates | 30g |
| Protein | 3g |
| Sugar | 14g |
| Fiber | 1.5g |
| Sodium | 175mg |
| Vitamin C | 3mg |
| Potassium | 180mg |
| Calcium | 30mg |
Values are approximate and will vary based on ingredients used.
Storage Instructions
Banana bread muffins are best on day one — warm from the oven with a soft, tender crumb that’s hard to match. Store completely cooled muffins in an airtight container at room temperature for up to 3 days. Place a single sheet of paper towel at the bottom of the container to absorb excess moisture and prevent the bases from turning soggy.
Refrigerating extends shelf life to 5 days but slightly firms the crumb — a 15-second microwave warm-up brings them back. For longer storage, use the freezer pack method: wrap each muffin individually in plastic wrap, seal in a freezer bag, and freeze for up to 3 months. Thaw overnight at room temperature or microwave from frozen for 45–60 seconds. Alternatively, freeze portioned raw batter in a lined muffin tin, pop the frozen cups out into a bag, and bake straight from frozen at 375°F for 25–28 minutes.
📖 Read More: Artisan Bread Recipes
Suggestions
- Banana Bread Muffin Bowl: Crumble a warm muffin into a bowl and top with Greek yogurt, sliced banana, a drizzle of honey, and a handful of granola. It transforms a simple muffin into a satisfying, high-protein breakfast bowl that feels far more intentional than it is. A great way to repurpose a slightly over-baked batch.
- High-Protein Version: Replace ¼ cup of flour with an equal amount of unflavored or vanilla protein powder, and stir 2 tablespoons of almond butter into the wet mixture. The texture stays moist and the protein per muffin jumps significantly — ideal as a post-workout snack that doesn’t taste like compromise.
- Dairy-Free Option: Swap butter for melted coconut oil and replace yogurt with an equal amount of unsweetened dairy-free coconut yogurt or applesauce. Both substitutes keep the crumb moist and tender without any dairy. The coconut oil adds a subtle tropical note that actually complements the ripe banana flavor beautifully.
- Kid-Friendly Version: Stir in a handful of mini chocolate chips and replace the walnuts entirely — most kids prefer the smooth texture. Reducing cinnamon to ½ teaspoon makes the flavor milder and more universally appealing. Furthermore, pressing a single chocolate chip on top of each muffin before baking makes them look finished and intentional straight from the oven.
- Weight-Loss Version: Cut sugar to ¼ cup and replace butter entirely with unsweetened applesauce. Using white whole wheat flour instead of all-purpose adds fiber, which improves satiety meaningfully. Each muffin drops to approximately 155 calories with this adjustment — still genuinely satisfying, with natural sweetness carrying most of the flavor load.
- Peanut Butter Banana Swirl: Stir 3 tablespoons of smooth peanut butter into the batter just before filling the cups, using only 2–3 folds so visible ribbons of peanut butter remain. The result is a marbled, protein-rich muffin with deep flavor in every bite. Top with a few banana slices pressed in before baking for a bakery-style finish.
- Banana Chocolate Chunk Muffins: Use roughly chopped dark chocolate (70% cacao or higher) instead of standard chips — the irregular pieces melt into pools throughout the muffin rather than staying as neat dots. Dark chocolate also brings genuine antioxidant benefits and a bittersweet contrast that balances the sweetness of ripe banana perfectly.
📖 Read More: Pita Bread Recipe
Seasonal Relevance
Bananas are available year-round, which makes banana bread muffins one of the most reliable recipes in any baker’s rotation regardless of season. That said, the best baking opportunity arrives whenever you have overripe bananas on hand — typically late summer through fall, when bananas seem to ripen faster in warmer kitchens. From July through October, buy a bunch specifically to let them go spotty on the counter before baking. Freeze ripe bananas at peak ripeness — peel them first, place in a zip-lock bag, and freeze for up to 3 months. Thaw frozen bananas at room temperature for 30 minutes before mashing; they release extra liquid as they thaw, which actually intensifies the banana flavor in the finished muffin.
Conclusion
Few baked goods are as forgiving, fast, or consistently satisfying as banana bread muffins. With one bowl, basic pantry staples, and 30 minutes, you get 12 perfectly portioned muffins that work for breakfast, snacking, or dessert without any extra effort. Try the peanut butter swirl for a protein-packed twist, or go straight chocolate chunk when you want something a little more indulgent. However you make them, this recipe delivers every time. Start baking — those overripe bananas on your counter are waiting.
FAQs
Q: Can I use frozen bananas instead of fresh for banana bread muffins?
Frozen bananas work beautifully — in fact, they often produce a better result than fresh. Freezing breaks down the banana’s cell structure, which intensifies the sweetness and creates an even smoother mash. Thaw completely at room temperature, drain off the excess liquid before mashing, and proceed exactly as the recipe directs. No adjustments needed.
Q: Why did my muffins turn out dense and heavy instead of light?
Dense muffins almost always come from overmixing the batter. Once the wet and dry ingredients are combined, the gluten in the flour develops quickly with every additional stir — producing a tough, bread-like texture rather than a tender crumb. Fold gently, stop at 12–15 strokes, and accept a lumpy batter. It bakes out perfectly.
Q: How do I make banana bread muffins without eggs?
Replace each egg with a flax egg — one tablespoon of ground flaxseed mixed with three tablespoons of water, rested for 5 minutes until gel-like. Alternatively, ¼ cup of unsweetened applesauce per egg works well in this recipe. Both substitutes maintain adequate moisture and binding without altering the banana flavor in any noticeable way.
Q: Can I reduce the sugar without ruining the texture?
Sugar does more than sweeten — it also contributes to moisture retention and the browning of the muffin top. Reducing to ¼ cup is safe without significantly affecting texture. Going below that risks drier muffins with pale, flat tops. Compensate by ensuring your bananas are very ripe, as their natural sugars help carry both the flavor and the moisture.
Q: What is the best way to get a high dome on my muffin tops?
Starting the oven temperature higher — at 400°F for the first 5 minutes, then reducing to 375°F for the remainder — creates an immediate burst of heat that forces rapid rising before the crust sets. Additionally, resting the filled batter in the tin for 5 minutes before baking gives the leavening agents a head start. Both techniques together produce a consistently tall, bakery-style dome.