Rice Pudding Recipe Creamy, Comforting & Ready in 40 Minutes
A rice pudding recipe done properly is one of the most satisfying things you can make from a handful of pantry staples — warm, creamy, gently sweet, fragrant with vanilla and cinnamon, and deeply comforting in a way that very few desserts manage without a long list of ingredients or a complicated technique. It’s the dessert that costs almost nothing, requires almost no equipment, and produces something genuinely worth sitting down for.
Short-grain rice simmers slowly in whole milk until it absorbs every drop into a thick, silky, spoonable pudding that holds its warmth for a long time and tastes better with each spoonful. Whether you’re making it as a weeknight dessert, a weekend treat, a cold-weather comfort, or a simple meal for someone who needs something gentle and nourishing, this rice pudding recipe delivers every single time. No complicated steps — just pure rice pudding satisfaction, warm and creamy from the stovetop in 40 minutes.
Ingredients
For the Rice Pudding (serves 4–6):
- 1 cup (200g) short-grain white rice [Arborio or pudding rice — do not substitute long-grain]
- 4 cups (960ml) whole milk [full-fat is essential — low-fat produces a thin, watery pudding]
- 1 cup (240ml) heavy cream [adds richness — can be replaced with extra milk for a lighter version]
- ¼ cup (50g) granulated sugar [adjust to taste]
- 1 tsp pure vanilla extract [or 1 vanilla bean, split and scraped]
- ½ tsp ground cinnamon [plus extra for serving]
- ¼ tsp ground nutmeg
- Pinch of fine salt [suppresses bitterness and enhances sweetness]
- 1 tbsp unsalted butter [stirred in at the end for gloss and richness]
Optional Flavour Additions:
- Zest of 1 lemon or orange — stirred in with the sugar (optional)
- 1 cinnamon stick — simmered in the milk and removed before serving (optional)
- ½ tsp rose water — added at the end for a floral, Middle Eastern note (optional)
- 2 cardamom pods, lightly crushed — simmered in the milk (optional)
- 1 tbsp honey in place of sugar — for a more rounded sweetness (optional)
For Serving:
- Ground cinnamon, for dusting
- Raspberry or strawberry jam, for swirling
- Fresh berries or sliced mango
- Toasted nuts — pistachios, almonds, or hazelnuts
- Brown sugar, for a caramelised top (optional)
- Salted caramel sauce, for drizzling (optional)
Step-by-Step Instructions
Step 1: Gather and Prep Your Ingredients
Before anything goes on the heat, measure every ingredient and have it at the counter. This is a short-grain rice recipe — Arborio or dedicated pudding rice — and substituting long-grain varieties will not produce the same result. Long-grain rice lacks the high starch content of short-grain varieties and produces a thin, grainy pudding where each rice grain remains separate rather than releasing starch into the milk to create the thick, creamy consistency that defines a properly made rice pudding recipe. If using a vanilla bean, split and scrape it now and add both the seeds and the pod to the milk. Have the butter measured and ready to go in at the very end.
Pro Tip: Rinse the short-grain rice briefly under cold water before cooking — just 30 seconds — to remove excess surface starch. This sounds counterintuitive since starch is what creates the creaminess, but surface starch causes the rice grains to clump together in a gluey mass in the early stages of cooking before the controlled starch release from inside the grain can happen. A quick rinse produces a pudding that is creamy from grain starch without being stodgy from surface starch.
Step 2: Warm the Milk and Add the Rice
Pour the whole milk and heavy cream into a medium to large heavy-bottomed saucepan — a heavy base is important because it distributes heat evenly and prevents the milk from scorching on the bottom of the pan, which would give the entire pudding a burnt flavour that cannot be fixed. Add the sugar, ground cinnamon, nutmeg, salt, and any whole spices or citrus zest being used. Heat over medium heat, stirring occasionally, until the milk is just beginning to steam and tiny bubbles appear at the edges — not a full simmer, just warming through. Add the rinsed rice to the warm milk and stir to distribute evenly. Reduce the heat to medium-low — the rice pudding recipe cooks at a gentle, patient heat from this point forward.
Pro Tip: Never bring the milk to a rapid boil before adding the rice. Boiling milk forms a skin that makes the pudding lumpy, scorches more easily, and changes the texture of the finished dish. The ideal cooking temperature for rice pudding is a steady, barely-there simmer — small bubbles breaking intermittently at the surface rather than a rolling boil. If the milk is simmering too aggressively, reduce the heat immediately.
Step 3: Cook Low and Slow, Stirring Frequently
Cook the rice and milk mixture over medium-low heat for 30–35 minutes, stirring every 3–4 minutes throughout the entire cooking time. The frequent stirring is not optional — it prevents the rice from settling and scorching on the bottom of the pan, prevents a skin from forming on the surface of the milk, and releases the starch from the rice grains into the surrounding liquid in a controlled, even way that produces the characteristic creamy consistency. As the rice absorbs the milk, the mixture thickens progressively — it will look thin and soupy for the first 15 minutes and then tighten noticeably in the final 10–15 minutes. The pudding is ready when the rice is completely tender, the mixture coats the back of a spoon, and the consistency is thick enough to mound slightly when dropped from the spoon.
Pro Tip: The rice pudding will look too thin at the 25-minute mark — resist the urge to add more rice or cornstarch to fix it. The final 8–10 minutes of cooking cause a rapid thickening that makes the pudding look exactly right at the 35-minute mark. It will also thicken further as it cools. A pudding taken off the heat at exactly the right consistency will be slightly too thick by the time it reaches room temperature — take it off the heat when it looks one step less thick than the finished result you want.
📖 Read More: Chicken Rice Casserole
Step 4: Add Vanilla, Butter, and Final Flavourings
Remove the saucepan from the heat. Stir in the vanilla extract and the tablespoon of cold unsalted butter — the cold butter added off the heat emulsifies into the hot pudding and gives the surface a glossy, slightly richer finish rather than the flat, matte appearance of a pudding made without it. Remove any whole spices — cinnamon stick, cardamom pods, vanilla bean pod — at this stage. If adding rose water, lemon zest, or orange zest, stir them in now while the pudding is still hot but off the heat so the volatile aromatic compounds don’t evaporate before the pudding is served. Taste the pudding carefully before serving — it should be creamy, gently sweet, warmly spiced, and deeply vanilla-forward. Adjust sugar if needed, keeping in mind that sweetness perception increases as the pudding cools.
Pro Tip: Add an extra splash of warm milk to the pudding immediately before serving if it has thickened beyond the consistency you want during the final few minutes off the heat. One or two tablespoons of warm milk stirred vigorously through the hot pudding loosens the consistency instantly without diluting the flavour — warm milk only, never cold, which can cause the starches to firm unevenly and produce a lumpy texture.
Step 5: Check Consistency and Adjust
Before the rice pudding goes into bowls, check the consistency one final time. It should flow slowly from the spoon — thick enough to hold its shape briefly before slowly spreading across the surface of the bowl. Too thick means a splash of warm milk added and stirred through. Too thin means returning to low heat for 3–5 minutes of continued gentle cooking, stirring constantly, until the starch tightens the mixture to the correct consistency. Taste once more — the seasoning may need adjustment after the butter and vanilla have been added, since both elements change the perception of sweetness and richness. A pinch of extra cinnamon, a few more drops of vanilla, or another tiny pinch of salt are the three most common finishing adjustments that make a good rice pudding recipe taste genuinely excellent.
Pro Tip: A pinch of salt added at the end — in addition to the pinch added during cooking — makes the finished rice pudding taste noticeably sweeter and more rounded than one seasoned only during cooking. Salt suppresses bitterness and amplifies sweetness in sweet dishes in the same way it does in savoury ones — a rice pudding without enough salt tastes flat and one-dimensional even when the vanilla, cinnamon, and sugar are all correctly balanced.
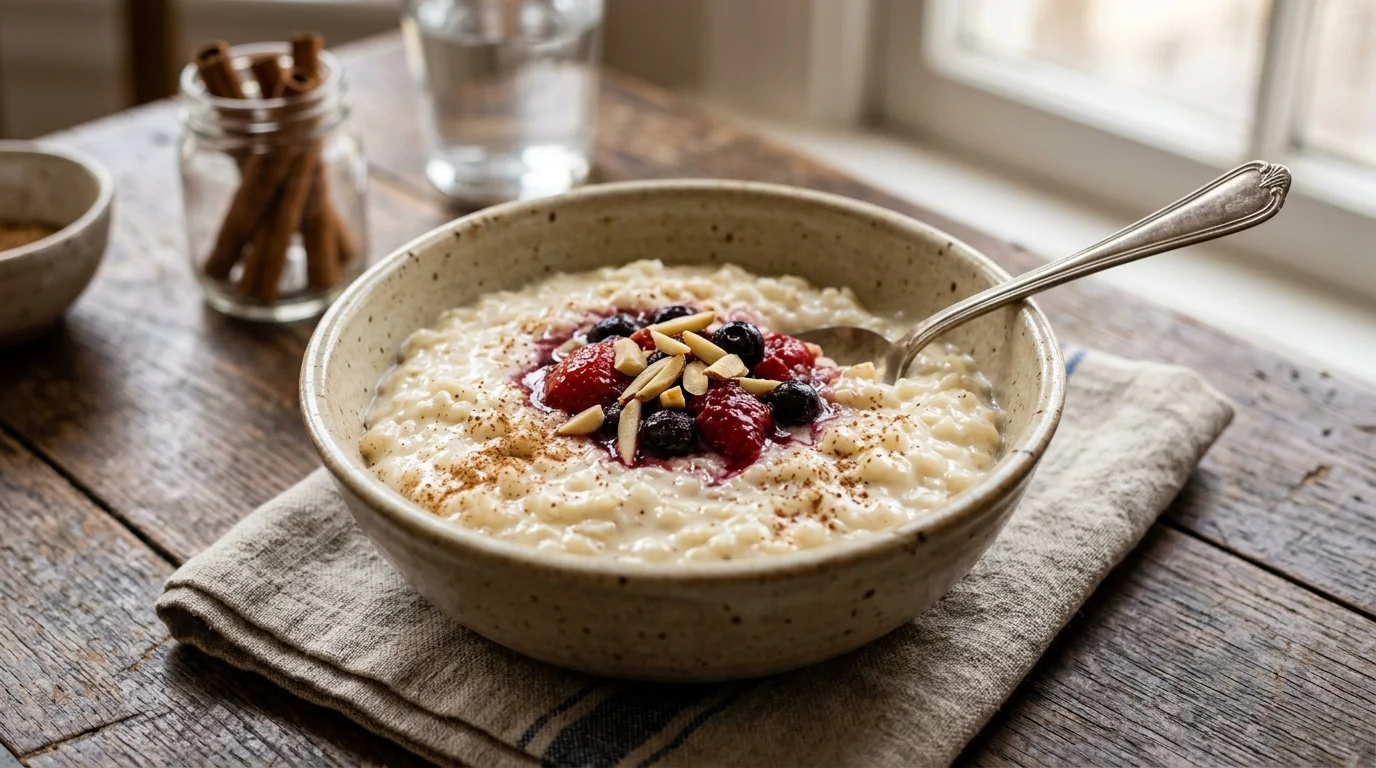
Step 6: Serve Warm or Chill and Serve Cold
Divide the finished rice pudding between warm bowls for the classic warm serving — the pudding stays at the ideal temperature in a warm bowl for significantly longer than in room-temperature ceramic. Dust each bowl with a light veil of ground cinnamon, add a spoonful of raspberry or strawberry jam pressed gently into the surface of the pudding, and scatter toasted nuts or fresh berries across the top. For a cold rice pudding, pour into a large bowl or individual ramekins and press plastic wrap directly against the surface to prevent a skin from forming. Refrigerate for at least 2 hours until set and cold. Stir in an extra tablespoon of cold milk before serving cold to loosen the texture, and add all toppings fresh immediately before serving.
Pro Tip: Press the plastic wrap directly against the surface of the pudding — not just over the rim of the bowl — before refrigerating. Any gap between the plastic wrap and the pudding surface allows the top layer to dry out and form a thick, leathery skin that has a completely different texture from the creamy pudding beneath it and cannot be re-incorporated smoothly once formed. Direct surface contact eliminates this entirely.
Cook Time
Total Time: 45 minutes | Prep: 5 minutes | Cook: 35 minutes | Rest: 5 minutes One saucepan — creamy rice pudding ready in 45 minutes.
Servings
Serves 4 as a generous dessert or 6 as a smaller portion.
Nutritional Information (approx. per serving — based on 4 servings, no optional toppings)
| Nutrient | Amount |
|---|---|
| Calories | 420 kcal |
| Fat | 18g |
| Saturated Fat | 11g |
| Carbohydrates | 54g |
| Protein | 10g |
| Sugar | 22g |
| Fiber | 0.5g |
| Sodium | 120mg |
| Vitamin C | 0mg |
| Potassium | 320mg |
| Calcium | 280mg |
Values are approximate and will vary based on milk type and toppings used.
Storage Instructions
Rice pudding stores very well and is a practical make-ahead dessert that holds up reliably in the refrigerator. Allow the pudding to cool to room temperature before transferring — approximately 20–30 minutes — then press plastic wrap directly against the surface and refrigerate for up to 4 days. The pudding thickens considerably during refrigeration as the starches set further in the cold — this is expected and entirely recoverable. When serving cold rice pudding that has firmed up in the refrigerator, stir in 1–2 tablespoons of cold milk per portion and mix well until the creamy, flowing consistency is restored. For serving warm from a refrigerated state, transfer the pudding to a saucepan and warm over medium-low heat with a splash of milk, stirring continuously, until it reaches the desired temperature and consistency. Do not microwave rice pudding from cold without adding liquid first — the starch tightens further under direct microwave heat and the pudding can seize into a thick, gluey texture that is difficult to loosen. For freezing, rice pudding freezes adequately but not ideally — the starch structure changes during freezing and thawing and produces a slightly grainy texture compared to fresh pudding. If freezing is necessary, freeze in individual portions for up to 1 month in sealed, airtight containers. Thaw overnight in the refrigerator and stir in warm milk gradually while heating gently on the stovetop to restore the smoothest possible consistency. Fresh-made rice pudding is always significantly better than thawed, and since the recipe takes only 40 minutes, making it fresh when needed is almost always preferable to freezing.
📖 Read More: Shrimp Fried Rice Recipe
Suggestions
- Baked Rice Pudding: Combine the rinsed rice with the milk, cream, sugar, vanilla, and spices in an oven-safe dish — no pre-cooking required. Dot the surface with small pieces of butter and dust with nutmeg. Bake at 325°F (160°C) for 2 hours, stirring twice in the first hour and leaving undisturbed in the second. The slow oven heat produces a golden, slightly caramelised skin on the top that is the defining characteristic of the baked version — the skin has a concentrated, slightly caramelised flavour that the stovetop version doesn’t develop.
- Coconut Rice Pudding: Replace the whole milk and heavy cream entirely with 2 cans of full-fat coconut milk topped up with water to reach the correct total volume. The coconut milk produces a dairy-free rice pudding that is just as rich and creamy as the dairy version — the natural fat content of full-fat coconut milk provides the same creaminess without any dairy. Add a teaspoon of lime zest and a tablespoon of toasted coconut flakes for a fully tropical finish that makes this version genuinely distinctive.
- Mango Rice Pudding: Make the standard coconut version above and serve warm or cold with a generous spoonful of fresh diced mango or mango purée across the top of each bowl. The acidity and sweetness of fresh mango against the creamy, slightly coconut-flavoured pudding is one of the most naturally appealing flavour combinations in the dessert world — simple, visually vibrant, and requiring no additional sugar or sauce beyond the mango itself.
- Chocolate Rice Pudding: Stir 3 tablespoons of unsweetened cocoa powder and an extra tablespoon of sugar into the milk at the beginning of cooking. In the final 2 minutes before the butter goes in, add 50g of finely chopped dark chocolate — the residual heat melts it completely without any direct heat that could make it seize. The finished pudding is deeply chocolatey, slightly bitter, and pairs beautifully with a dollop of whipped cream and a scatter of flaky sea salt across the top.
- Cardamom and Rose Rice Pudding: Add 4 lightly crushed cardamom pods to the milk at the start and remove before serving. Stir ½ teaspoon of rose water and 1 tablespoon of honey into the finished pudding off the heat instead of vanilla extract. Top each serving with crushed pistachios and a few dried edible rose petals if available. This Middle Eastern-inspired version is the most aromatic and perfumed of all the variations — the cardamom and rose together produce a rice pudding that tastes genuinely different from any Western version and makes an exceptional dinner party dessert.
- Brown Sugar and Cinnamon Rice Pudding: Replace the granulated sugar with brown sugar — the molasses notes in brown sugar add a caramel-like warmth to the pudding that white sugar doesn’t deliver. Double the cinnamon to 1 full teaspoon and add a pinch of allspice. Finish each bowl with a sprinkle of additional brown sugar pressed lightly across the surface and briefly torched with a kitchen blowtorch until caramelised — this version of rice pudding is the closest to a crème brûlée in character and produces a genuinely impressive result from very simple pantry ingredients.
- Leftover Rice Shortcut: If cooked rice is already available in the refrigerator, place 2 cups of cooked short-grain white rice in a saucepan with 2 cups of whole milk, ½ cup of cream, the sugar, vanilla, and spices. Cook over medium-low heat, stirring frequently, for 15–18 minutes until the milk is absorbed and the pudding has reached the correct consistency. This shortcut version produces a slightly denser, stickier pudding than one made from raw rice but is entirely acceptable and reduces the active cook time to under 20 minutes from already-cooked rice.
- Lighter Rice Pudding: Replace the heavy cream with an extra cup of whole milk — 5 cups of milk total and no cream. Reduce the sugar to 3 tablespoons and rely on the natural sweetness of the vanilla and the whole milk for the remaining sweetness. Skip the finishing butter. The lighter version is noticeably thinner in texture and less rich in flavour than the full-cream version, but at under 280 calories per serving it is a genuinely satisfying dessert that fits a calorie-conscious routine without requiring any artificial sweeteners or fat substitutes.
Seasonal Relevance
A rice pudding recipe is genuinely year-round but the format and the toppings that suit it most naturally shift with the season. From October through February, warm rice pudding is the most appropriate and most satisfying version — ladled steaming into warm bowls on a cold evening with nothing more than a dusting of cinnamon and a spoonful of jam is one of the most specifically winter-appropriate comfort desserts available in any cuisine. The brown sugar and cinnamon version and the cardamom and rose build suit cold weather particularly well — the warming spice profiles belong to the season in the same way mulled wine and spiced biscuits do. From May through September, cold rice pudding becomes the natural format — chilled, topped with fresh mango or berries, and served in small glasses for a summery dessert that is light enough for a warm evening. The coconut and mango version is the most specifically summer-appropriate variation in the list — tropical, fresh, and naturally dairy-free for warm-weather eating. Spring, March through May, is when fresh berries return to the market and make the best simple topping for a lightly sweetened rice pudding that bridges the gap between the warming winter version and the full summer build. In all seasons, the leftover rice shortcut is the most practically useful version — a 20-minute dessert from ingredients that are always available.
Conclusion
A rice pudding recipe earns its place as one of the most reliable, most comforting desserts in any kitchen because the method is forgiving, the ingredients are always available, and the result is something that consistently satisfies in a way that more complicated desserts often don’t manage. Get the milk at a gentle simmer rather than a boil, stir frequently throughout the cook, take the pudding off the heat before it looks quite finished, and add the butter and vanilla off the heat. Those four things done correctly produce a rice pudding that is creamy all the way through, flavourful from the first spoonful to the last, and worth making every week through the colder months. Try the baked version, the coconut and mango build, the brown sugar and cinnamon crème brûlée style — each one is a completely different experience from the same handful of pantry staples. Once you have a reliable rice pudding recipe, very little else answers the comfort dessert question as efficiently or as well.
FAQs
Q: Why is my rice pudding grainy or the rice not fully cooked? Grainy or undercooked rice in a pudding is caused by one of three things — cooking at too high a temperature which evaporates the milk before the rice has time to absorb it and soften fully, using long-grain rice instead of short-grain which doesn’t release the same starch content and stays firmer for longer, or insufficient cooking time without enough stirring to keep the rice evenly distributed in the liquid. Use Arborio or dedicated pudding rice, maintain a steady medium-low simmer rather than a high heat, stir every 3–4 minutes, and cook for the full 35 minutes even if the pudding looks thick earlier. If the milk has been absorbed before the rice is tender, add ½ cup of warm milk and continue cooking.
Q: Can I make rice pudding in the oven instead of on the stovetop? Yes — baked rice pudding is a valid and popular alternative that produces a different result from the stovetop version. Combine the raw rinsed rice with the milk, cream, sugar, vanilla, and spices in an oven-safe dish without any pre-cooking. Dot the surface with butter and dust with nutmeg. Bake at 325°F (160°C) for approximately 2 hours, stirring twice during the first hour and leaving undisturbed for the second to allow the characteristic golden skin to form. The baked version requires no active stirring after the first hour and produces a slightly firmer, more set pudding with a caramelised top that the stovetop version doesn’t develop.
Q: How do I stop a skin from forming on my rice pudding? A skin forms when the protein and fat in milk are exposed to air and cool — it is entirely a surface contact problem. Prevent it during cooking by stirring the pudding frequently so the surface never has time to dry and set. Prevent it during cooling and storage by pressing plastic wrap directly against the surface of the pudding the moment it goes into a bowl or container — not over the rim, but in direct contact with every centimetre of the pudding’s surface. If a skin has already formed before the pudding is served, stir it back into the pudding firmly — in a warm pudding it will dissolve back in completely. In a cold pudding it may remain slightly different in texture, which is why the direct plastic wrap contact method is the only reliable prevention.