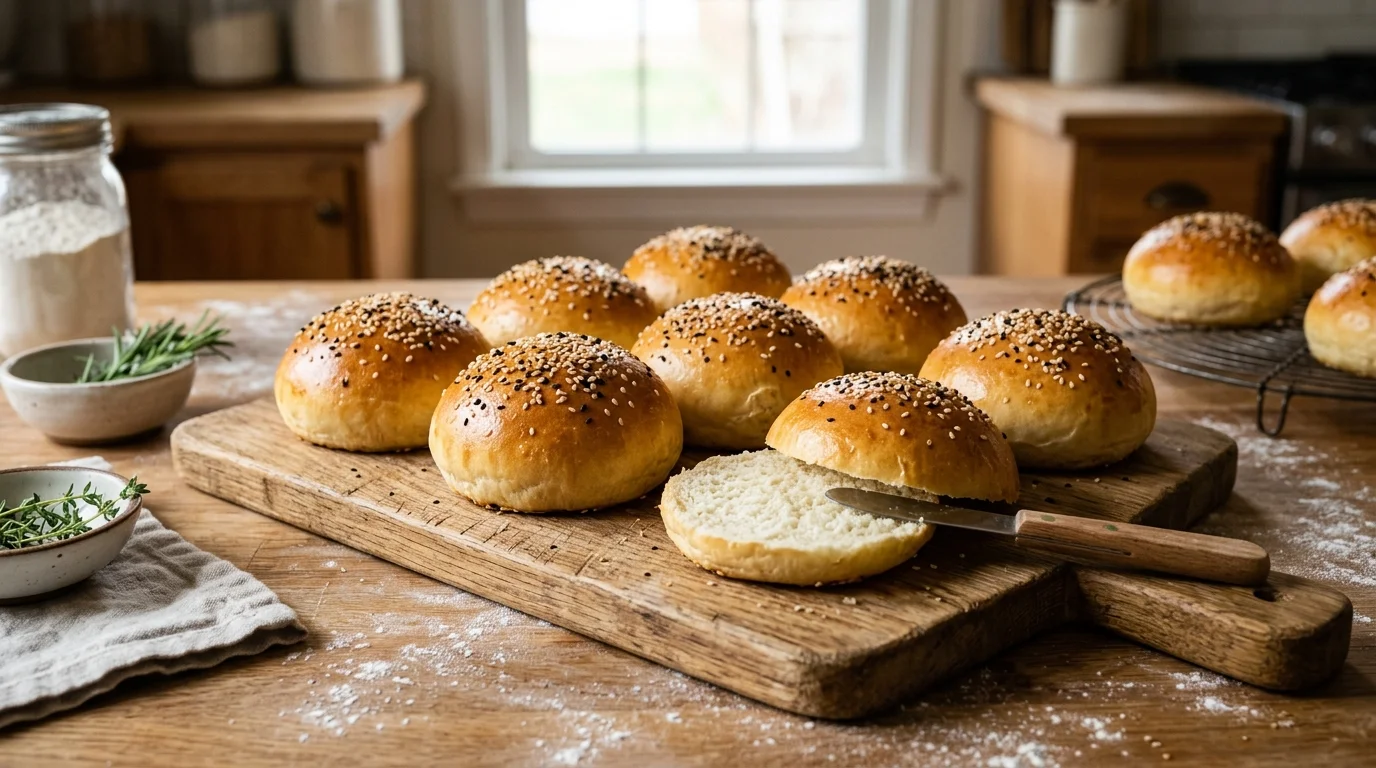
Hamburger Buns Soft, Golden & Ready in 2 Hours
Homemade hamburger buns are one of those projects that sound ambitious and turn out to be genuinely simple — and the difference between a burger built on a homemade bun and one built on a supermarket bun is immediately and unmistakably clear. The homemade version is pillowy and soft all the way through, holds together against the juices of a patty without going soggy, toasts to a perfect golden interior, and has a flavour that a mass-produced bun simply cannot replicate.
The whole process takes about 2 hours including rise time, with less than 20 minutes of actual hands-on work. Once you’ve made a batch, you’ll find reasons to make them weekly — for smash burgers, for pulled pork, for chicken sandwiches, for any build that deserves better than a supermarket bun. No complicated steps — just pure hamburger bun perfection, golden and ready to fill.
Ingredients
For the Hamburger Buns (makes 8 buns):
- 3 cups (360g) bread flour [or all-purpose flour — bread flour produces a chewier, more structured bun]
- 2¼ tsp (7g) instant yeast [one standard packet]
- 1 tbsp granulated sugar [feeds the yeast and adds slight sweetness]
- 1 tsp fine salt
- ¾ cup (180ml) warm whole milk [around 110°F — warm but not hot]
- ¼ cup (60ml) warm water [same temperature as the milk]
- 2 tbsp unsalted butter, softened [adds richness and tenderness]
- 1 large egg, room temperature
For the Egg Wash:
- 1 large egg
- 1 tbsp whole milk or water
- Pinch of fine salt
For the Topping (Optional but Recommended):
- 2 tbsp sesame seeds [white or black]
- 1 tsp poppy seeds (optional)
- 1 tsp flaky sea salt (optional)
- Everything bagel seasoning (optional)
Optional Enrichments for Brioche-Style Buns:
- Add 2 extra tbsp unsalted butter to the dough (optional)
- Add 1 extra egg yolk for a richer, more golden crumb (optional)
- Replace water with additional whole milk for maximum softness (optional)
Step-by-Step Instructions
Step 1: Gather and Prep Your Ingredients
Before any mixing begins, bring the egg and butter to room temperature — cold butter doesn’t incorporate into dough smoothly and leaves visible streaks of fat that never fully hydrate into the flour, producing an uneven crumb. Check the temperature of the milk and water carefully — the correct range is 105–115°F, which feels comfortably warm on the inside of your wrist but not hot. Water above 120°F kills yeast entirely and you won’t know until the dough fails to rise, which costs 90 minutes of wait time. Measure every ingredient before anything is combined. Homemade hamburger buns require precision in the liquid-to-flour ratio — too much liquid produces buns that spread flat rather than rising round and tall.
Pro Tip: Test the yeast before committing to the full recipe if you’re unsure of its freshness. Combine the warm milk, warm water, sugar, and yeast in a small bowl and wait 5–10 minutes — it should foam and become noticeably bubbly during this window. No foam means the yeast is dead or the liquid was too hot or too cold. A failed yeast test costs 5 minutes; discovering dead yeast after kneading and a full proof costs over an hour.
Step 2: Make the Dough
In a large bowl or the bowl of a stand mixer, combine the bread flour and salt. In a separate jug, combine the warm milk, warm water, sugar, and instant yeast — stir briefly and let it sit for 5 minutes until slightly foamy. Pour the yeast mixture into the flour along with the softened butter and the room-temperature egg. Mix on low speed with a dough hook for 2 minutes until the ingredients come together into a shaggy mass, then increase to medium speed and knead for 8–10 minutes until the dough is smooth, elastic, and slightly tacky but not sticky. The dough is ready when it passes the windowpane test — stretch a small piece between your fingers and it should thin to a translucent membrane without tearing. For hand kneading, work the dough on a lightly floured surface for 10–12 minutes using a push-fold-turn motion.
Pro Tip: Resist the urge to add more flour during kneading if the dough feels slightly sticky. Hamburger bun dough is deliberately wetter and more tacky than bread dough — that extra hydration is what produces the soft, pillowy interior of a properly made bun. A dough that feels perfectly smooth and dry before proofing will bake into a dense, tight bun. Sticky-tacky is correct at this stage.
Step 3: First Proof — Let the Dough Rise
Shape the kneaded dough into a smooth ball, place it in a lightly oiled bowl, and turn it once so all surfaces are coated in oil. Cover tightly with plastic wrap or a damp clean kitchen towel. Place the bowl in a warm, draught-free spot — an oven with just the light on, a warm corner of the kitchen, or a turned-off microwave with a cup of hot water inside all work well. Allow the dough to rise for 60–75 minutes until it has doubled in size. The first proof builds flavour and the gluten structure that gives the hamburger buns their spring and chew. Don’t rush it with excessive heat — a slow proof at a moderate temperature produces more flavour than a fast proof in a very warm environment.
Pro Tip: The dough has proofed sufficiently when pressing a floured finger into the surface leaves an indentation that springs back slowly — about halfway — rather than immediately. An indentation that springs back instantly means the dough needs more time. An indentation that stays completely without any spring means the dough is over-proofed — still usable but the buns will have a slightly denser, less structured crumb than properly proofed dough.
📖 Read More: Hamburger Casserole Recipes
Step 4: Divide, Shape, and Second Proof
Gently turn the risen dough onto a lightly floured surface and press it flat to release the gas — don’t punch aggressively, which overdevelops the gluten and tightens the dough unnecessarily. Divide the dough into 8 equal portions using a bench scraper or sharp knife — use a kitchen scale for exact equal portions of approximately 90–95g each. Unequal buns bake unevenly and look inconsistent. Shape each portion into a smooth ball by pulling the edges underneath and pinching them together at the base, then rolling gently against the work surface with a cupped hand to develop surface tension. Place the shaped buns on a parchment-lined baking sheet, spaced at least 3 inches apart. Flatten each bun very slightly with the palm of your hand — they should look like flattened spheres rather than perfect balls. Cover loosely with oiled plastic wrap and proof for 30–45 minutes until noticeably puffed.
Pro Tip: The second proof is shorter than the first but equally important — properly second-proofed buns bake up tall, round, and with an even, open crumb. Under-proofed buns bake dense and tight; over-proofed buns spread flat during baking. The test is the same gentle finger-press — a slow, partial spring-back means they’re ready for the oven.
Step 5: Apply the Egg Wash and Add Toppings
Preheat the oven to 375°F (190°C) while the buns complete their second proof. Whisk together the egg, milk, and pinch of salt in a small bowl until completely uniform. Using a soft pastry brush, apply the egg wash gently across the entire surface of each proofed bun — top and all sides — in one smooth, even coat. The egg wash is what gives hamburger buns their characteristic deep golden-brown sheen — without it, the surface bakes to a pale, matte tan rather than the glossy, bakery-quality finish. Apply the sesame seeds or any other topping immediately after the egg wash while the surface is still wet — they adhere as the egg wash sets during baking and stay in place through handling and filling.
Pro Tip: Apply the egg wash with a very light touch — pressing down with the brush on a proofed bun deflates the air built up during the second proof and the bun bakes flatter than it should. Brush from the top down in one smooth stroke per surface rather than scrubbing back and forth, which compresses the dough on each pass. A light hand with the egg wash preserves the height and round shape of every bun through the final bake.
Step 6: Bake, Cool, and Toast
Bake the egg-washed, topped buns at 375°F for 14–18 minutes until they are a deep, even golden brown across the entire surface. Rotate the baking sheet halfway through baking if your oven has hot spots. The internal temperature of a properly baked hamburger bun should reach 190–200°F — an instant-read thermometer inserted into the side of a bun confirms doneness more reliably than colour alone, which can vary between ovens. Transfer to a wire rack immediately and cool for at least 20 minutes before splitting or storing — cutting into a hot bun releases steam that hasn’t finished distributing through the crumb and produces a gummy interior rather than the clean, soft texture of a fully cooled bun. To toast, split and place cut-side down in a dry skillet over medium heat for 60–90 seconds until golden.
Pro Tip: For the softest, most pillowy hamburger buns, brush the tops with melted butter the moment they come out of the oven while still hot — the butter soaks into the surface and produces a tender, slightly rich top crust rather than the firmer, chewier crust that develops when buns cool without any fat on the surface. This butter finish is the step that makes homemade buns noticeably softer and more indulgent than their appearance suggests.
Cook Time
Total Time: 2 hours | Active Prep: 20 minutes | First Proof: 70 minutes | Shape and Second Proof: 45 minutes | Bake: 16 minutes | Cool: 20 minutes One bowl, one baking sheet — 8 perfect hamburger buns in 2 hours.
Servings
Makes 8 standard hamburger buns — approximately 10cm (4 inches) in diameter.
Nutritional Information (approx. per bun — plain, no toppings or egg wash)
| Nutrient | Amount |
|---|---|
| Calories | 210 kcal |
| Fat | 5g |
| Saturated Fat | 3g |
| Carbohydrates | 34g |
| Protein | 7g |
| Sugar | 3g |
| Fiber | 1g |
| Sodium | 260mg |
| Vitamin C | 0mg |
| Potassium | 90mg |
| Calcium | 40mg |
Values are approximate and will vary based on flour type and enrichments used.
Storage Instructions
Homemade hamburger buns are at their absolute best on the day they’re baked — the crumb is most tender and the crust most golden within the first 6–8 hours of baking. After that, store them in a sealed zip-lock bag or airtight container at room temperature for up to 3 days. Do not refrigerate homemade buns — refrigeration accelerates staling significantly and produces a dry, stiff bun within 24 hours that toasting can only partially recover. For buns being stored beyond day one, toasting before use is always recommended — a 60-second cut-side-down toast in a dry skillet restores much of the original tenderness and flavour that staling removes. For freezing, hamburger buns freeze exceptionally well for up to 3 months. Allow them to cool completely, then freeze in a single layer on a baking sheet until solid before transferring to a freezer bag — this prevents them from fusing together. Thaw individual buns at room temperature for 30–45 minutes, or wrap in a damp paper towel and microwave for 20–25 seconds for a faster thaw that also adds moisture back to the crumb. Toasting after thawing is strongly recommended — it revives the surface texture and warmth that makes a homemade hamburger bun genuinely worth the effort of making.
Suggestions
- Brioche Hamburger Buns: Add 2 extra tablespoons of softened butter and 1 extra egg yolk to the dough alongside the standard ingredients. Replace the water entirely with additional whole milk. The extra fat enriches the crumb into something genuinely brioche-adjacent — richer, more golden-yellow in colour, and slightly sweeter in flavour than the standard bun. Brioche buns pair best with smash burgers and fried chicken sandwiches where the richness of the bread complements rather than competes with the protein.
- Whole Wheat Hamburger Buns: Replace 1 cup of bread flour with 1 cup of whole wheat flour. The whole wheat adds a nutty, slightly earthy flavour and increases the fibre content meaningfully — but reduces the gluten network slightly, so add 1 extra tablespoon of vital wheat gluten if available to compensate for the reduced structure. The finished bun is slightly denser than the all-white flour version but noticeably more flavourful and nutritionally more complete.
- Pretzel Hamburger Buns: After the second proof, brush each bun with a baking soda wash — combine 1 tablespoon of baking soda with 1 cup of boiling water, cool slightly, and brush generously over each proofed bun before baking. The alkaline wash is what creates the characteristic dark mahogany colour, chewy crust, and distinctive slightly bitter flavour of a pretzel. Top with flaky sea salt immediately after the wash. Pretzel buns pair exceptionally well with sharp cheddar burgers and bratwurst sandwiches.
- Garlic Herb Hamburger Buns: Melt 2 tablespoons of butter with 2 cloves of minced garlic and 1 teaspoon of dried Italian herbs in a small pan. Brush the tops of the proofed buns with the garlic butter instead of egg wash before baking, then brush once more with the remaining garlic butter the moment they come out of the oven. The garlic infuses into the surface crust during baking and the second brush adds fragrance and sheen after. These buns work particularly well with grilled chicken sandwiches and Italian sausage builds.
- Slider-Sized Hamburger Buns: Divide the dough into 16 equal portions of approximately 45–48g each rather than 8 portions. Shape and proof identically to the full-size version but reduce the bake time to 11–13 minutes at the same 375°F temperature. Slider buns are the most practical format for parties, game day, and any occasion where individual full-size burgers are impractical. The recipe produces 16 slider buns from the same dough quantity, which covers a crowd efficiently from a single batch.
- Dairy-Free Hamburger Buns: Replace the whole milk with full-fat oat milk — it produces the most neutral, mildly sweet dairy-free result that closely mimics the flavour and fat content of whole milk in bread dough. Replace the butter with a good quality dairy-free butter alternative. The finished bun is entirely plant-based without any meaningful compromise in texture, flavour, or baking behaviour — oat milk performs more similarly to dairy milk in enriched bread doughs than any other non-dairy alternative.
- Black Sesame and Furikake Buns: Apply the standard egg wash and top each bun generously with black sesame seeds and a pinch of furikake seasoning instead of white sesame. The black sesame produces a dramatically different visual — deep black seeds against the golden bun surface — and a slightly more intense, nuttier flavour than white sesame. These buns suit an Asian-inspired burger build — a teriyaki beef patty, a katsu chicken sandwich, or a Japanese-style burger with pickled daikon and Kewpie mayo.
- Weight-Conscious Hamburger Buns: Reduce the butter to 1 tablespoon, replace whole milk with unsweetened oat milk, and reduce the sugar to 1 teaspoon — the yeast activates on 1 teaspoon of sugar as reliably as it does on 1 tablespoon. Divide the dough into 10 portions instead of 8 for smaller individual buns at approximately 165 calories each rather than 210. Skip the egg wash butter finish and brush lightly with water instead for a slightly firmer, less rich crust. Each bun still has the same homemade quality and flavour — just lighter.
Seasonal Relevance
Hamburger buns are a year-round bake, but when and how you use them shifts meaningfully with the season. From May through September, homemade buns are at their most relevant — summer is peak burger season, the outdoor grill is running, and the quality difference between a homemade bun and a supermarket one is most visible and most appreciated when the burger itself is also being made with care. This is the season for sesame-topped classic buns, brioche-style buns for smash burgers, and slider buns for backyard gatherings. From October through February, hamburger buns shift to indoor use — for stovetop smash burgers, for pulled pork sliders at gatherings, and for any sandwich build that benefits from a properly made bun in cold weather. The pretzel bun variation belongs specifically to autumn and winter — its darker, more robust flavour suits the season’s appetite for richer food. Spring, March through May, is when the first outdoor grilling sessions of the year bring the bun back to prominence — a fresh batch of homemade buns for the first backyard burger of spring is one of the more quietly satisfying kitchen projects available, and the whole wheat variation makes a particularly good early-season choice when the appetite is shifting toward lighter, less indulgent food after winter.
Conclusion
Homemade hamburger buns prove that the component of a burger that’s most often taken for granted is the one that makes the biggest difference when it’s made properly. The bread itself — its texture, its flavour, its ability to hold up against a juicy patty without disintegrating — sets the standard that everything else in the burger has to meet. Two hours of mostly passive wait time, 20 minutes of actual work, and one baking sheet is all it takes to produce something that makes every burger built on it better by default. Make the classic version first, understand the dough feel and the proofing cues, and then move through the variations — the brioche, the pretzel, the garlic herb. Each one gives you a different eating experience from the same reliable method, and every version earns its place in whatever sandwich or burger build it supports.
FAQs
Q: Why did my hamburger buns spread flat instead of rising tall and round? Flat buns are caused by one of three things — over-proofed dough that has lost its structural integrity before baking, dough that was too wet and lacked the gluten strength to hold its shape during the second proof, or buns spaced too far apart on the baking sheet so they spread outward rather than upward. Check the finger-press test before baking — if the indentation doesn’t spring back at all, the dough is over-proofed. For future batches, slightly reduce the second proof time, space the buns closer together on the sheet so they support each other’s rise, and ensure the flour was measured correctly using the spoon-and-level method rather than scooping.
Q: Can I make hamburger bun dough ahead of time? Yes — the dough can be made up to 24 hours in advance using a cold proof method. After the first knead, place the dough in an oiled bowl, cover tightly, and refrigerate overnight rather than proofing at room temperature. The cold slows the yeast activity and allows a long, slow fermentation that produces significantly more complex flavour than a quick room-temperature proof. The following day, remove the dough from the refrigerator and allow it to come to room temperature for 30–45 minutes before dividing, shaping, and completing the second proof as normal. Cold-proofed hamburger buns consistently taste better than same-day buns made from a room-temperature proof.
Q: What is the difference between bread flour and all-purpose flour in hamburger buns? Bread flour contains approximately 12–14% protein compared to all-purpose flour’s 10–12% — the higher protein content produces more gluten when the dough is kneaded, which creates a stronger, more elastic structure that holds its shape better during proofing and baking. The result is a bun with more chew, better height, and a more structured crumb than an all-purpose flour version. All-purpose flour produces a softer, more tender bun with less chew — closer to a commercial supermarket bun in texture. Both work well for hamburger buns and the choice depends on the style of bun you prefer — bread flour for a chewier, sturdier bun that holds up to wet fillings; all-purpose for a softer, more pillowy bun that compresses gently under a hand.