Chicken Breast Recipes Juicy, Flavour Packed & Ready in 30 Minutes
Chicken breast recipes are the backbone of weeknight cooking for good reason they’re fast, lean, affordable, and genuinely versatile enough to go in any flavour direction you want without any pushback from the ingredient itself. The challenge most people run into isn’t finding a recipe it’s consistently producing chicken breast that is juicy, well-seasoned, and actually worth eating rather than something dry and flavourless that gets pushed around the plate.
The difference between disappointing chicken breast and genuinely good chicken breast comes down to three things: proper seasoning, correct heat management, and not overcooking it. Get those three things right and every chicken breast recipe you make becomes reliable, repeatable, and something people ask for again. No complicated steps — just pure chicken breast recipe results, done right every time in under 30 minutes.
Ingredients
For the Chicken:
- 4 boneless, skinless chicken breasts [approximately 170–200g / 6–7 oz each]
- 2 tbsp olive oil
- 1 tsp fine salt
- 1 tsp black pepper, freshly ground
- 1 tsp garlic powder
- 1 tsp smoked paprika
- ½ tsp onion powder
- ½ tsp dried Italian seasoning [or dried oregano and thyme]
- ¼ tsp cayenne pepper [optional, adjust to heat preference]
For the Pan Sauce (Optional but Recommended):
- 3 cloves garlic, minced
- ½ cup low-sodium chicken broth
- 2 tbsp unsalted butter
- 1 tbsp fresh lemon juice
- 1 tsp Dijon mustard
- 1 tbsp fresh parsley or thyme, finely chopped
- Salt and black pepper, to taste
For Serving:
- Lemon wedges
- Fresh herbs — parsley, thyme, or rosemary
- Roasted vegetables, steamed rice, or a simple green salad
Optional Marinades (choose one for a different flavour direction):
- Honey Garlic: 2 tbsp honey, 3 cloves garlic minced, 1 tbsp soy sauce, 1 tbsp olive oil (optional)
- Lemon Herb: juice of 1 lemon, zest of 1 lemon, 2 tbsp olive oil, 1 tsp dried oregano, 2 cloves garlic (optional)
- Buffalo Style: 3 tbsp hot sauce, 1 tbsp melted butter, ½ tsp garlic powder, ½ tsp smoked paprika (optional)
- Balsamic Glaze: 2 tbsp balsamic vinegar, 1 tbsp olive oil, 1 tsp honey, 1 tsp Dijon mustard (optional)
Step-by-Step Instructions
Step 1: Gather and Prep Your Ingredients
Before any heat goes on, prep the chicken properly. Remove the breasts from the refrigerator 20–30 minutes before cooking — chicken breast that goes straight from a cold refrigerator into a hot pan cooks unevenly, with an overcooked exterior and an undercooked centre, because the temperature differential is simply too large to bridge in the short cooking time the cut requires. Pat each breast completely dry with paper towels — moisture on the surface of the chicken creates steam in the pan rather than a sear, and a seared surface is the single greatest contributor to flavour in any chicken breast recipe. If the breasts are uneven in thickness — thicker at one end, thin at the other — cover with plastic wrap and pound the thick end gently with a rolling pin or heavy pan until the whole breast is a uniform 1-inch thickness.
Pro Tip: Pound or butterfly thick chicken breasts to an even thickness before seasoning. An even thickness means the thinnest part and the thickest part reach the correct internal temperature simultaneously — 165°F (74°C) — rather than the thin end drying out completely while the thick end finishes cooking. This one step eliminates the most common cause of dry chicken breast across every cooking method.
Step 2: Season Generously and Rest
In a small bowl, mix together the salt, pepper, garlic powder, smoked paprika, onion powder, Italian seasoning, and cayenne. Drizzle the olive oil over each chicken breast and rub it across both sides to coat the surface completely — the oil helps the spice rub adhere and promotes even browning in the pan. Apply the spice mixture generously to both sides of each breast, pressing it gently into the surface rather than just dusting it on. Don’t be timid with the seasoning — chicken breast is a lean cut with a mild flavour that genuinely needs bold seasoning to taste of something other than protein. Let the seasoned chicken rest at room temperature for 10 minutes while the pan heats — the seasoning begins to penetrate the surface and the chicken edges slightly closer to room temperature during this window.
Pro Tip: Season the chicken the night before and leave it uncovered on a plate in the refrigerator overnight if you have the time. The dry rub draws out a small amount of surface moisture which is then reabsorbed into the meat along with the seasoning — this is called a dry brine and it produces measurably juicier, more deeply flavoured chicken breast than seasoning immediately before cooking.
Step 3: Sear the Chicken Breast
Heat a large, heavy skillet — cast iron is ideal, stainless steel is the second choice — over medium-high heat for 2–3 minutes until the pan is properly hot. Add 1 tablespoon of olive oil and let it shimmer before the chicken goes in. Place the seasoned chicken breasts smooth-side down in the pan — do not move them, shake the pan, or press them down with a spatula. Cook undisturbed for 5–7 minutes depending on thickness. The chicken will release from the pan naturally when the sear is complete and the crust has formed — if it sticks when you try to move it, it is not ready. A properly seared chicken breast releases cleanly on its own. When it releases, the cooked surface should be a deep, uniform golden-brown with visible caramelisation across the entire surface.
Pro Tip: Resist the urge to move the chicken. Every time you lift or shift a chicken breast during the sear, you interrupt the Maillard reaction building at the contact surface and extend the time needed to develop a proper crust. Put it in, walk away, and trust the process. The only thing you need to do during this stage is listen — a consistent sizzle means the pan is at the right temperature. A loud spattering means it’s too hot. Silence means it’s too cool.
📖 Read More: bang bang chicken
Step 4: Flip, Finish, and Check Temperature
Flip each chicken breast once — one flip only — and reduce the heat to medium. Cook the second side for 4–6 minutes until the chicken is cooked through. The most reliable way to check doneness is an instant-read thermometer inserted into the thickest part of the breast — pull it off the heat at 160°F (71°C) and let carry-over cooking bring it to the safe 165°F (74°C) during the rest period. If you don’t have a thermometer, press the thickest part of the breast firmly with a finger — it should feel firm and spring back, not soft and yielding. A soft centre means raw; a very hard, unyielding centre means overcooked. Firm with a slight give is the target. Transfer the cooked chicken breasts to a cutting board or warm plate immediately.
Pro Tip: An instant-read thermometer is the single most valuable piece of kitchen equipment for anyone who cooks chicken breast regularly. It removes all guesswork from the process and eliminates both undercooking and overcooking in a way that no visual or tactile test can fully replicate. They cost under $15 and pay for themselves in saved meals within the first week of use.
Step 5: Rest the Chicken — Do Not Skip This
Cover the cooked chicken breasts loosely with foil and let them rest on the cutting board for a full 5 minutes before cutting. This is the step that separates juicy chicken breast from dry chicken breast, and it is skipped more consistently than any other instruction in cooking. During resting, the muscle fibres that contracted under heat begin to relax, and the juices that were driven toward the centre of the breast by the heat redistribute evenly throughout the whole piece. Cut into a chicken breast recipe too early and those juices pour out onto the cutting board — the chicken is dry before a single bite is taken. Rest it fully and every slice remains moist and well-flavoured from edge to centre.
Pro Tip: Rest time is proportional to cooking time. A pan-seared chicken breast needs 5 minutes minimum. A larger roasted breast or a butterflied piece cooked on a grill needs 7–8 minutes. The general rule is 1 minute of rest for every 100g of cooked protein — it is not excessive and it is never a waste of time.
Step 6: Make the Pan Sauce, Slice, and Serve
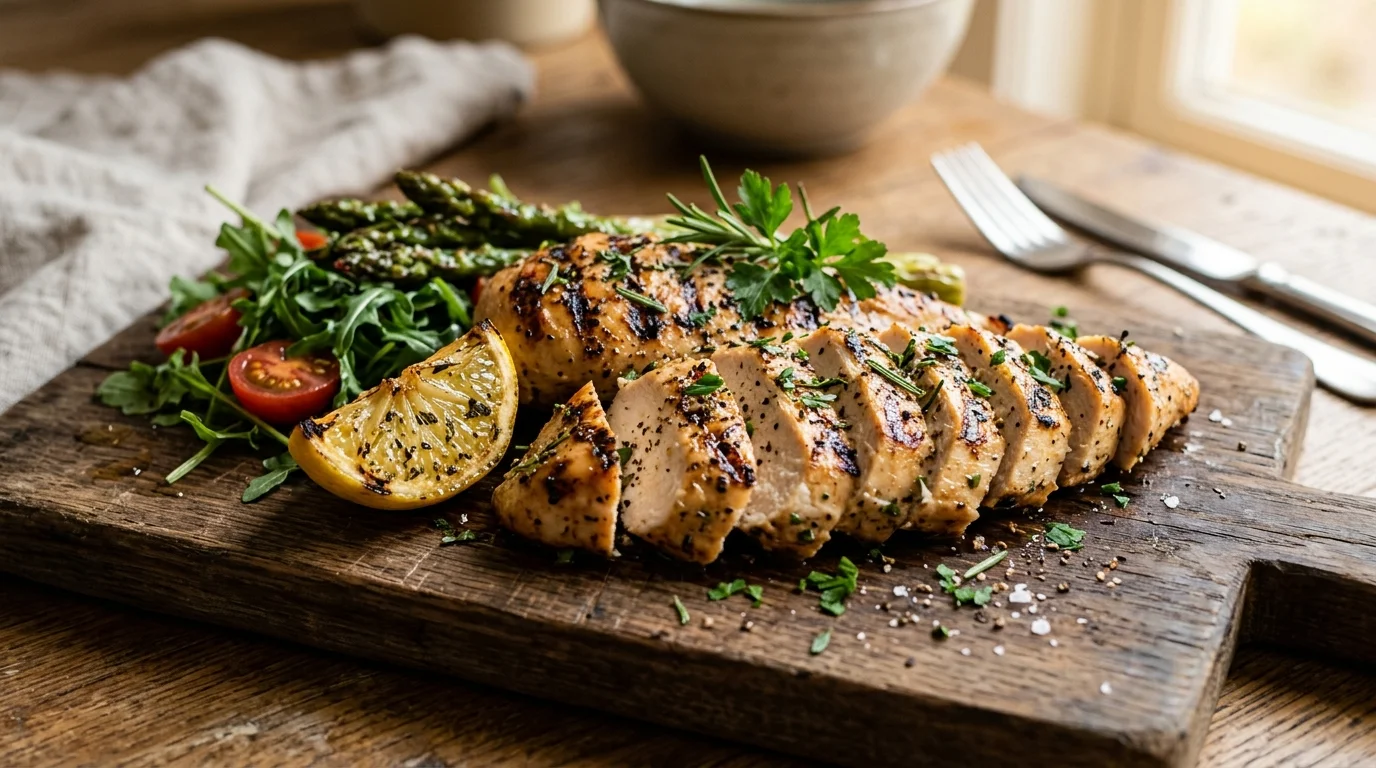
While the chicken rests, make the quick pan sauce in the same skillet over medium heat. Add the minced garlic to the remaining fat in the pan and stir for 30 seconds until fragrant. Pour in the chicken broth and scrape up every caramelised bit from the bottom of the pan — those bits are concentrated flavour that define the character of the sauce. Add the Dijon mustard and lemon juice and stir to combine. Let the sauce simmer for 2–3 minutes until slightly reduced. Remove from the heat and swirl in the cold butter one tablespoon at a time until fully melted and the sauce looks glossy and emulsified. Taste and adjust salt and pepper. Slice the rested chicken breast against the grain — the direction perpendicular to the muscle fibres — into even slices and arrange on plates. Spoon the pan sauce generously over the top, scatter fresh herbs, and serve immediately with lemon wedges on the side.
Pro Tip: Always slice chicken breast against the grain. Slicing with the grain produces long, chewy muscle fibres that require significant effort to chew through. Slicing against the grain cuts those fibres short, which produces a noticeably more tender result from the exact same piece of meat. Look at the surface of the breast before cutting — the grain runs lengthwise along most chicken breasts, so your knife should move perpendicular to that direction.
Cook Time
Total Time: 30 minutes | Prep: 10 minutes | Rest (before cooking): 10 minutes | Cook: 12–14 minutes | Rest (after cooking): 5 minutes One skillet — perfectly cooked chicken breast recipes on the table in 30 minutes.
Servings
Serves 4 — one chicken breast per person with pan sauce.
Nutritional Information (approx. per serving — chicken breast with pan sauce, no sides)
| Nutrient | Amount |
|---|---|
| Calories | 340 kcal |
| Fat | 18g |
| Saturated Fat | 7g |
| Carbohydrates | 4g |
| Protein | 40g |
| Sugar | 1g |
| Fiber | 0g |
| Sodium | 520mg |
| Vitamin C | 6mg |
| Potassium | 620mg |
| Calcium | 30mg |
Values are approximate and will vary based on ingredients used.
Storage Instructions
Cooked chicken breast stores better than most people give it credit for, provided it’s handled correctly from the moment it leaves the pan. Let the chicken cool to room temperature — no more than 30 minutes — before transferring to an airtight container. Refrigerate for up to 4 days. The pan sauce stores separately in a small sealed container for up to 3 days and reheats beautifully in a small saucepan over low heat with a splash of broth to loosen it. For reheating the chicken itself, the single most important rule is low and slow — high heat drives out the remaining moisture in already-cooked chicken breast and produces a dry, rubbery result. Slice the chicken before reheating where possible, as thin slices reheat more gently and evenly than a whole breast. Warm sliced chicken in a covered skillet over medium-low heat with a splash of chicken broth or water for 2–3 minutes, or microwave individual portions loosely covered with a damp paper towel in 30-second intervals until just warmed through — not hot. For meal prep, cooked and sliced chicken breast is one of the most versatile refrigerator ingredients available. It goes into salads, wraps, pasta, grain bowls, soups, and sandwiches throughout the week without any additional cooking required. For freezing, raw chicken breasts freeze for up to 3 months — seal individually in zip-lock bags with as much air removed as possible and thaw overnight in the refrigerator. Cooked chicken breast can also be frozen for up to 2 months — slice before freezing, separate slices with parchment paper, and thaw in the refrigerator before gently reheating. Never refreeze chicken that has already been thawed once.
📖 Read More: Buffalo Chicken Dip
Suggestions
- Honey Garlic Chicken Breast: Whisk together 2 tablespoons of honey, 3 minced garlic cloves, 1 tablespoon of soy sauce, and 1 tablespoon of olive oil. Marinate the chicken for at least 30 minutes or up to 24 hours in the refrigerator before searing. In the final 2 minutes of cooking, pour the remaining marinade into the pan and let it caramelise around the chicken — it thickens quickly into a sticky, golden glaze that coats every surface. This is one of the most universally loved chicken breast recipes and works over steamed rice, in wraps, or sliced cold over a salad the next day.
- Lemon Herb Baked Chicken Breast: Place seasoned chicken breasts in a baking dish, drizzle with olive oil, squeeze over the juice of one full lemon, scatter fresh thyme and rosemary across the top, and bake at 400°F (200°C) for 22–25 minutes until the internal temperature reaches 165°F. This version requires zero stovetop time and produces tender, herb-scented chicken with a golden exterior that works as well for a family dinner as it does for meal prep. The lemon juice bastes the chicken from below as it bakes and keeps the breast moist throughout.
- Stuffed Chicken Breast: Butterfly each breast by cutting horizontally through the thickest part without cutting all the way through, opening it like a book. Fill the interior with a mixture of softened cream cheese, baby spinach, sun-dried tomatoes, and shredded mozzarella. Press the edges closed and secure with toothpicks. Sear in an ovenproof skillet for 3 minutes per side, then transfer to a 375°F oven for 18–20 minutes until cooked through. This version of chicken breast recipes looks significantly more elaborate than the effort involved and works well as a dinner party main.
- Grilled Chicken Breast: Marinate the chicken in the lemon herb or balsamic glaze marinade for at least 1 hour. Preheat the grill to medium-high and oil the grates thoroughly. Grill for 6–7 minutes per side without moving until the chicken releases cleanly from the grill surface and the internal temperature reads 165°F. Let it rest 5 minutes before slicing. Grilled chicken breast has a smoky, charred edge that pan-searing cannot fully replicate — it’s the summer version of this recipe and pairs particularly well with a fresh corn salad or a simple green salad with vinaigrette.
- Crispy Parmesan Crusted Chicken Breast: Set up a breading station with seasoned flour, beaten egg, and a mixture of fine breadcrumbs and freshly grated Parmesan in equal parts. Dredge each breast in flour, then egg, then the Parmesan breadcrumb mixture, pressing the crust on firmly. Pan-fry in ½ inch of neutral oil over medium heat for 5–6 minutes per side until golden and cooked through. The Parmesan crust creates a salty, deeply savoury shell around the chicken that stays crispy even after resting, and it pairs exceptionally well with a simple marinara for dipping or a dressed arugula salad alongside.
- Buffalo Style Chicken Breast: Toss the seared and rested chicken breasts in a mixture of 3 tablespoons of hot sauce and 1 tablespoon of melted butter while still warm, coating every surface. The butter-hot sauce combination clings to the seared exterior and delivers that signature buffalo tang without overwhelming the chicken itself. Serve sliced over a blue cheese dressed salad, in a wrap with shredded lettuce and celery, or as a topping for a grain bowl. This version of chicken breast recipes is equally good eaten warm or cold the following day.
- One-Pan Chicken Breast With Vegetables: After searing the chicken on both sides and removing it to rest, add diced zucchini, halved cherry tomatoes, sliced bell pepper, and whole garlic cloves to the same pan. Season with salt, pepper, and Italian herbs and cook for 4–5 minutes until just tender. Return the chicken to the pan on top of the vegetables, cover with a lid, and cook over medium-low heat for a further 5 minutes to finish cooking the chicken gently through the steam. Everything comes out of one pan, the vegetables absorb the chicken fat and caramelised bits from the sear, and the whole dinner is on the table in under 35 minutes with minimal cleanup.
- Weight-Loss Friendly Chicken Breast: Use the base recipe exactly as written — chicken breast is already one of the leanest protein sources available with under 165 calories per 170g serving of plain cooked meat. For a lower-calorie full meal, skip the pan sauce butter and replace it with a tablespoon of olive oil and extra lemon juice, serve over a large dressed salad instead of rice or roasted vegetables, and use the lemon herb marinade which adds negligible calories but significant flavour. A properly cooked chicken breast recipe needs no compromise on seasoning or technique to fit a weight-conscious meal plan — only the sides and finishing fat need adjusting.
Seasonal Relevance
Chicken breast recipes are genuinely year-round, but the preparation that feels most appropriate shifts with the season. From May through September, grilled chicken breast is the default — cooking outdoors, fresh herb marinades at their most fragrant, and lighter sides like corn salad and fresh tomatoes make the whole dish feel seasonally right. Summer is also when fresh lemon, basil, and garden herbs are at their most vibrant, which makes the lemon herb and honey garlic versions particularly good during these months. From October through February, the oven-baked and one-pan versions come into their own — the oven provides warmth, the heavier sides like roasted root vegetables and mashed potato suit the season’s appetite, and the pan sauce with butter and Dijon feels appropriately rich for cold-weather eating. Stuffed chicken breast is a year-round option but tends to appear most naturally at autumn and winter dinner tables where a more elaborate presentation is appropriate for the slower pace of the season. Spring, March through May, is when the transition back to lighter preparations begins — fresh herb crusts, lemon-forward sauces, and the first outdoor grilling sessions of the year make chicken breast the natural protein choice as the weather warms and the produce quality begins to recover from winter.
Conclusion
Chicken breast recipes earn their place in the permanent weekly rotation because the ingredient itself is fast, affordable, lean, and adaptable to more flavour directions than almost any other protein available. The technique is learnable in a single cook — proper seasoning, a hot pan, one flip, the correct internal temperature, and a full rest before cutting. Once those fundamentals are locked in, every chicken breast recipe you attempt becomes reliable and repeatable rather than inconsistent. Work through the variations in the suggestions — the honey garlic glaze, the Parmesan crust, the stuffed version — and build a repertoire of chicken breast recipes that covers every occasion, every mood, and every season. Every version starts from the same disciplined foundation, and every version delivers something worth cooking again.
FAQs
Q: How do I stop chicken breast from drying out every time I cook it? Dry chicken breast comes from one or more of three causes — cooking from cold rather than room temperature, cooking at too high a heat for too long, or cutting into it before it has rested. Bring the chicken to room temperature before cooking, use a thermometer to pull it off the heat at 160°F rather than guessing by time alone, and rest it for a full 5 minutes loosely covered with foil before cutting. These three adjustments address every structural cause of dry chicken breast and work across every cooking method — pan, oven, and grill.
Q: What internal temperature should chicken breast reach? The USDA safe minimum for chicken breast is 165°F (74°C) measured at the thickest part of the meat. For the juiciest result, pull the chicken off the heat at 160°F (71°C) and cover loosely with foil — carry-over cooking from residual heat brings it to the safe temperature during the 5-minute rest period without continuing to cook and dry out the exterior. An instant-read thermometer inserted into the thickest part of the breast is the only fully reliable method — colour, firmness, and timing are all useful indicators but none of them are as precise as a temperature reading.
Q: Can I use chicken thighs instead of chicken breast in these recipes? Yes — and in most of these recipes, chicken thighs are actually the more forgiving option. Thighs have a higher fat content that keeps them moist through a wider range of internal temperatures, which means they’re harder to overcook accidentally. They take slightly longer to cook than breast — add 3–5 minutes to the total cooking time — and benefit from the same seasoning and searing technique described in this recipe. The flavour is richer and more pronounced than breast, which suits the honey garlic, buffalo, and one-pan variations particularly well. Use boneless, skinless thighs as the most direct substitute in any chicken breast recipe from this list.