Pancakes From Scratch Fluffy, Golden & Ready in 20 Minutes
Pancakes from scratch are one of those things that sound like more effort than they actually are. The reality is a bowl, a whisk, and ten minutes of cooking that produces something so far ahead of any boxed mix that you will never reach for the packet again.
The difference is in the batter made from real ingredients with no fillers, stabilisers, or artificial flavour and in understanding the two or three small technique details that turn flat, rubbery pancakes into tall, cloud-soft ones with golden edges and a tender crumb that holds butter and syrup without collapsing. Whether it’s a slow Saturday morning, a birthday breakfast, or just a Tuesday where the week needs a better start, pancakes from scratch deliver every time. No complicated steps — just pure homemade pancake perfection, on the table in 20 minutes.
Ingredients
For the Pancake Batter (makes 10–12 medium pancakes):
- 2 cups (240g) all-purpose flour
- 2 tbsp granulated sugar
- 2 tsp baking powder
- ½ tsp baking soda
- ½ tsp fine salt
- 2 large eggs, room temperature
- 1 ¾ cups buttermilk [or whole milk with 1 tbsp white vinegar — see pro tip]
- 3 tbsp unsalted butter, melted and slightly cooled [plus more for the pan]
- 1 tsp pure vanilla extract
Optional Mix-Ins:
- 1 cup fresh or frozen blueberries (optional)
- ½ cup chocolate chips (optional)
- 1 tsp cinnamon or nutmeg for a spiced batter (optional)
- 1 tsp lemon zest for a citrus note (optional)
- ½ cup diced fresh strawberries (optional)
For Serving:
- Pure maple syrup
- Unsalted butter, softened
- Fresh berries or sliced fruit (optional)
- Powdered sugar, for dusting (optional)
- Whipped cream (optional)
Step-by-Step Instructions
Step 1: Gather and Prep Your Ingredients
Pull everything out and bring the eggs and buttermilk to room temperature — this takes about 15 minutes and matters more than most people realise. Cold eggs and cold buttermilk mixed into melted butter cause the fat to seize into small solid lumps that never fully incorporate, which produces uneven batter and tough spots in the finished pancake. Measure every dry ingredient separately before mixing anything — baking powder, baking soda, salt, and sugar all need to be evenly distributed through the flour before any liquid touches them. Melt the butter and set it aside to cool slightly so it doesn’t scramble the eggs when combined.
Pro Tip: If you don’t have buttermilk, make a quick substitute in 60 seconds — pour 1 tablespoon of white vinegar or fresh lemon juice into a measuring cup, then fill to the 1 ¾ cup line with whole milk. Stir briefly and let it sit for 5 minutes until it curdles slightly. This homemade buttermilk works identically to store-bought in pancake batter and produces the same lift and tang in the finished pancake.
Step 2: Mix the Dry Ingredients
In a large mixing bowl, whisk together the all-purpose flour, sugar, baking powder, baking soda, and salt. Whisk for a full 20–30 seconds rather than just stirring — this aerates the flour mixture, distributes the leavening agents evenly throughout, and breaks up any small lumps of baking powder or soda that would otherwise sit in isolated pockets and create uneven rise. Creating a well in the centre of the dry ingredients before adding the wet mixture helps the two combine with less total mixing, which is critical for keeping the pancakes tender rather than tough.
Pro Tip: Measure flour correctly by spooning it into the measuring cup and levelling off with a straight edge rather than scooping directly from the bag. Scooping compacts the flour by up to 30%, which means your batter ends up with significantly more flour than the recipe intends and the pancakes come out dense and dry. Spoon and level every single time for consistent results.
Step 3: Combine the Wet Ingredients and Make the Batter
In a separate medium bowl, whisk together the eggs, buttermilk, melted butter, and vanilla extract until smooth and fully combined. Pour the wet ingredients into the well in the centre of the dry ingredients. Using a fork or spatula, stir with broad strokes from the centre outward — stop the moment the batter just comes together. It will look lumpy, streaky, and slightly uneven, and that is exactly correct. Overmixed pancake batter develops gluten in the flour, which produces pancakes that are rubbery, flat, and dense rather than tall and tender. Lumps in the batter hydrate and disappear during the rest period — they are not a problem and should not be mixed out.
Pro Tip: Let the batter rest for 5 minutes after mixing before it goes anywhere near the pan. This rest period allows the baking powder and baking soda to begin reacting with the buttermilk, which starts building the air bubbles that create the fluffy interior. It also allows the flour to fully hydrate, which smooths the batter slightly without any additional mixing. Do not stir the batter again after this rest — those air bubbles are what you want to keep intact.
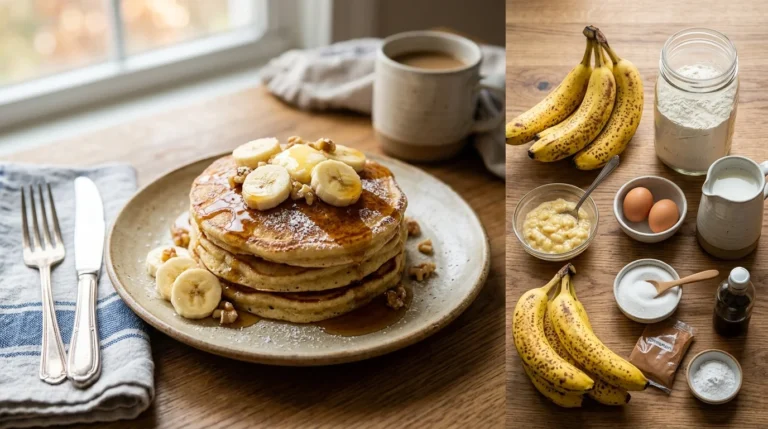
📖 Read More: Banana Pancakes
Step 4: Heat the Pan and Cook the First Pancake
Heat a large non-stick skillet or griddle over medium heat for 2–3 minutes until evenly warmed throughout. Add a small knob of butter — about ½ teaspoon — and let it melt and foam, then subside. The moment the foaming stops, the pan is at the right temperature. Pour approximately ¼ cup of batter per pancake onto the pan — use a ladle or measuring cup for consistency. Do not spread or smooth the batter after it lands; let it settle naturally. Cook undisturbed for 2–3 minutes until bubbles form across the entire surface of the pancake, the edges look set and matte rather than shiny and wet, and the underside is deep golden when you lift a corner to check.
Pro Tip: Cook one test pancake before committing to the full batch. The first pancake is almost always used to calibrate the pan temperature — if it browns too fast, reduce the heat; if it takes more than 3 minutes to show bubbles, increase it slightly. The test pancake tells you everything you need to know about how the remaining batch will perform before a single one goes to waste.
Step 5: Flip Once and Finish
Slide a wide, thin spatula fully under the pancake in one smooth motion and flip confidently — hesitant flipping leads to folded edges and batter splashing onto the pan surface. Cook the second side for 1–1.5 minutes until the underside is golden and the pancake has puffed noticeably through the centre. The second side always cooks faster than the first, so don’t walk away. Press the centre of the pancake gently with the spatula — it should spring back immediately, which means it’s cooked through. A pancake that leaves an indentation when pressed needs another 30–45 seconds. Transfer to a wire rack or oven-safe plate rather than stacking them directly — stacking traps steam between layers and softens the bottom pancake.
Pro Tip: Never press down on a pancake from scratch with the spatula while it’s cooking — this is the most common pancake mistake and the one most people don’t know they’re making. Pressing forces the air bubbles out of the batter that were built up during the rest period and are responsible for the fluffy interior. A pressed pancake is a flat pancake, every time without exception.
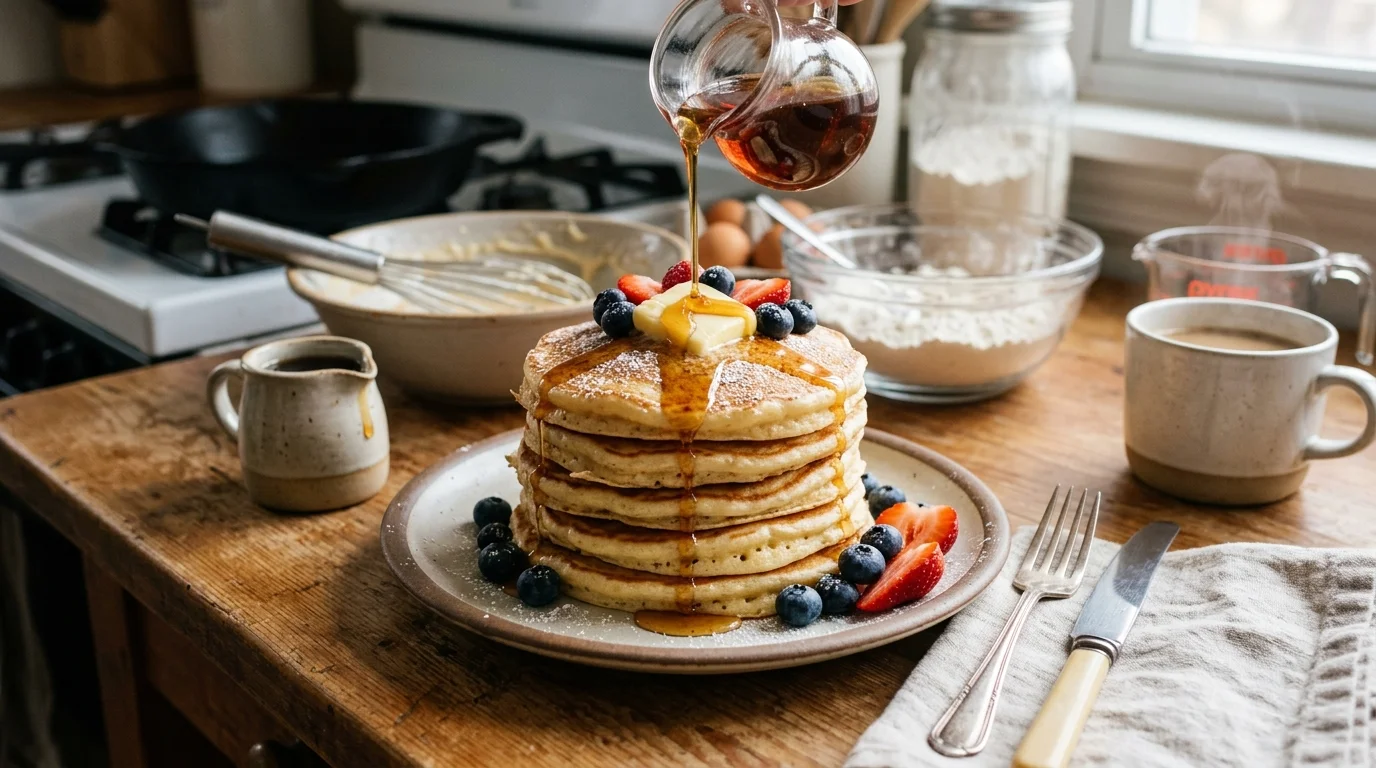
Step 6: Keep Warm, Plate, and Serve
Keep finished pancakes warm by placing them in a single layer on a wire rack set over a baking sheet in a 200°F oven. This holds them at serving temperature without trapping steam the way a covered plate does, and keeps the exterior slightly crisp at the edges rather than softening the whole pancake as it waits. Once the full batch is cooked, stack three to four pancakes from scratch per plate and serve immediately with softened butter placed between each layer so it melts down through the stack as it sits, pure maple syrup warmed briefly in a small saucepan, and any fresh fruit or dusted powdered sugar you’re serving alongside. Pancakes are at their absolute best the moment butter hits the top of a warm stack and begins to melt.
Pro Tip: Warm the maple syrup before serving — pour it into a small saucepan and heat over low for 2 minutes, or microwave in a heatproof jug for 30 seconds. Warm syrup pours more evenly, soaks into the pancake layers faster, and stays fluid on the plate rather than pooling thickly at the base of the stack. It’s a small step that makes a noticeable difference to the eating experience.
Cook Time
Total Time: 20 minutes | Prep: 8 minutes | Rest: 5 minutes | Cook: 12–15 minutes One bowl, one pan — a full stack of pancakes from scratch on the table in 20 minutes.
Servings
Makes 10–12 medium pancakes — serves 3 to 4.
Nutritional Information (approx. per serving — 3 pancakes, no toppings)
| Nutrient | Amount |
|---|---|
| Calories | 380 kcal |
| Fat | 12g |
| Saturated Fat | 7g |
| Carbohydrates | 56g |
| Protein | 11g |
| Sugar | 9g |
| Fiber | 1g |
| Sodium | 480mg |
| Vitamin C | 0mg |
| Potassium | 240mg |
| Calcium | 180mg |
Values are approximate and will vary based on ingredients used.
Storage Instructions
Pancakes from scratch store and reheat far better than most people expect, which makes them worth making in a larger batch than you need on the day. Let the cooked pancakes cool completely on a wire rack before storing — stacking warm pancakes traps steam between each layer and makes them soggy by the time they’re refrigerated. Once cool, stack them with a small square of parchment paper between each pancake to prevent sticking, place the stack in an airtight container or zip-lock bag, and refrigerate for up to 4 days. To reheat individual pancakes, place them directly in a dry non-stick pan over medium heat for 60–90 seconds per side until warmed through and slightly re-crisped at the edges — this method restores the texture far better than any other reheating approach. The toaster works well too for a quick single-pancake reheat — one or two cycles on a medium setting produces a pancake that’s warm throughout and slightly toasted on the surface, which is genuinely better than a microwaved version. Avoid microwaving where possible; it produces soft, slightly rubbery pancakes that lose the structural quality of the original. For freezing, pancakes from scratch are excellent candidates — freeze the cooled, parchment-separated stack in a sealed freezer bag for up to 2 months. Reheat directly from frozen in the toaster for 2–3 cycles or in a 350°F oven on a wire rack for 8–10 minutes. The batter itself does not freeze well once mixed — the leavening agents lose their potency after freezing and the pancakes won’t rise properly when cooked from frozen batter. Always freeze the cooked pancakes, not the raw batter.
Suggestions
- Blueberry Pancakes From Scratch: Fold 1 cup of fresh or frozen blueberries gently into the finished batter just before cooking — do not stir them in during the initial mixing, as the juice bleeds into the batter and turns it grey. Frozen blueberries work particularly well because they hold their shape slightly longer during cooking, which means they burst with juice on the plate rather than dispersing throughout the batter. Add a teaspoon of lemon zest to the batter to complement the berry flavour.
- Chocolate Chip Pancakes: Scatter a small handful of mini chocolate chips directly onto the poured batter in the pan rather than folding them into the batter in the bowl — this gives you control over distribution and prevents the chips from sinking to the bottom of the bowl and clumping in the first few pancakes. Mini chips melt more evenly and distribute more consistently than standard-size chips across a small pancake surface.
- Buttermilk Protein Pancakes: Replace ¼ cup of the all-purpose flour with unflavoured whey or plant-based protein powder and add an extra egg white to the wet ingredients. The extra egg white adds structure to compensate for the reduced flour, while the protein powder increases the protein content per serving without significantly affecting the flavour or texture of the finished pancake. These are the pancakes worth making on training days — genuinely filling and nutritionally balanced.
- Dairy-Free Pancakes From Scratch: Replace the buttermilk with full-fat oat milk mixed with 1 tablespoon of apple cider vinegar — let it sit for 5 minutes to curdle before using. Replace the melted butter with refined coconut oil or a good quality dairy-free butter alternative. The pancakes rise and cook identically to the original version, and the oat milk adds a subtle sweetness to the batter that makes them particularly good with fresh fruit and maple syrup.
- Cinnamon Spice Pancakes: Add 1 teaspoon of ground cinnamon, ¼ teaspoon of ground nutmeg, and ¼ teaspoon of ground ginger to the dry ingredients before mixing. Stir 1 tablespoon of brown sugar into the batter in place of the standard granulated sugar for a slight molasses depth that complements the spices beautifully. Serve with warm maple syrup, a dusting of cinnamon sugar, and a spoonful of Greek yogurt instead of whipped cream for a slightly lighter finish.
- Lemon Ricotta Pancakes: Replace ½ cup of the buttermilk with ½ cup of whole milk ricotta and add the zest of one full lemon to the wet ingredients. Ricotta pancakes are noticeably fluffier and richer than standard pancakes from scratch — the cheese adds moisture and fat that produces an exceptionally tender crumb with a slight tang that pairs beautifully with fresh raspberries and powdered sugar rather than maple syrup.
- Kid-Friendly Shaped Pancakes: Use a squeeze bottle or a piping bag filled with batter to draw letters, numbers, animals, or simple shapes directly onto the lightly buttered pan before filling in with additional batter. Let the outline set for 30 seconds before pouring the fill batter over the top — the outline darkens slightly faster than the fill batter, giving the finished pancake a visible, raised design when flipped. The same batter recipe works perfectly for this; no adjustments needed beyond the delivery method.
- Weight-Loss Friendly Pancakes From Scratch: Replace half the all-purpose flour with whole wheat flour for more fibre and a lower glycaemic impact. Reduce the butter to 1 tablespoon and replace the remaining fat with 2 tablespoons of unsweetened applesauce, which adds moisture without the same calorie density as butter. Use a light spray of cooking oil instead of butter on the pan. Serve with fresh berries and a tablespoon of pure maple syrup rather than a generous pour — the berries add volume and natural sweetness that makes the reduced syrup feel sufficient.
Seasonal Relevance
Pancakes from scratch work in every season and at every time of year, but the toppings and mix-ins that make them feel most right shift with the calendar. From June through August, fresh blueberries, sliced peaches, and ripe strawberries are at their best and make the most vibrant, naturally sweet pancake toppings available — no syrup required when peak summer fruit goes directly onto a warm stack with a dusting of powdered sugar. In autumn, September through November, cinnamon spice batter with sliced caramelised apple and a drizzle of warm maple syrup is the pancake that fits the season perfectly — warming, deeply flavoured, and appropriate for the shift toward richer food that comes with cooler mornings. In winter, December through February, chocolate chip and lemon ricotta variations feel most at home — something indulgent and comforting on a cold morning when a slow breakfast is one of the few pleasures the season reliably offers. Spring, March through May, is when the fresh fruit returns in waves — first strawberries, then cherries, then blueberries — and the pancake from scratch recipe adapts to meet each one as it arrives. In all seasons, the base batter requires no adjustment at all — only what goes in and on top needs to respond to what’s available.
Conclusion
Pancakes from scratch prove that the gap between a good breakfast and a great one is smaller than most people think — a bowl, a whisk, ten ingredients, and the discipline not to overmix the batter or press down on the pancake while it cooks. Get those two things right and everything else falls into place. The batter is forgiving, the technique is learnable in a single batch, and the result is something genuinely worth getting out of bed for on any morning of the week. Make the classic version first and understand how the batter should look and feel before it hits the pan. Then work through the variations — the blueberry, the lemon ricotta, the cinnamon spice. Each one gives you a slightly different experience from the same reliable foundation, and every version is better than anything that ever came from a box.
FAQs
Q: Why are my pancakes from scratch flat instead of fluffy? Flat pancakes almost always come from one of three causes: overmixed batter, baking powder that has lost its potency, or batter that was cooked immediately without a rest period. Overmixing develops gluten and forces out the air bubbles that create rise. Old baking powder — test it by dropping a teaspoon into hot water and checking for vigorous bubbling — produces little to no leavening reaction in the batter. Skipping the 5-minute rest period means the baking powder hasn’t had time to begin reacting with the buttermilk before the batter hits the pan. Address all three and flat pancakes stop being a problem entirely.
Q: Can I make the pancake batter the night before? Yes — with one important adjustment. Mix the batter fully, cover the bowl tightly with plastic wrap, and refrigerate overnight. The baking soda will have largely spent its reaction by morning, so add an extra ¼ teaspoon of baking powder to the cold batter and stir gently once before cooking. The overnight rest actually improves the flavour of the finished pancake — the flour has more time to hydrate and the batter develops a slightly deeper, more complex taste than freshly mixed batter. Let it sit at room temperature for 10 minutes before cooking so it’s not stone cold when it hits the pan.
Q: Why does my first pancake always come out wrong? Because the first pancake is always a pan calibration tool, not a finished product. It tells you whether the heat is too high or too low, whether the butter is browning too fast, and whether the batter consistency is right. Professional cooks account for this — the first pancake goes to whoever is cooking, not to the plate. Adjust the heat based on what the first pancake tells you and every subsequent one will be better. This is not a failure of the recipe; it’s a normal part of the process that happens in every kitchen with every pancake batter.
Q: What’s the correct consistency for pancake batter from scratch? The batter should be thick enough to hold its shape when poured — it should spread slowly on the pan rather than running immediately to the edges — but thin enough to settle into a flat circle without help from a spatula. The visual benchmark is somewhere between a thick smoothie and a pourable yogurt. If the batter is too thick to spread at all, add buttermilk a tablespoon at a time until it loosens slightly. If it’s too thin and spreads immediately into a flat puddle, add flour a tablespoon at a time. Correct consistency produces a pancake that’s naturally round with slightly irregular, organic-looking edges rather than a perfect disc.
Q: Can I use self-raising flour instead of all-purpose flour and baking powder? Yes — replace the all-purpose flour with self-raising flour and omit the baking powder and baking soda entirely. Self-raising flour already contains a fixed amount of leavening, which works adequately for pancakes from scratch. The rise will be slightly less dramatic than the buttermilk and baking soda combination in this recipe, but the result is still a perfectly good pancake. Keep the salt in the recipe regardless, since self-raising flour’s sodium content varies by brand and is rarely sufficient to season a full batch of batter on its own.
Q: How do I know when to flip a pancake? Three signs indicate a pancake is ready to flip: bubbles have formed and broken across the entire surface of the batter, not just around the edges; the edges of the pancake look set and matte rather than shiny and wet; and when you lift the edge with a spatula, the underside is a deep golden colour. All three should be present simultaneously before flipping. Flipping on bubbles alone — before the edges are set — leads to batter spilling off the unset perimeter when the pancake is turned. Waiting for all three signals produces a pancake that holds its shape perfectly through the flip and finishes cooking evenly on the second side.
Q: Can I make pancakes from scratch without eggs? Yes — replace each egg with one of the following: ¼ cup of unsweetened applesauce, a flax egg (1 tablespoon of ground flaxseed mixed with 3 tablespoons of water and rested for 5 minutes until gel-like), or ¼ cup of mashed ripe banana, which also adds natural sweetness to the batter. The texture of egg-free pancakes is slightly denser and less structured than the standard version, but they cook and flip well and hold toppings without collapsing. The flax egg produces the most structurally similar result to a standard egg in terms of binding and lift.