
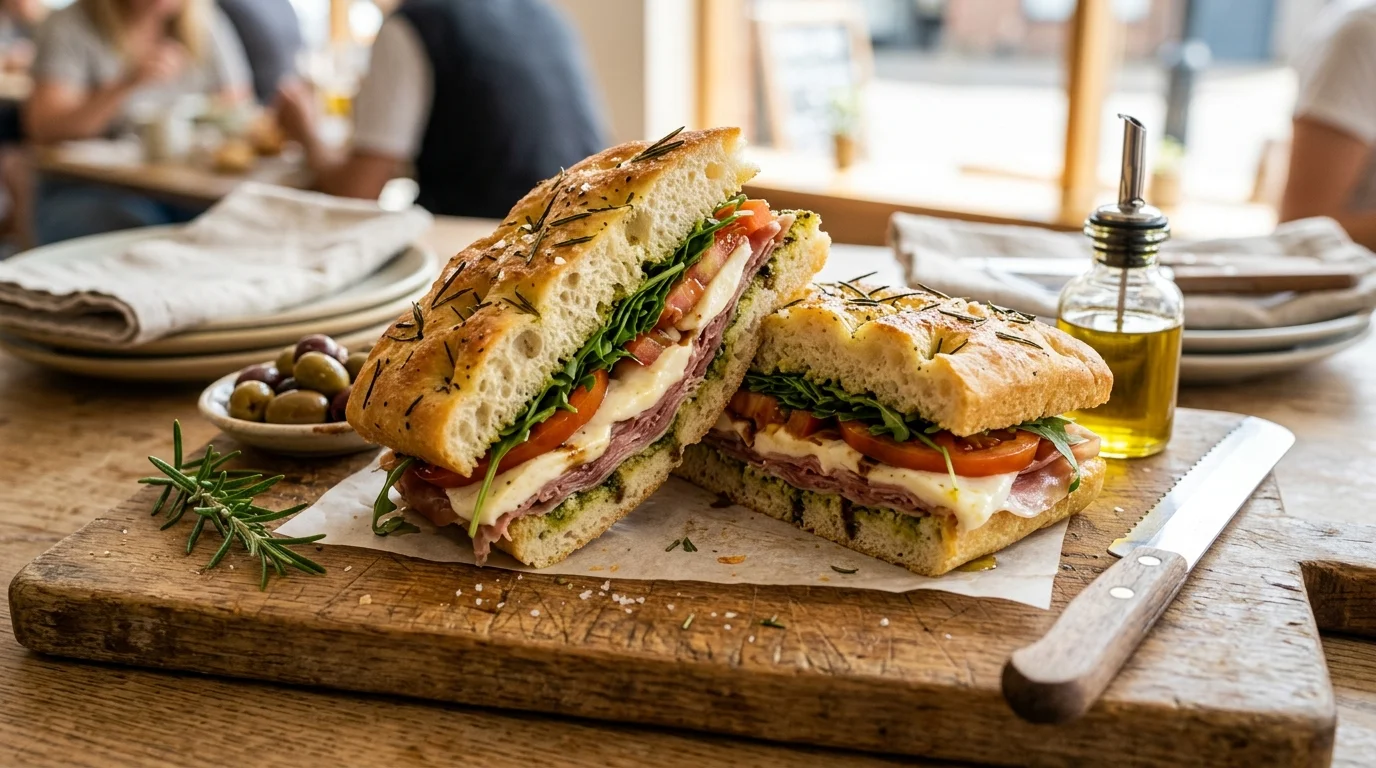
Focaccia Sandwich Ready in 20 Minutes
A focaccia sandwich is in a completely different league from anything you’d put between two slices of regular bread. The focaccia itself — golden, olive-oil-rich, dimpled crust on the outside and pillowy soft on the inside — does more for a sandwich than any standard loaf ever could. It holds up against wet fillings without going soggy, it toasts beautifully, and it brings its own flavour to every bite before a single ingredient gets layered on. Whether you’re building it for lunch, a weekend gathering, or a picnic that needs to travel well, a focaccia sandwich delivers on every count. No complicated steps — just pure focaccia sandwich satisfaction, stacked and ready to eat.
Ingredients
For the Focaccia Base (one 9×13 pan — makes 6 sandwiches):
- 4 cups (480g) all-purpose flour
- 2 ¼ tsp instant yeast (one standard packet)
- 1 ½ tsp fine salt
- 1 ¾ cups warm water (around 110°F / 43°C)
- 6 tbsp extra virgin olive oil, divided
- 1 tsp flaky sea salt, for topping
- 1 tsp dried rosemary or fresh rosemary sprigs [or Italian seasoning]
For the Classic Italian Focaccia Sandwich Filling:
- 200g (7 oz) thinly sliced prosciutto or salami
- 150g (5 oz) fresh mozzarella, sliced [or provolone]
- 1 cup baby arugula [or mixed greens]
- ½ cup roasted red peppers, drained and sliced
- ¼ cup sun-dried tomatoes, roughly chopped
- 2 tbsp good quality basil pesto
- 2 tbsp mayonnaise [or aioli]
- 1 tbsp balsamic glaze, for drizzling
- Salt and black pepper, to taste
Optional Add-Ins:
- ½ avocado, thinly sliced (optional)
- 4–6 slices crispy pancetta or bacon (optional)
- ¼ cup marinated artichoke hearts, drained (optional)
- 1 tsp chili flakes, for heat (optional)
- Fresh basil leaves, for layering (optional)
Step-by-Step Instructions
Step 1: Gather and Prep Your Ingredients
Start by pulling everything out and getting the focaccia dough going first — it needs time to rise, and the rest of the prep fits neatly into that window. Measure the flour, salt, and yeast into a large bowl. Slice your mozzarella, drain the roasted red peppers, chop the sun-dried tomatoes, and have your deli meats laid out and ready. If you’re using any optional add-ins, prep them now too. Having everything organised before the dough goes into the pan means the assembly stage moves quickly and cleanly without any scrambling mid-build.
Pro Tip: Check the temperature of your water before adding the yeast. Too cold and the yeast won’t activate; too hot and it kills the yeast entirely. Around 110°F feels like warm bath water on your wrist — not hot, not cool. An instant-read thermometer takes the guesswork out completely.
Step 2: Make and Proof the Focaccia Dough
In a large bowl, whisk the flour, salt, and instant yeast together. Pour in the warm water and 3 tablespoons of olive oil, then mix with a fork or your hands until a shaggy, sticky dough forms — don’t be tempted to add more flour, the stickiness is correct. Cover the bowl tightly with plastic wrap and let it rise at room temperature for 1–1.5 hours until doubled in size. Pour 2 tablespoons of olive oil into a 9×13-inch baking pan and spread it across the base. Tip the risen dough into the oiled pan and gently stretch it toward the edges — if it springs back, cover it and rest for 10 minutes before trying again.
Pro Tip: For an even better focaccia sandwich base, make the dough the night before and let it cold-proof in the refrigerator overnight. Slow fermentation builds significantly more flavour in the bread, and the dough is also easier to stretch cold. Pull it out 30 minutes before baking to take the chill off.
Step 3: Dimple, Top, and Bake the Focaccia
Preheat your oven to 425°F (220°C). Once the dough has relaxed and spread close to the pan edges, use your fingertips to press deep dimples all across the surface — this is the defining step of any focaccia, and it serves a purpose beyond aesthetics. The dimples hold pools of olive oil on the surface during baking, which creates the characteristic golden, slightly crispy top. Drizzle the remaining tablespoon of olive oil generously across the entire surface. Scatter flaky sea salt and rosemary over the top. Bake at 425°F for 20–23 minutes until deep golden across the top and pulling away from the sides of the pan.
Pro Tip: Don’t be shy with the olive oil. Focaccia that looks almost too oiled before it goes into the oven is exactly right. The oil is what creates the crispy, flavourful crust — under-oiled focaccia bakes pale and bland.
📖 Read More: Hamburger Meat Recipes
Step 4: Cool and Slice the Focaccia
Remove the baked focaccia from the oven and let it cool in the pan for 10 minutes before transferring to a wire rack. Don’t cut into it straight from the oven — the interior crumb needs a few minutes to set, and slicing too early compresses the airy structure you spent time building. Once the focaccia has cooled to warm rather than hot, slide it onto a cutting board. Using a long serrated knife, slice the entire sheet horizontally through the middle to create one large top half and one large bottom half. From there, cut into individual sandwich portions — roughly 4×5 inches each — or cut the whole sheet into six equal rectangles before splitting each one.
Pro Tip: A serrated bread knife with a long blade is non-negotiable here. A standard chef’s knife drags through soft focaccia and compresses the bread. One long, sawing motion with a serrated knife gives you a clean, even cut without flattening the loaf.
Step 5: Build the Spread and Layer the Fillings
Mix the mayonnaise and basil pesto together in a small bowl until smooth and well combined — this is your base spread, and it does the heavy lifting for flavour before a single filling goes down. Spread it generously across both cut faces of each focaccia portion. On the bottom half, layer the roasted red peppers first — they act as a moisture barrier between the bread and the wetter fillings. Follow with the prosciutto or salami, then the sliced mozzarella, sun-dried tomatoes, and any optional add-ins like avocado or artichoke hearts. The order of layering matters — heavier, drier ingredients first, more delicate ones on top.
Pro Tip: Season each layer lightly as you build. A small pinch of salt and crack of black pepper between the meat and cheese layer makes a measurable difference to the depth of the finished focaccia sandwich — not enough to taste distinctly, but enough to notice if it’s missing.
Step 6: Add Greens, Drizzle, Press, and Serve
Pile the baby arugula on top of the cheese layer — use more than you think you need, because it compresses significantly once the top is pressed down. Drizzle the balsamic glaze directly over the arugula and let it run slightly into the other layers. Press the top half of the focaccia down firmly with the palm of your hand to compact the sandwich slightly — this is the step that makes it stay together when you cut and eat it. Cut each portion cleanly with a serrated knife and serve immediately. If the focaccia sandwich is travelling or being plated ahead, wrap tightly in parchment paper and let it rest for 10 minutes — the light pressure improves the structure.
Pro Tip: For a pressed focaccia sandwich, wrap the assembled sandwich tightly in parchment paper and set a heavy pan or cutting board on top for 5–10 minutes. The brief pressing binds the layers together and makes every cross-section clean and photogenic when cut.
Cook Time
Total Time: 2 hours (including dough rise) | Active Prep: 20 minutes | Bake: 22 minutes | Rise Time: 60–90 minutes
Overnight cold proof option reduces morning prep to 30 minutes total.
Servings
Makes 6 generous focaccia sandwiches from one 9×13-inch baking pan.
Nutritional Information (approx. per serving)
| Nutrient | Amount |
|---|---|
| Calories | 580 kcal |
| Fat | 28g |
| Saturated Fat | 9g |
| Carbohydrates | 62g |
| Protein | 22g |
| Sugar | 4g |
| Fiber | 3g |
| Sodium | 860mg |
| Vitamin C | 12mg |
| Potassium | 310mg |
| Calcium | 190mg |
Values are approximate and will vary based on ingredients used.
Storage Instructions
A focaccia sandwich is best eaten within a few hours of assembly — the bread stays at its crispest and the greens hold their texture longest during this window. If you need to store assembled sandwiches, wrap each one individually in parchment paper followed by a layer of foil, and refrigerate for up to 24 hours. The focaccia will soften slightly in the fridge but remains entirely pleasant to eat cold or at room temperature. Avoid storing assembled sandwiches with arugula or fresh greens inside for longer than overnight — the greens wilt and release moisture that soaks into the bread. For longer storage, keep the components separate: store the baked, unassembled focaccia at room temperature wrapped in a clean kitchen towel for up to 2 days, or in an airtight bag for up to 3 days. The fillings — meats, cheese, roasted peppers — can be refrigerated separately for up to 4 days and assembled fresh to order. For freezing, the focaccia base freezes exceptionally well on its own. Slice it into individual sandwich-sized portions, wrap each piece tightly in plastic wrap and then foil, and freeze for up to 2 months. Thaw at room temperature for an hour, then warm briefly in a 350°F oven for 5 minutes to revive the crust before assembling and filling as fresh.
📖 Read More: Cheeseburger Soup
Suggestions
- Caprese Focaccia Sandwich: Layer thick slices of fresh mozzarella, ripe tomato, and whole fresh basil leaves on the pesto-spread base. Drizzle with extra virgin olive oil and balsamic glaze, then season with flaky salt and black pepper. This is the cleanest, most ingredient-forward version of the focaccia sandwich — it relies entirely on the quality of what goes inside, so use the best mozzarella and tomatoes you can find.
- Grilled Chicken Version: Replace the prosciutto with sliced grilled chicken breast marinated in lemon juice, garlic, and Italian herbs. Add roasted red peppers, provolone, and a generous spread of sun-dried tomato pesto on both sides. This version transforms the focaccia sandwich into a high-protein main that works equally well warm or cold, making it one of the most practical meal prep builds in this list.
- Vegetarian Build: Skip all the cured meats and double up on roasted vegetables instead — zucchini, eggplant, bell pepper, and red onion roasted until caramelised and slightly charred. Layer with burrata or fresh mozzarella, arugula, and a drizzle of good olive oil and balsamic. The roasted vegetables bring a depth and sweetness that makes this focaccia sandwich every bit as satisfying as the meat version.
- Dairy-Free Option: Use a dairy-free aioli or vegan mayonnaise as the base spread, skip the mozzarella entirely, and add a thick layer of hummus to one side of the bread for creaminess. Fill with roasted red peppers, sun-dried tomatoes, arugula, avocado, and marinated artichokes. The olive-oil-rich focaccia base is naturally dairy-free, so only the filling needs adjusting.
- Kid-Friendly Version: Keep the fillings simple and familiar — sliced turkey or mild ham, mild cheddar cheese, and thinly sliced cucumber on a light spread of butter or mild mayo. Skip the arugula (too bitter for young palates) and replace it with baby spinach or shredded lettuce. Cut into small squares after assembling so little ones can handle them easily. The soft, pillowy focaccia interior makes it one of the most approachable sandwich breads for children.
- Spicy Calabrian Build: Add 2 tablespoons of Calabrian chili spread directly into the pesto-mayo base and layer with spicy Italian soppressata, sharp provolone, pickled jalapeños, and roasted red peppers. The heat from the chilies works beautifully against the richness of the oil-soaked focaccia — bold, savoury, and deeply satisfying for anyone who likes their sandwiches with a serious kick.
- Breakfast Focaccia Sandwich: Swap the Italian fillings for scrambled eggs, crispy bacon or pancetta, sharp cheddar, and sliced avocado. Spread one side with a thin layer of hot sauce mayo and layer generously. The focaccia holds breakfast fillings far better than an English muffin or toast — its sturdiness means the sandwich stays together through the whole eating experience without collapsing.
- Weight-Loss Friendly Version: Use a thinner slice of focaccia — just the top crust layer rather than a full half — and fill generously with lean turkey, a single slice of part-skim mozzarella, a full cup of arugula, tomato, and roasted red peppers. Skip the balsamic glaze and replace the full-fat mayo with a light Greek yogurt-based spread mixed with lemon juice and herbs. The calorie count drops by over 200 per sandwich while the fillings remain genuinely satisfying.
Seasonal Relevance
Focaccia sandwiches work in every season, but the fillings that make them truly excellent shift throughout the year. From June through August, peak-season tomatoes, fresh basil, and ripe avocado are at their best — the classic Caprese-style focaccia sandwich needs nothing more than good produce and good olive oil to be outstanding.
In autumn, September through November, roasted squash, caramelised onion, and aged Gruyère make exceptional fillings that pair beautifully with the rosemary-topped focaccia base. Winter focaccia sandwiches, December through February, lean naturally toward richer, heartier builds — cured meats, sharp cheeses, and jarred roasted peppers from the pantry do the heavy lifting when fresh produce is limited. S
pring brings asparagus, peas, and fresh herbs back into season from March through May, all of which make excellent sandwich additions either raw or briefly roasted. The focaccia base itself can be baked year-round without any seasonal adjustment — it’s what you put inside that responds to the calendar.
Conclusion
A focaccia sandwich earns its reputation because the bread itself is genuinely half the dish. Get the focaccia right — properly dimpled, generously oiled, baked until deep golden — and every filling combination you try will work. The base recipe here gives you a reliable, flavourful loaf every time, and the variations take it in directions that suit every occasion, preference, and season.
Once you’ve made the focaccia from scratch once, you’ll understand why it spoils you for regular sandwich bread permanently. Build your first focaccia sandwich this week, try a different filling next time, and work your way through the suggestions. It only gets better with practice.
FAQs
Q: Can I use store-bought focaccia instead of making it from scratch?
Yes — a good quality bakery focaccia works well and cuts the total time down to under 20 minutes. Look for focaccia with a golden, oiled crust and a soft interior rather than a dense or dry loaf. Many grocery store delis and Italian bakeries carry it fresh. Avoid pre-packaged focaccia that’s been sitting for several days — it tends to be dry and doesn’t toast or press well. Homemade focaccia gives you control over flavour, thickness, and topping, but store-bought is a completely legitimate shortcut.
Q: How do I stop the focaccia sandwich from getting soggy?
The key is layering in the right order. Always put the roasted red peppers or any oily, wet ingredient directly on top of the spread — they act as a moisture barrier between the bread and the wetter fillings. Add greens last, just before closing the sandwich. If you’re making the sandwich ahead, keep the greens separate and add them at serving time. Toasting the cut face of the focaccia in a dry pan or oven for 3–4 minutes before assembling also creates a barrier that slows moisture absorption significantly.
Q: Can I make focaccia dough without a stand mixer?
Absolutely — the dough in this recipe requires no kneading and no mixer. It’s a high-hydration, no-knead dough that comes together with just a fork and a few minutes of stirring. The long rise time does the structural work that kneading would otherwise handle. This is one of the most beginner-friendly bread doughs you can make, precisely because it relies on time and hydration rather than technique or equipment.
Q: What cheese works best in a focaccia sandwich?
Fresh mozzarella is the classic choice — its mild, milky flavour and soft texture sit perfectly against the oily, savoury bread. Provolone is a firmer, slightly sharper alternative that melts beautifully if you’re warming the sandwich. Burrata is the most indulgent option — split it open and let it spread across the bread like a rich, creamy layer. For sharper flavour, aged Gruyère or sharp provolone work especially well in the autumn and winter builds where bolder flavours are welcome.
Q: Can I make focaccia sandwiches ahead for a party or picnic?
Yes — and they actually travel exceptionally well. Assemble the sandwiches without the fresh greens, wrap each one tightly in parchment paper, and refrigerate. Add the arugula or greens just before serving. If you’re bringing them to a picnic, wrap in parchment then foil to keep them compact and protected. The focaccia holds its structure well under light pressure, which makes it one of the best breads for sandwiches that need to be packed, stacked, and transported without falling apart.
Q: My focaccia came out dense and flat — what went wrong?
The two most common causes are water that was too hot (which kills the yeast) and not enough rise time. Make sure your water is warm but not hot — around 110°F — and give the dough a full hour to double in size before you move it to the pan. The second rise in the pan also matters; the dough should look noticeably puffy before it goes into the oven. A dense, flat focaccia almost always points back to yeast that didn’t activate properly or dough that wasn’t given enough time to proof.
Q: Is a focaccia sandwich suitable for a weight-loss diet?
With a few adjustments, yes. Use a thinner portion of focaccia and fill generously with lean protein and plenty of fresh vegetables to maximise volume and satiety without significantly increasing calories. Replace full-fat mayo with a yogurt-based spread, skip the cheese or use a small amount of part-skim mozzarella, and load up on arugula, tomato, and roasted peppers. The olive oil in the focaccia itself is a healthy fat — the calorie management is mainly in the portion size and the filling choices rather than the bread itself.