Starbucks Drink Frappuccino Recipe Thick, Creamy & Ready in 5 Minutes
A Starbucks Drink Frappuccino recipe made at home is one of the most satisfying copycat projects you can take on in a kitchen because the result is genuinely indistinguishable from the original and costs a fraction of what the menu charges per cup.
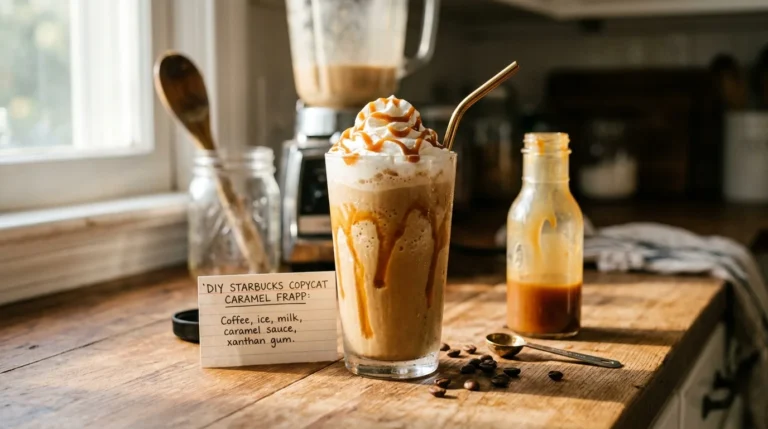
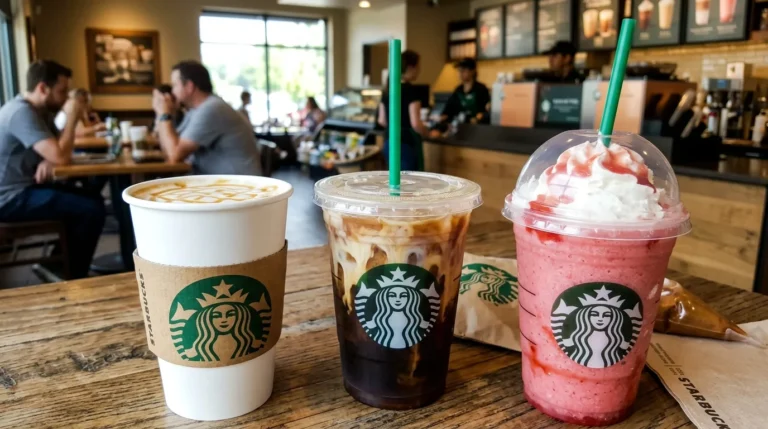
The Frappuccino formula is straightforward once you understand it: strong cold coffee, milk, sweetener, and ice blended into a thick, creamy base, then finished with whipped cream and whatever sauce or drizzle defines that particular flavour. That’s it. No proprietary blend, no secret ingredient, no equipment beyond a blender. Whether you’re making a classic Caramel Frappuccino, a Mocha, a Vanilla Bean, or a seasonal favourite, this Starbucks Frappuccino recipe gives you the base method that works for every variation. No complicated steps — just pure Frappuccino perfection, cold and ready in 5 minutes.
Ingredients
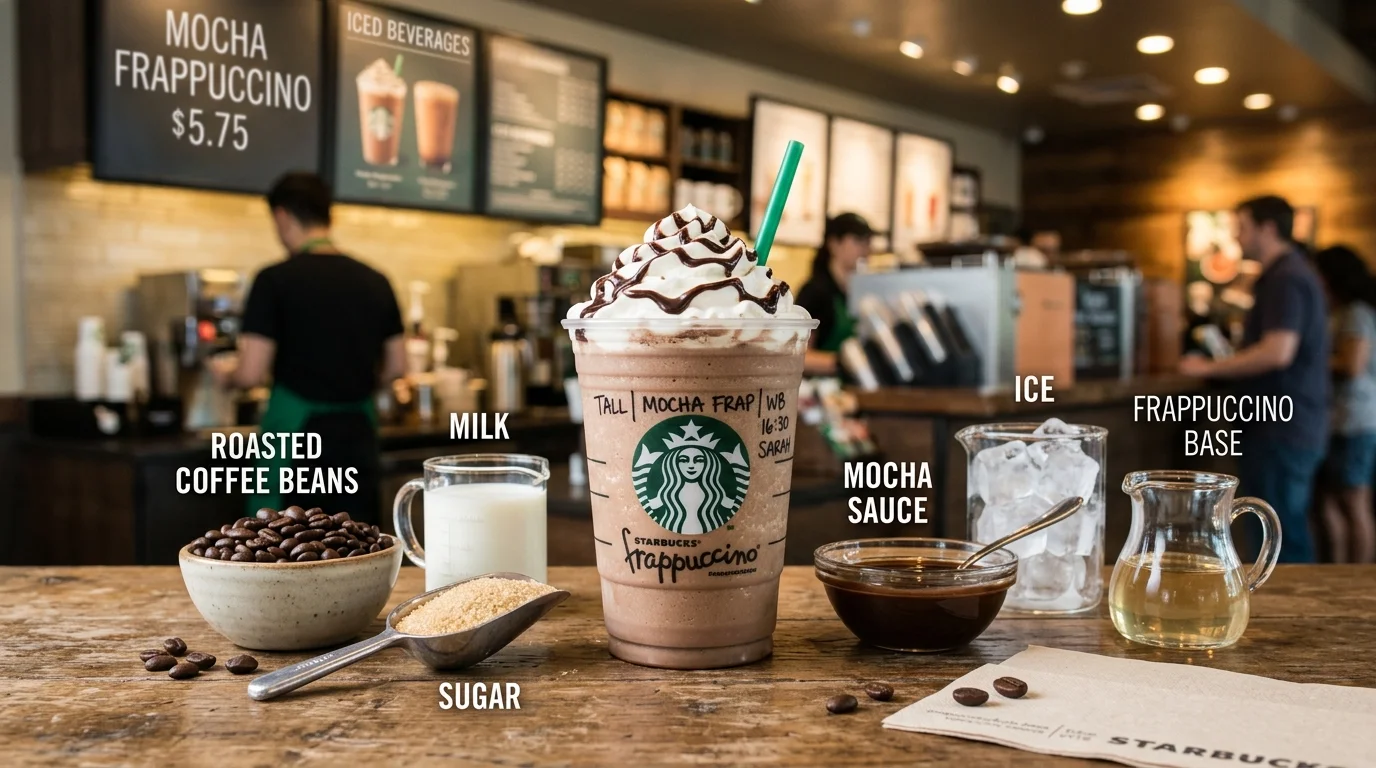
For the Classic Caramel Frappuccino Base (serves 2):
- 2 shots espresso, cooled [or ½ cup strong cold brew]
- 1 cup whole milk [or oat milk for dairy-free]
- 2 tbsp caramel sauce [plus extra for drizzling]
- 2 tbsp simple syrup [or 1½ tbsp sugar]
- 1½ cups ice cubes [approximately 8–10 standard cubes]
- ½ tsp pure vanilla extract
- Whipped cream, for topping [from a can or homemade]
For the Simple Syrup (make once, use all week):
- 1 cup granulated white sugar
- 1 cup water
For Popular Frappuccino Variations — Swap or Add:
- Mocha Frappuccino: replace caramel sauce with 2 tbsp chocolate syrup or cocoa powder [+ 1 tbsp sugar]
- Vanilla Bean Frappuccino: skip the coffee entirely, use 1 tsp vanilla extract + 1 tbsp vanilla syrup, no espresso
- Java Chip Frappuccino: add 2 tbsp chocolate syrup + 2 tbsp mini chocolate chips to the Mocha base
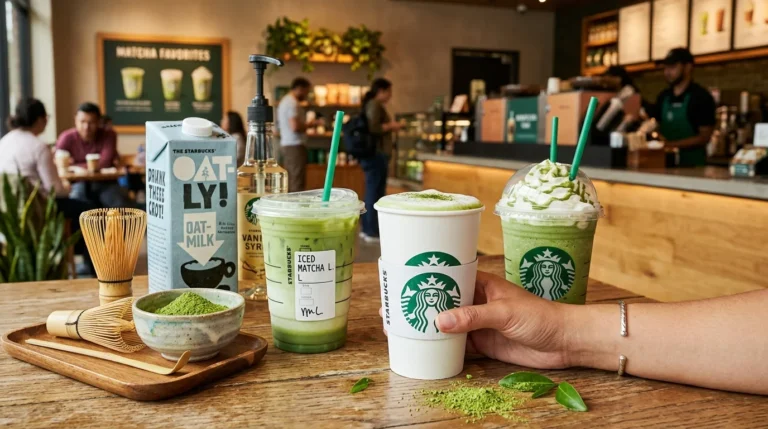
- Matcha Frappuccino: skip coffee, use 1 tsp matcha whisked into 2 tbsp warm water, add to milk base
- Strawberry Frappuccino: skip coffee, blend with ½ cup frozen strawberries + 1 tbsp strawberry syrup
- Pumpkin Spice Frappuccino: add 2 tbsp pumpkin purée + ½ tsp pumpkin spice to the coffee base
Optional Toppings:
- Caramel drizzle, chocolate sauce, or strawberry sauce
- Crushed graham crackers or cookie crumble
- Cinnamon or cocoa powder dusting
- Extra whipped cream, for a generous finish
- Chocolate chips or sprinkles (optional)
Step-by-Step Instructions
Step 1: Gather and Prep Your Ingredients
Before the blender goes on, get everything cold and ready. Pull the espresso shots and set them aside to cool completely — hot espresso added to ice melts the cubes immediately and produces a watery, thin Frappuccino before the blending even starts. Make the simple syrup if you haven’t already by combining equal parts sugar and water in a saucepan, simmering for 2 minutes until clear, and cooling in the refrigerator. Measure the caramel sauce, milk, and vanilla extract and have them at the counter. The entire Starbucks Frappuccino recipe comes together in under 60 seconds of blending — the prep is where the quality is determined, not the blend time.
Pro Tip: Make coffee ice cubes by pouring leftover cold brew or espresso into an ice cube tray and freezing overnight. Using coffee ice cubes instead of regular water ice cubes means the Frappuccino stays thick and flavourful as the ice melts rather than becoming progressively more watery and diluted the longer it sits. This single swap produces a noticeably better Frappuccino at home than any other technique change.
Step 2: Make the Simple Syrup
Combine 1 cup of water and 1 cup of granulated sugar in a small saucepan over medium heat. Stir continuously as the mixture heats until every granule of sugar is fully dissolved — about 2–3 minutes — and the liquid runs completely clear. Remove from the heat and cool before using or storing. The simple syrup is the sweetening foundation of every Starbucks Frappuccino recipe, and having a jar ready in the refrigerator means every subsequent build takes under 5 minutes from counter to glass. A single batch covers approximately 8–10 Frappuccino servings and keeps refrigerated in a sealed jar for up to 2 weeks.
Pro Tip: Flavoured simple syrups are the fastest way to expand your Frappuccino range without buying commercial syrups. Vanilla syrup — add 1 tsp vanilla extract to the cooling base syrup. Brown sugar cinnamon — substitute brown sugar for white and add ½ tsp cinnamon. Hazelnut — add 2 tbsp hazelnut extract per cup of finished syrup. Each variation takes 30 seconds of extra prep and unlocks a completely different Frappuccino flavour profile from the same base technique.
Step 3: Layer the Blender in the Correct Order
Add the ingredients to the blender in an order that guarantees a smooth, evenly mixed result. Pour the cooled espresso into the blender first, followed by the milk, simple syrup, vanilla extract, and caramel sauce. Add these in that sequence and stir briefly with a spoon before the ice goes in — pre-mixing the liquids ensures the sweetener and flavouring agents are fully distributed through the coffee base before the ice dilutes and chills everything simultaneously during blending. Add the ice cubes last, on top of the liquid mixture. This layering method means the liquid creates a vortex from the bottom that draws the ice downward into the blades efficiently rather than the ice sitting above and bouncing without proper contact.
Pro Tip: Use exactly the ice quantity in the recipe — 1½ cups — rather than estimating by eye. Too much ice produces a thick, icy Frappuccino that melts into a watery drink within 5 minutes and tastes diluted even when freshly blended. Too little ice produces a thin, barely chilled drink that doesn’t have the density or cold temperature that defines the Frappuccino experience. Measuring ice is the most overlooked consistency variable in any homemade Frappuccino recipe.
📖 Read More: Starbucks Coffee
Step 4: Blend on High Until Completely Smooth
Start the blender on its lowest setting for 10–15 seconds to draw the ice into the vortex before the blades hit full speed — this prevents large ice chunks from bouncing around the jar without making blade contact and reduces the wear on a standard home blender. Increase immediately to the highest speed and blend for 45–60 seconds until the mixture is completely uniform — no visible ice chunks, no streaks of unblended syrup, and a smooth, thick pour when you tilt the jar. The finished Starbucks Frappuccino recipe base should be opaque, uniformly coloured, and thick enough to coat the inside of the blender jar as it moves. If it looks thin or watery, add 3–4 extra ice cubes and blend for another 20 seconds.
Pro Tip: Don’t lift the blender lid to check the consistency mid-blend — stop the blender completely, wait 5 seconds for the contents to settle, then assess. Frappuccino base that looks perfectly thick while still spinning looks significantly thinner once the rotation stops and the air incorporated during blending dissipates. Always assess settled, still consistency — not spinning consistency — before deciding whether to adjust.
Step 5: Taste and Adjust Before Pouring
Pour a small amount into a spoon and taste deliberately before anything goes into the serving glasses. The Caramel Frappuccino should taste sweet, caramel-forward, and boldly coffee-flavoured — with the milk providing body and creaminess rather than dominating. If the coffee flavour is too strong, add another tablespoon of simple syrup and blend briefly. If it tastes flat and one-dimensional, a small extra drizzle of caramel sauce blended in for 10 seconds brings the flavour into focus. If the texture is thinner than expected, the ice ratio was off — add more ice and blend again rather than trying to compensate through flavour adjustments. Get the taste and texture right at this stage before the whipped cream and toppings go on — it’s the only moment you can correct without dismantling the finished drink.
Pro Tip: Cold suppresses sweetness perception significantly — a Frappuccino that tastes correctly sweet straight from the blender will taste slightly less sweet by the time it’s been sitting for 5 minutes with ice continuing to melt into it. Sweeten the base very slightly beyond what tastes exactly right during the taste test — the extra sweetness compensates for the progressive dilution that happens between blending and finishing the drink.
Step 6: Pour, Top, and Serve Immediately
Pour the blended Frappuccino base into two tall chilled glasses immediately — every minute it sits in the blender the ice continues to melt and the texture thins. Drizzle a thin line of caramel sauce around the inside of each glass before pouring — run the nozzle around the inner wall of the glass in a spiral pattern so the caramel sticks to the sides and shows through the drink as a visual element. Pour the Frappuccino base into the caramel-rimmed glasses and top generously with whipped cream, starting from the outside edge and spiralling inward to build height. Finish with a generous drizzle of caramel across the whipped cream and serve immediately with a wide dome lid and straw if available.
Pro Tip: Apply whipped cream from a can in a continuous circular motion while moving the nozzle upward — starting at the outer edge of the glass and spiralling inward and upward produces a dome of whipped cream with visible height that looks deliberate and professional. A flat blob of whipped cream applied in one spot looks nothing like the Starbucks presentation and collapses immediately. The spiral technique takes 5 seconds and makes the finished drink genuinely impressive.
Cook Time
Total Time: 5 minutes | Prep: 3 minutes | Blend: 2 minutes One blender — a perfect Starbucks Frappuccino recipe ready in 5 minutes.
Servings
Makes 2 large Frappuccinos — approximately 400ml per serving.
Nutritional Information (approx. per serving — Classic Caramel Frappuccino with whole milk and whipped cream)
| Nutrient | Amount |
|---|---|
| Calories | 380 kcal |
| Fat | 14g |
| Saturated Fat | 9g |
| Carbohydrates | 56g |
| Protein | 6g |
| Sugar | 48g |
| Fiber | 0g |
| Sodium | 160mg |
| Vitamin C | 0mg |
| Potassium | 240mg |
| Calcium | 180mg |
Values are approximate and will vary based on ingredients and toppings used.
Storage Instructions
A Starbucks Frappuccino recipe is a drink designed to be consumed within minutes of blending — the texture, temperature, and structural integrity of the whipped cream topping are all at their absolute peak the moment the glass is handed over, and all three deteriorate quickly. The blended Frappuccino base without toppings can be poured into a sealed bottle or jar and refrigerated for up to 4 hours — it will separate and lose some of its blended texture, but a vigorous shake before drinking revives it adequately for a second serving. Do not refrigerate a Frappuccino with whipped cream already applied — the cream collapses into the drink within minutes and there is no recovery. For the most practical make-ahead approach, pre-batch the liquid components — espresso or cold brew, simple syrup, and any sauce or flavouring — in a sealed jar in the refrigerator for up to 3 days. When ready to serve, add the milk, pour over ice, and blend fresh in under 2 minutes. This component-batching method is the approach that produces the most consistent, freshest-tasting result across multiple daily servings without needing to measure everything from scratch each time. Coffee ice cubes, made by freezing cold brew in an ice cube tray, can be stored in the freezer for up to 2 months and pulled out as needed — they are the single best make-ahead preparation for any Frappuccino recipe because they improve the quality of every build rather than simply enabling convenience.
📖 Read More: Starbucks Copycat Recipes
Suggestions
- Mocha Frappuccino: Replace the caramel sauce with 2 tablespoons of chocolate syrup or 1 tablespoon of unsweetened cocoa powder mixed with 1 tablespoon of sugar. Add an extra half shot of espresso for a more intense coffee-chocolate flavour. Top with whipped cream and a generous chocolate sauce drizzle in a crosshatch pattern across the cream. The Mocha is the most boldly coffee-forward Frappuccino in the lineup and works best with a strong, dark-roasted cold brew as the coffee base.
- Vanilla Bean Frappuccino: Skip the coffee entirely — this is a no-coffee build. Blend 1 cup of whole milk with 1 tablespoon of vanilla syrup, 2 tablespoons of simple syrup, 1 tsp of vanilla extract, and 1½ cups of ice. The result is a pure, milky, vanilla-sweet frozen drink that is the most approachable Frappuccino for anyone who doesn’t drink coffee. Add a small handful of white chocolate chips to the blend for a White Chocolate Crème Frappuccino variation.
- Java Chip Frappuccino: Build the Mocha Frappuccino base and add 2 tablespoons of mini chocolate chips directly to the blender before blending — they break down into tiny chocolate flecks that distribute through the entire drink rather than sitting in pieces. Add extra whole mini chips to the top after pouring, along with whipped cream and chocolate sauce drizzle. The Java Chip is the most texturally interesting Frappuccino in the lineup — the chocolate flecks in every sip are the defining characteristic.
- Matcha Cream Frappuccino: Whisk 1 teaspoon of ceremonial matcha into 2 tablespoons of warm water until smooth and lump-free. Blend with 1 cup of whole milk, 2 tablespoons of vanilla simple syrup, and 1½ cups of ice — no espresso. The result is a vivid green, slightly earthy, creamy frozen drink that is visually distinctive and genuinely delicious. Top with whipped cream and a fine matcha dusting through a small sieve for a clean, deliberate finish.
- Caramel Ribbon Crunch Frappuccino: Build the standard Caramel Frappuccino base but layer the inside of the serving glass with a darker caramel sauce — dark caramel or a small amount of dulce de leche thinned with hot water — before pouring. Add crushed shortbread or graham cracker crumbs between the whipped cream and the caramel drizzle on top. The combination of dark caramel ribbon inside the drink, light caramel drizzle on the cream, and the crunch element on top produces the most complex caramel Frappuccino build in the list.
- Pumpkin Spice Frappuccino: Add 2 tablespoons of pumpkin purée, ½ teaspoon of pumpkin spice blend, and an extra tablespoon of simple syrup to the standard coffee Frappuccino base before blending. The pumpkin purée adds body and a natural earthy sweetness that pairs with the espresso in a way that feels genuinely seasonal rather than artificially flavoured. Finish with whipped cream, a dusting of pumpkin spice, and a cinnamon stick rested against the side of the glass.
- Dairy-Free Frappuccino: Replace whole milk with full-fat oat milk — it produces the closest texture to dairy milk in a blended drink and has a natural sweetness that complements caramel and vanilla flavours without competing with them. Use a dairy-free whipped topping or skip the cream entirely and compensate with an extra tablespoon of caramel sauce drizzled in a spiral over the surface of the drink. Every Frappuccino variation in this list works with this swap — the oat milk produces a result that is genuinely indistinguishable from the dairy version in both texture and flavour.
- Lower-Calorie Frappuccino: Use unsweetened almond milk instead of whole milk — it saves approximately 80 calories per cup — reduce the simple syrup to 1 tablespoon, use sugar-free caramel sauce, and skip the whipped cream. Add a teaspoon of vanilla extract to compensate for the flavour depth that the reduced syrup removes. The finished drink comes in under 180 calories per large serving and still delivers the thick, creamy, cold coffee experience that makes a Frappuccino worth making — just without the sugar load of the full-build version.
Seasonal Relevance
A Starbucks Frappuccino recipe is inherently a warm-weather drink — blended ice, whipped cream, and cold coffee make the most sense from May through September when the temperature outside makes a hot drink feel like the wrong choice. Summer is the natural season for every Frappuccino build in this list, and June through August is when the Caramel, Mocha, and Vanilla Bean versions get made most frequently as a daily afternoon treat or a post-lunch pick-me-up that doubles as dessert. The Java Chip and chocolate-forward builds suit the warmer months particularly well — the combination of cold coffee and chocolate flavour is one of the most specifically summer-appropriate taste combinations available. From October through February, the Pumpkin Spice Frappuccino is the cold-weather outlier — it’s a blended drink built around an autumn flavour profile, and it works in October and November before the weather shifts fully to hot-drink season. The Matcha Cream Frappuccino is the most genuinely season-agnostic build in the list — its earthy, creamy, non-coffee character makes it equally appealing on a warm spring morning in April and a mild autumn afternoon in October. Spring, March through May, marks the return of Frappuccino season — the first warm days of the year are when homemade Frappuccinos start appearing again, built from the cold brew batched the night before and the simple syrup made at the beginning of the week.
Conclusion
A Starbucks Frappuccino recipe made at home proves that the drinks worth paying premium prices for in a café are almost always simpler to replicate than the menu price implies. The base formula — cold coffee, milk, sweetener, ice, blended smooth, topped with cream and sauce — covers every Frappuccino on the menu. Get the coffee cold before blending, measure the ice accurately, blend fully at high speed, and serve immediately. Those four things produce a result that is genuinely comparable to the original at a fraction of the cost and in a fraction of the time. Work through the variations — the Mocha, the Java Chip, the Vanilla Bean, the seasonal Pumpkin Spice — and build the one that becomes your daily order. Then stop paying $7 for something that takes 5 minutes and costs under a dollar to make at home.
FAQs
Q: What coffee works best in a homemade Starbucks Frappuccino recipe? Cold brew is the most practical and consistently best coffee base for a homemade Frappuccino. It’s already cold, which means it goes straight into the blender without melting the ice, and its lower acidity produces a smoother, less bitter flavour than hot-brewed espresso that has been cooled. For the strongest, most Starbucks-accurate coffee flavour, use cold brew concentrate rather than standard cold brew — 2–3 tablespoons of concentrate equals approximately 1 shot of espresso. If cold brew isn’t available, pull espresso shots 15–20 minutes before building the Frappuccino and allow them to cool completely on the counter or briefly in the refrigerator before blending.
Q: Why does my homemade Frappuccino turn watery so quickly? Watery Frappuccinos are caused by one of three things — too much ice for the volume of liquid, ice that’s too large and melts faster than it chills, or a blender that runs hot and generates heat during blending that melts the ice before the blend is complete. Use the exact ice ratio in this recipe — 1½ cups per 2-serving batch — and measure rather than estimate. Use standard ice cube tray cubes rather than crushed ice, which melts significantly faster. If your blender runs warm, blend in two shorter 30-second bursts rather than one 60-second continuous run to limit heat buildup. Coffee ice cubes, made from cold brew frozen in a standard tray, solve the watery problem entirely — they chill the drink without adding any water as they melt.
Q: Can I make a Frappuccino without a blender? Not accurately — the blended ice texture is the defining characteristic of a Frappuccino and cannot be replicated by shaking or stirring. A cocktail shaker with crushed ice produces a shaken iced coffee, which is a different drink. If a blender is unavailable, use a NutriBullet or any personal blender — even a small one handles the ice and liquid volume in this recipe without difficulty. For a blender-free alternative that still tastes like Starbucks, build a shaken iced coffee using the Brown Sugar Oat Milk Shaken Espresso technique — it’s a different drink but equally satisfying and requires only a mason jar and ice.