Mongolian Beef Recipe Sticky, Savoury & Ready in 25 Minutes
A Mongolian beef recipe is the takeout dish that is genuinely faster and better made at home — tender strips of flank steak coated in cornstarch, seared until crispy at the edges, then tossed in a sticky, deeply savoury sauce built on soy, brown sugar, garlic, and ginger. It hits every note at once — sweet, salty, slightly caramelised, and deeply satisfying. It works as a fast weeknight dinner, a meal prep staple, or a showstopping dish over steamed rice. No complicated steps — just pure Mongolian beef satisfaction, sticky and ready in 25 minutes.
Ingredients
For the Beef:
- 500g (1.1 lb) flank steak, sliced thinly against the grain [½ inch thick maximum]
- 3 tbsp cornstarch [coats the beef for a crispy edge and thickens the sauce]
- 2 tbsp neutral oil [vegetable or canola — high smoke point required]
- ½ tsp fine salt
- ¼ tsp black pepper
For the Mongolian Sauce:
- ½ cup (120ml) low-sodium soy sauce
- ⅓ cup (65g) brown sugar [packed — dark brown sugar for deeper molasses flavour]
- ¼ cup (60ml) water
- 4 cloves garlic, minced
- 1 tbsp fresh ginger, finely grated
- 1 tbsp hoisin sauce [adds depth and a slight sweetness]
- 1 tsp sesame oil [added at the end — not for cooking]
- ½ tsp crushed red pepper flakes [optional — for heat]
For Serving:
- Steamed jasmine or long-grain white rice
- 4 spring onions, white and green parts sliced diagonally
- 1 tsp toasted sesame seeds
- Extra red pepper flakes [optional]
Optional Add-Ins:
- 1 cup broccoli florets, blanched and added with the sauce (optional)
- 1 red bell pepper, thinly sliced and stir-fried before the beef (optional)
- 1 tsp rice wine vinegar — added to sauce for brightness (optional)
Step-by-Step Instructions
Step 1: Gather and Prep Your Ingredients
Before the wok goes on, slice the beef, mince the garlic, grate the ginger, and mix the entire sauce in a small jug — stir until the brown sugar is fully dissolved before cooking begins. A Mongolian beef recipe moves at wok speed once the heat is on — undissolved sugar in the sauce creates uneven caramelisation and burnt spots rather than the smooth, glossy glaze the dish is known for.
Pro Tip: Dissolve the brown sugar completely in the sauce before cooking — undissolved sugar burns in the hot wok.
Step 2: Partially Freeze and Slice the Beef
Place the flank steak in the freezer for 20–25 minutes before slicing — partially frozen beef is significantly firmer and slices paper-thin with a sharp knife far more easily than room-temperature meat. Slice against the grain into strips no thicker than ½ inch. Against the grain is non-negotiable — slicing with the grain produces long, chewy fibres that no amount of tenderising or sauce can correct in the finished dish.
Pro Tip: Partially freeze for 20 minutes — this is the single easiest technique upgrade for clean, thin beef slices.
Step 3: Coat the Beef in Cornstarch
Pat the sliced beef completely dry with paper towels — surface moisture prevents the cornstarch from adhering properly and causes the beef to steam rather than sear. Toss the dried beef in the cornstarch, salt, and pepper until every piece is lightly and evenly coated. Shake off any excess — a thin coat crisps and thickens the sauce correctly; a thick coat produces a heavy, gluey texture in the finished dish.
Pro Tip: Dry beef first, then cornstarch — wet beef makes the coating clump rather than coat evenly.
📖 Read More: beef stroganoff
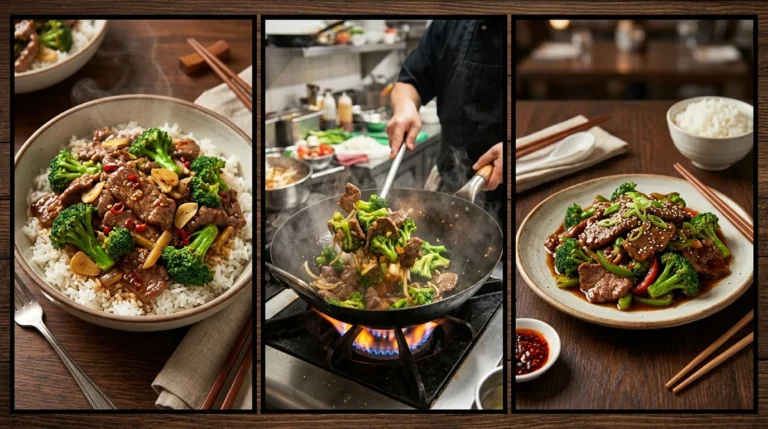
Step 4: Sear the Beef in Batches
Heat a wok or large heavy skillet over the highest heat your stove produces for 2–3 minutes until smoking. Add 1 tablespoon of neutral oil. Add the cornstarch-coated beef in a single layer — never crowding the pan. Sear for 90 seconds without moving, then toss and cook for 45 more seconds. Remove to a plate. Wipe the wok and repeat with the remaining beef. Crispy, caramelised edges on every piece are the goal.
Pro Tip: Two batches always — crowding drops the temperature and steams the beef instead of searing it.
Step 5: Build the Sauce and Combine
Return the wok to high heat. Add a small splash of neutral oil, then the minced garlic and grated ginger — stir for 30–45 seconds until fragrant and pale golden. Pour the pre-mixed sauce into the wok and bring to a simmer. Cook for 2–3 minutes, stirring, until the sauce reduces and thickens to a glossy, syrupy consistency that coats a spoon. Return all the seared beef to the wok and toss to coat every piece in the sauce.
Pro Tip: Simmer the sauce until it coats a spoon before adding the beef — thin sauce produces a watery, unglazed result.
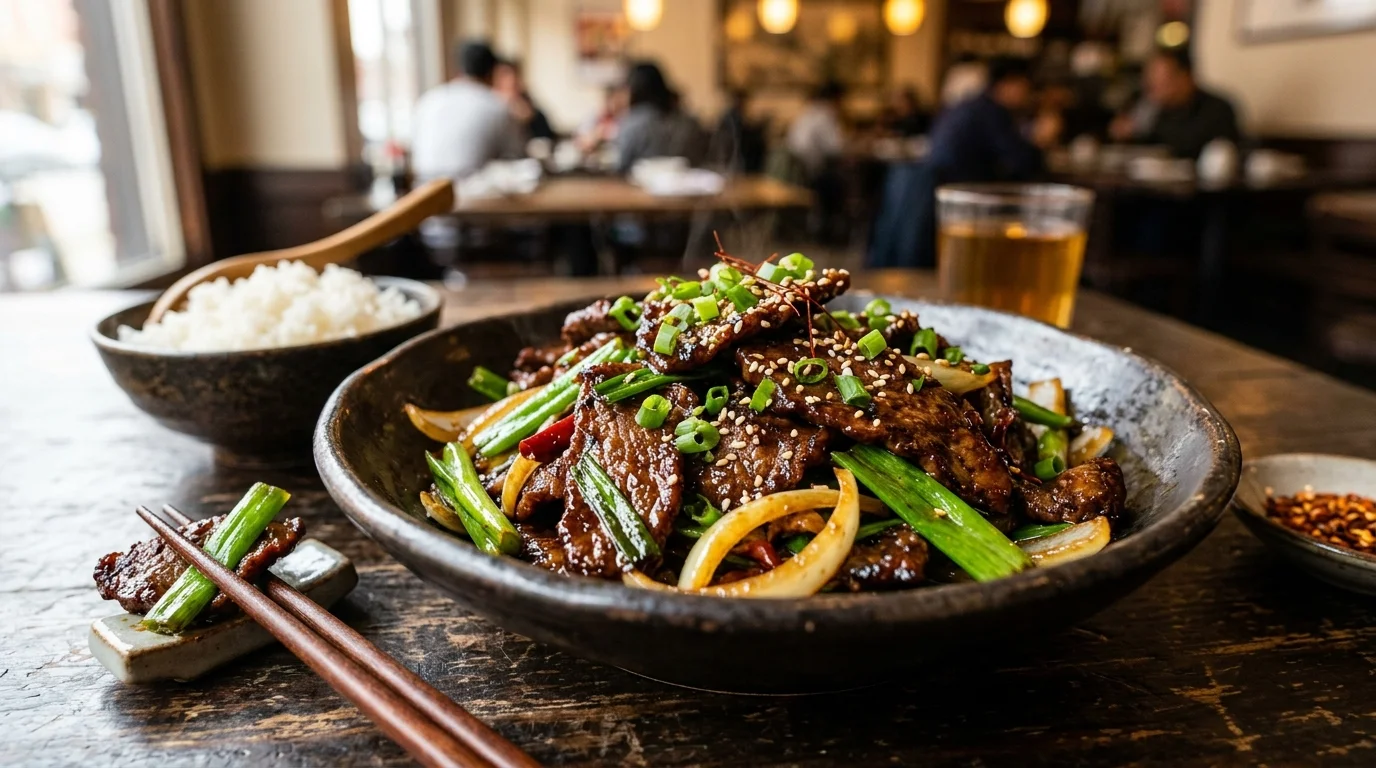
Step 6: Finish and Serve Immediately
Add the sesame oil and half the sliced spring onions directly into the wok in the final 30 seconds of tossing — the sesame oil goes in last because its delicate aromatic compounds evaporate under prolonged heat. Toss once more. Serve the Mongolian beef immediately over steamed jasmine rice. Scatter the remaining spring onion greens and toasted sesame seeds across the top. Serve from the wok at the table for the best presentation and the hottest possible serve.
Pro Tip: Sesame oil last, always — add it to a hot wok earlier and the flavour disappears completely.
Cook Time
Total Time: 25 minutes | Prep: 10 minutes | Sear Beef: 6 minutes | Sauce and Combine: 5 minutes One wok — Mongolian beef on the table in 25 minutes.
Servings
Serves 4 over steamed rice.
Nutritional Information (approx. per serving — Mongolian beef with sauce, no rice)
| Nutrient | Amount |
|---|---|
| Calories | 380 kcal |
| Fat | 14g |
| Saturated Fat | 4g |
| Carbohydrates | 28g |
| Protein | 36g |
| Sugar | 18g |
| Fiber | 0g |
| Sodium | 820mg |
| Vitamin C | 2mg |
| Potassium | 520mg |
| Calcium | 40mg |
Values are approximate and will vary based on ingredients used.
Storage Instructions
Mongolian beef stores well in the refrigerator for up to 3 days in an airtight container — the sauce continues to penetrate the beef during storage and day-two Mongolian beef is noticeably more flavourful than the freshly cooked version. Reheat in a hot wok or skillet over medium-high heat for 2–3 minutes, adding a splash of water to loosen the sauce if it has thickened. Never microwave — it produces rubbery beef and the sauce loses its glossy consistency.
For meal prep, cook the beef and sauce in advance and refrigerate separately from the rice. Reheat the beef in the wok as above and cook fresh rice on the day. For freezing, the cooked Mongolian beef freezes for up to 2 months in a sealed container. Thaw overnight in the refrigerator and reheat in a hot wok with a splash of water to revive the sauce consistency. The texture holds well after a single freeze-thaw cycle.
📖 Read More: Beef and Broccoli
Suggestions
- Mongolian Beef With Broccoli: Add 2 cups of blanched broccoli florets to the wok alongside the seared beef when tossing through the sauce. The broccoli absorbs the Mongolian sauce beautifully and adds colour, crunch, and nutrition to the dish. This is the most popular variation — the combination of beef and broccoli in the sticky soy sauce is genuinely hard to improve on.
- Crispy Mongolian Beef: Increase the cornstarch to ⅓ cup per 500g of beef for a noticeably thicker, crispier coating. Deep fry the coated beef in 2 inches of oil at 375°F for 2–3 minutes until deeply golden and shatteringly crispy before tossing in the sauce. This restaurant-style version delivers maximum crunch against the sticky glaze.
- Mongolian Chicken: Replace the flank steak with thinly sliced boneless chicken breast or thigh. Coat in cornstarch identically and sear in batches using the same method. The sauce works identically with chicken — reduce the searing time to 60–90 seconds per side for breast pieces to avoid overcooking. The finished dish is lighter and lower in fat than the beef version.
- Spicy Mongolian Beef: Double the red pepper flakes to 1 full teaspoon and add 1 tablespoon of gochujang paste to the sauce alongside the soy and brown sugar. The gochujang adds a deep, fermented heat that builds through the sweetness of the brown sugar and produces a significantly more complex sauce than crushed pepper flakes alone.
- Low-Sugar Mongolian Beef: Replace the brown sugar with 3 tablespoons of honey and 1 tablespoon of unsweetened apple sauce. Honey produces a less intensely sweet, more floral glaze that caramelises beautifully at high heat. Reduce the soy sauce to ⅓ cup and add 1 tablespoon of rice wine vinegar to maintain the sauce balance. Each serving comes in under 320 calories.
- Mongolian Beef Noodles: Toss the finished Mongolian beef and sauce through cooked lo mein noodles or udon noodles in the wok rather than serving over rice. Add a handful of bean sprouts and extra spring onion. The noodles absorb the sticky sauce differently from rice — more completely, more evenly, and with a satisfying chew that makes this the most filling version in the list.
- Mongolian Beef Lettuce Wraps: Serve the sticky Mongolian beef in large iceberg or butter lettuce cups instead of over rice. Add diced cucumber, shredded carrot, and fresh cilantro inside each cup alongside the beef. A low-carb, fresh, hand-held format that suits warm weather and lighter appetites. Each wrap is a genuinely satisfying combination of warm beef, cool lettuce, and crunchy vegetables.
- Vegetarian Mongolian Tofu: Replace the beef with firm tofu pressed dry and sliced into thick strips. Coat in cornstarch and pan-fry in neutral oil until golden and crispy on all sides before adding the sauce. Use the same Mongolian sauce recipe without adjustment — the tofu absorbs the sweet-soy glaze beautifully and produces a plant-based version that satisfies in its own right.
Seasonal Relevance
A Mongolian beef recipe works in every season — the pantry-based sauce ingredients are always available and the 25-minute cook time is equally practical in summer heat and winter cold. From October through March, Mongolian beef served over steamed rice in a hot bowl is one of the most warming, satisfying weeknight dinners available — the sticky, rich sauce suits the cold-weather appetite for bold, deeply savoury food. From May through September, the lettuce wrap version and the noodle build feel lighter and more seasonally appropriate. The broccoli addition peaks in quality from September through November when broccoli is at its most vibrant and affordable.
Conclusion
A Mongolian beef recipe earns its place in the permanent weeknight rotation because it delivers restaurant-quality results in 25 minutes from ingredients that are always in the pantry. Slice the beef against the grain, dry it before coating, sear in batches at maximum heat, reduce the sauce before adding the beef, and add the sesame oil last. Those five things produce a Mongolian beef that is sticky, caramelised, and deeply satisfying from the first bite to the last. Try the crispy deep-fried version for maximum texture, the broccoli addition for a complete meal, or the noodle build for something different. Make it once and it earns a weekly spot without any convincing.
FAQs
Q: What cut of beef is best for a Mongolian beef recipe? Flank steak is the best option — it has the right fat-to-lean ratio, slices cleanly against the grain into thin strips, and develops excellent caramelised edges when seared at high heat. Skirt steak is the closest alternative with a slightly more intense flavour. Sirloin works well as a budget-friendly substitute — less flavourful than flank but reliable and widely available. Avoid stew beef or chuck — both are too tough for quick high-heat cooking and produce chewy results.
Q: Why is my Mongolian beef sauce not thickening properly? Thin sauce comes from two causes — not simmering the sauce long enough before adding the beef, or adding too much water to the sauce recipe. Simmer the sauce for the full 2–3 minutes until it visibly coats a spoon before the beef goes back in. The cornstarch coating on the seared beef also dissolves into the sauce during tossing and contributes additional thickening — both elements work together. If the sauce is still thin, remove the beef and reduce the sauce alone for 1–2 more minutes.
Q: Can I make Mongolian beef ahead of time? Yes — the seared beef and the sauce can both be made up to 2 days in advance and stored separately in the refrigerator. Reheat the sauce in the wok until simmering, add the pre-cooked beef, and toss for 60–90 seconds until heated through and re-glazed. This make-ahead method produces results nearly identical to same-day cooking and is the most practical approach for a weeknight dinner when prep time is limited.